
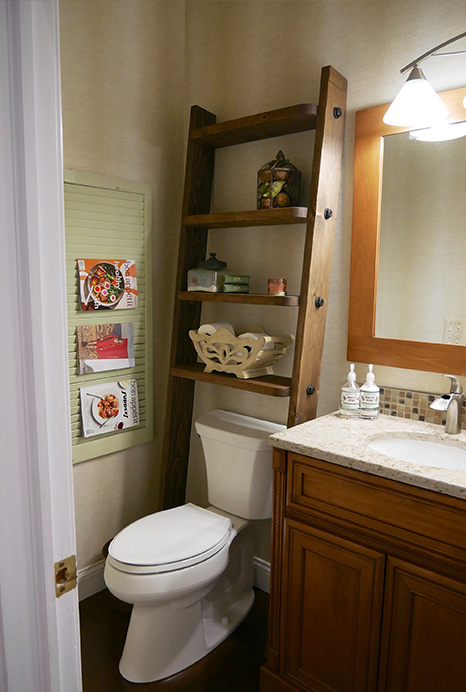
Leaning Bathroom Shelf
In an effort to get things like extra toilet paper, hand towels and accessories off the floor and to reduce the counter clutter in our guest bathroom, we decided to build a leaning shelf to add some storage space. This was a quick and easy project that could be completed with only a few tools and three pieces of lumber found at almost any home improvement center.
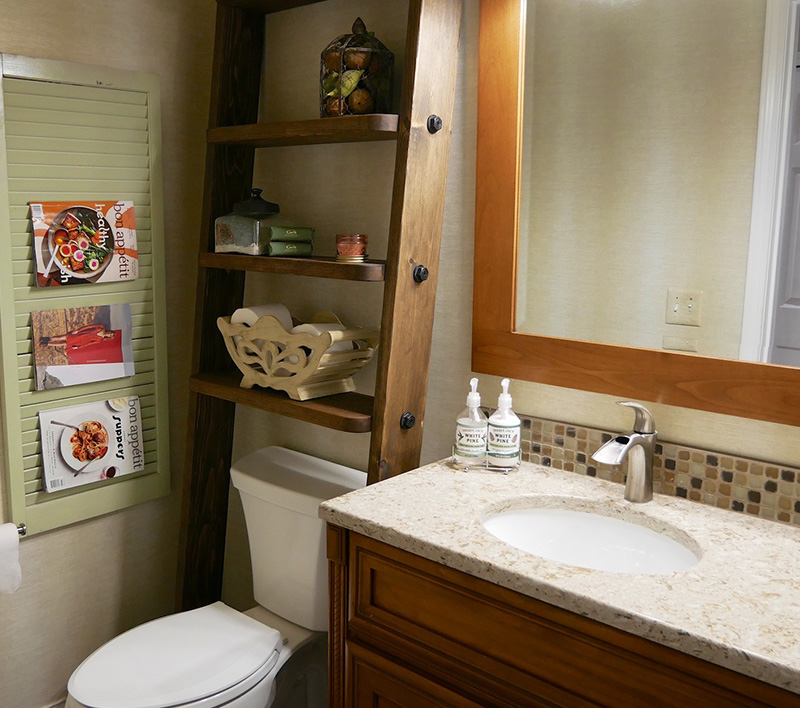
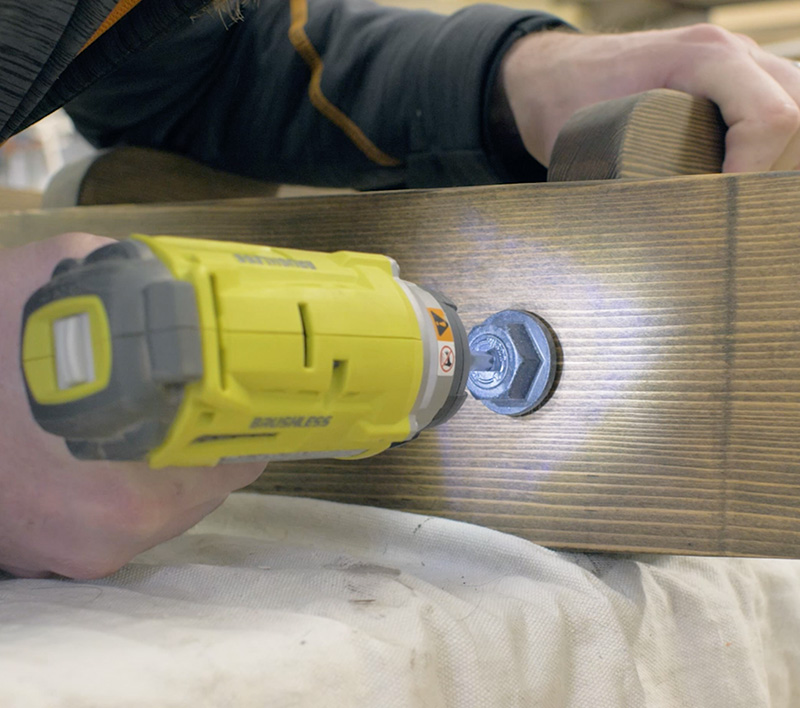
When planning this project, we knew the construction-grade lumber would give it a rustic look — a look that could be refined with a good sanding and a nice dark finish. We also liked the idea of adding a subtle industrial flair to it. We accomplished that with the Outdoor Accents® structural wood screws and hex-head washers and couldn’t be happier with how it turned out.
Read on to see just how easily this project came together.
Download the plans (pdf): Leaning Bathroom Shelf
Required Tools
• Drill/driver
• Circular saw and speed square
• Sander
• Tape measure
• Pencil
• Safety glasses
• Hearing protection
Materials
• (2) 2×6 x 8′ lumber
• (1) 2×8 x 8′ lumber
• 3 ½” Outdoor Accents® structural wood screws (12-pack)
• Outdoor Accents® hex-head washer (8-pack)
• Wood glue (optional)
Cut List
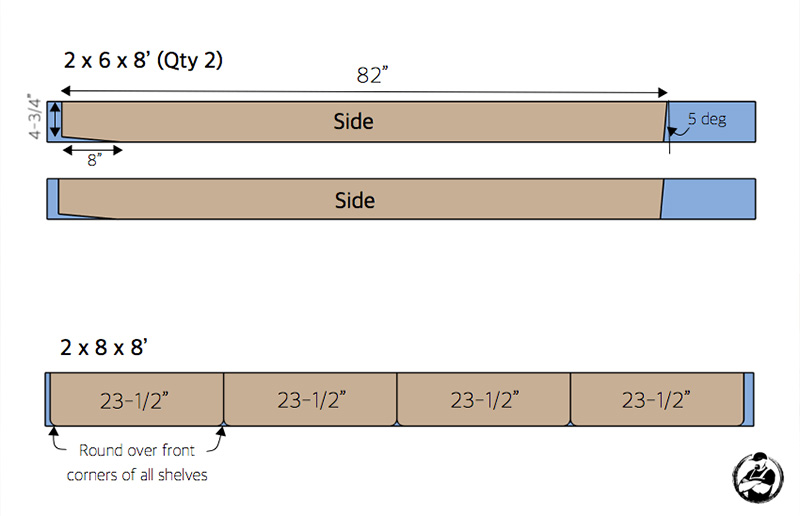
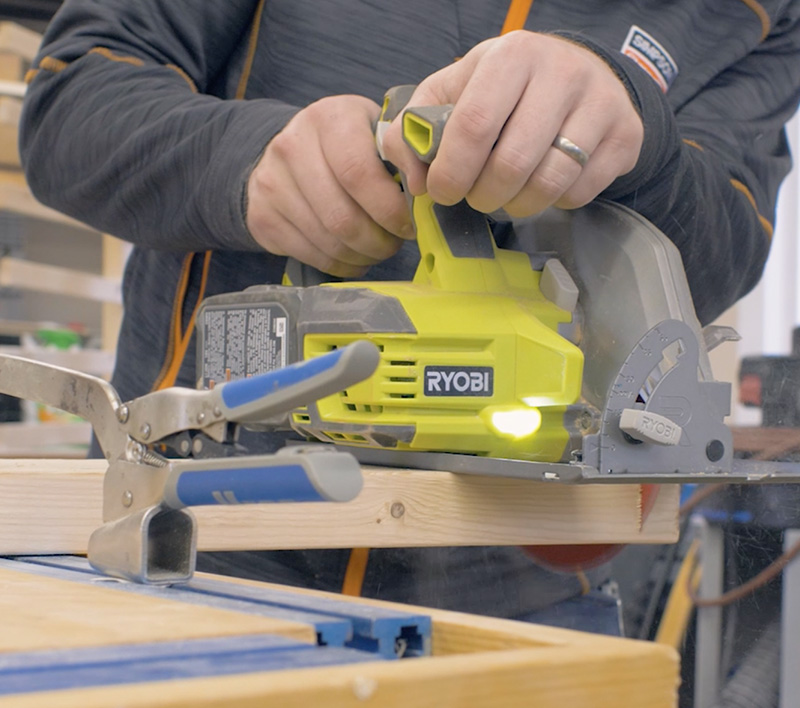
If you don’t have a miter saw, the 5° miter can be cut with a circular saw and a speed square. Simply pivot the corner of the speed square about the end of the board until the 5° mark on the speed square lines up with the side of the board.
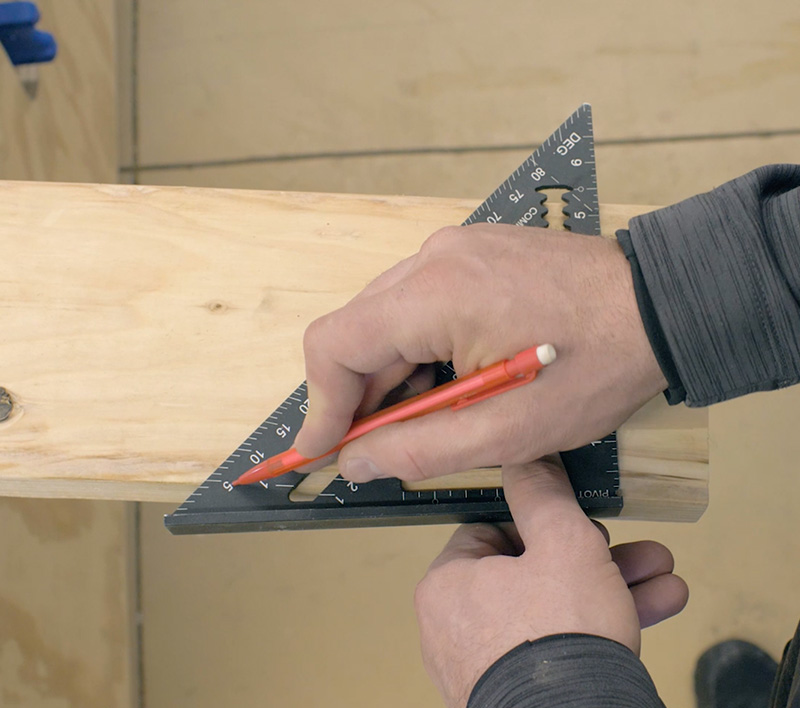
Next, strike a line, clamp the board down to your work surface, and cut along the line with a circular saw.
After you have all the pieces cut, you can sand the front corners of the shelves smooth and round.
Step 1: Marking the Shelf Locations
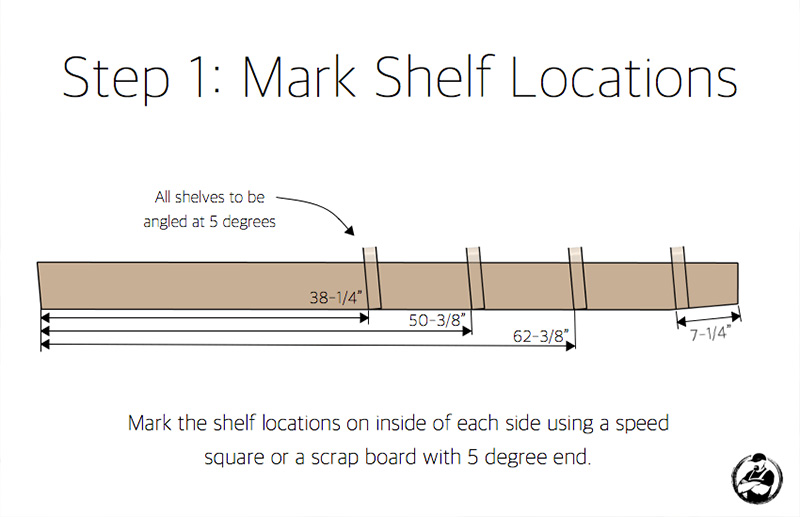
With the side and shelves cut, you can start to lay out the shelf locations. Below is a diagram that will show you exactly where they go.
Lay out the shelf locations using a speed square the same way you did for the cuts. Mark the shelf locations on the inside of each side.

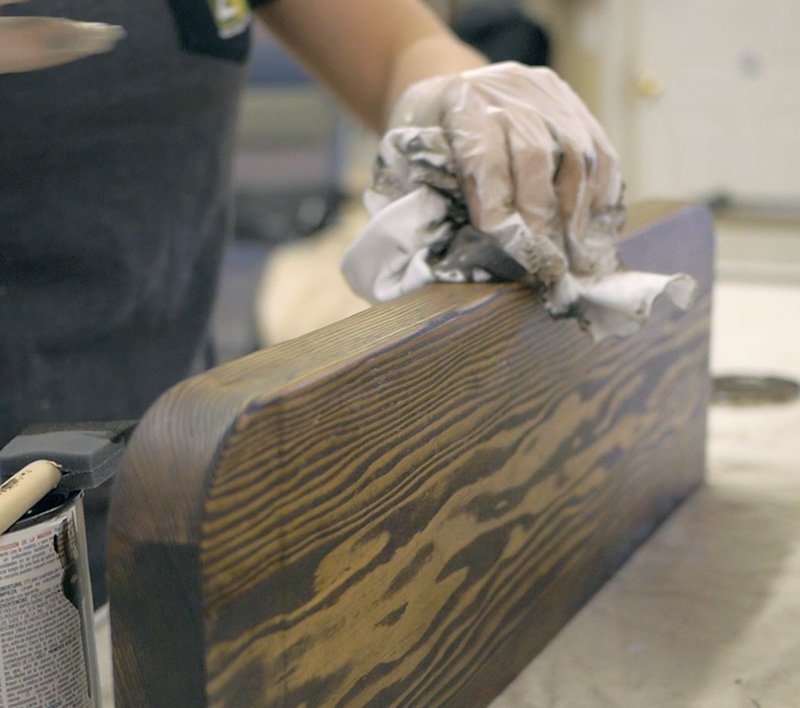
Step 2: Finishing
With some projects, it’s easier to finish the lumber prior to assembly, and this is one of those projects. Since it would be near impossible to finish the wood with the hardware already installed, we went ahead and stained and sealed each piece individually.
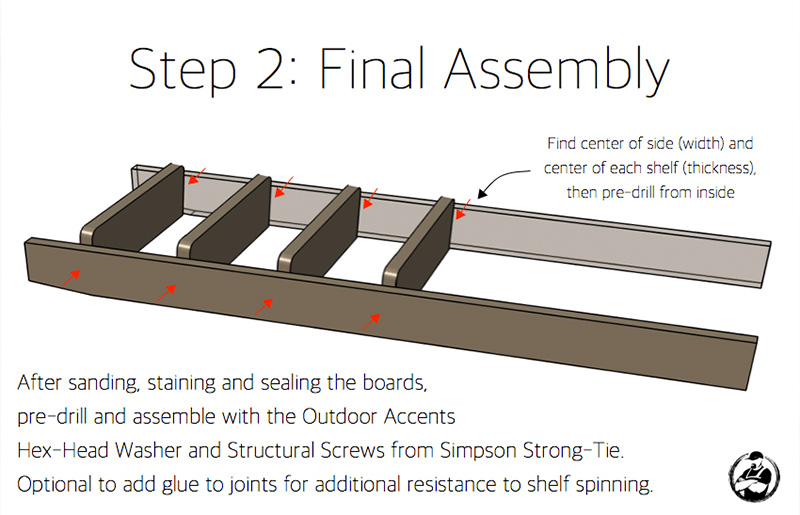
Step 3: Assembling the Leaning Shelf
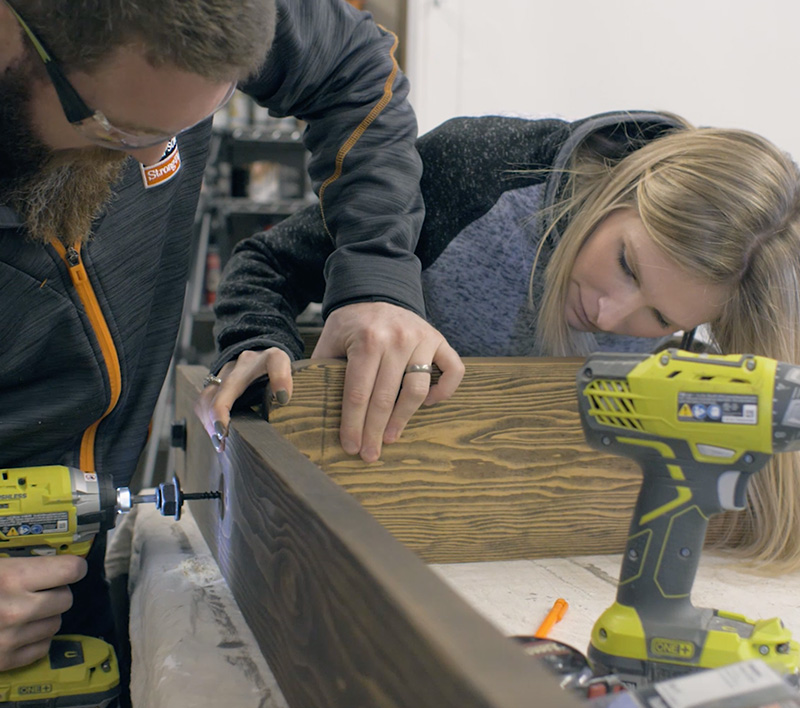
With the pieces dry, it’s time for the final assembly. Start by marking out the screw holes. Find the center of the side and make a mark ¾” higher than the lines you marked earlier for the shelf locations. This will ensure that the screw goes through the middle of the shelf. Now predrill each screw location to prevent the sides from splitting.
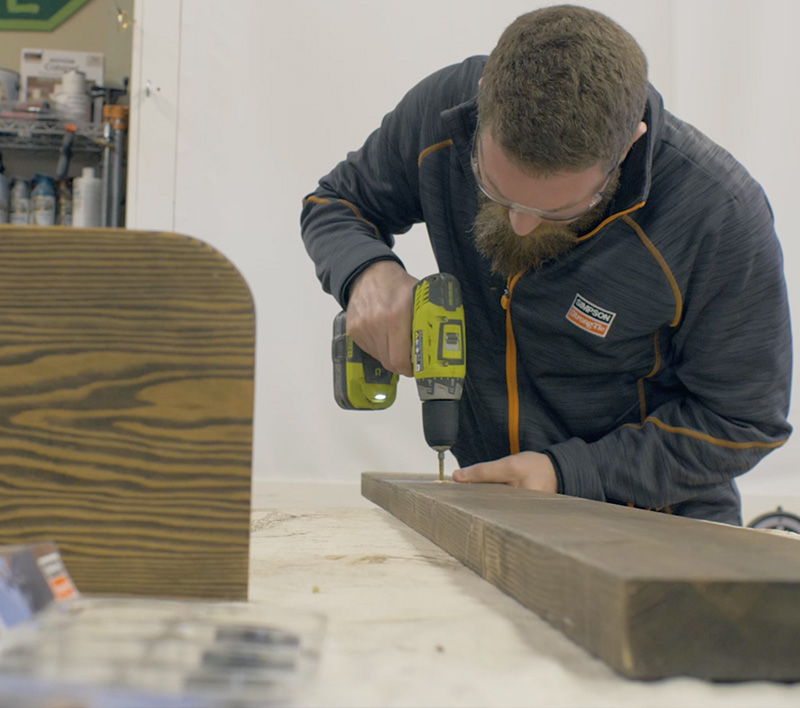
After predrilling the screw locations lay out the sides and shelves. Attach the shelves using the Outdoor Accents® structural wood screws and hex-head washers. You can use the diagram below as an example.
Enlisting a second pair of hands when installing the shelves can make this step much easier.
To lessen any mess, we opted not to add glue to our joints. Even without glue, the shelves were quite stable and resisted rotation. I think we’ll be all right because we don’t plan on storing anything very heavy on these shelves, nor do we do we expect anyone to try using them as steps. If you want to further reduce the chances of shelf rotation, you could add glue at the connections or toenail the sides to the back of each shelf.
Here’s the finished product!
Hopefully, you enjoyed this project. If you want to check out more how-to projects like this, be sure to head on over to rogueengineer.com. Until our next project, be safe and happy building!
OUTDOOR DIY PROJECTS
- How to Build a Cool, Modern Chicken Coop
- How to Build a Floating Deck
- How to Build a Outdoor Accents Pergola
- How to Build a Simple Rolling Planter
INDOOR DIY PROJECTS
- How to Build a Leaning Bathroom Shelf
- How to Build a Stylish Bar Cart
- How to Build a Candle Wall Sconce Using Pipe Grip Ties
- How to Make Barn Door Window Coverings
- How to Build a Garage Wall Storage System
- How to Build a Ceiling Suspended Garage Storage System


