
Hi friends, I’m so excited to share our biggest and best DIY project to date! We partnered with Simpson Strong-Tie to build a floating deck and pergola for our neighbors. Our neighbors are a fellow military family and this floating deck and pergola is our welcome home gift for their deployed soldier. I am thrilled to work with a company like Simpson Strong-Tie that proudly supports our brave men and women in uniform. And I’m equally thrilled that we were able to bless our neighbors with this amazing outdoor space that they can enjoy for years to come.
Because Adam works during the week and I homeschool our two young kiddos, we dedicated our weekends to building this deck and pergola for our neighbors. It took the two of us about 10 weekends from start to finish. It was a ton of hard work and we’re incredibly proud of the result! As an Army family ourselves, we know the sacrifice of deployment all too well and we’re so thankful that we’re able to give back to a fellow military family. I mean, who wouldn’t want to come home to this gorgeous space?!
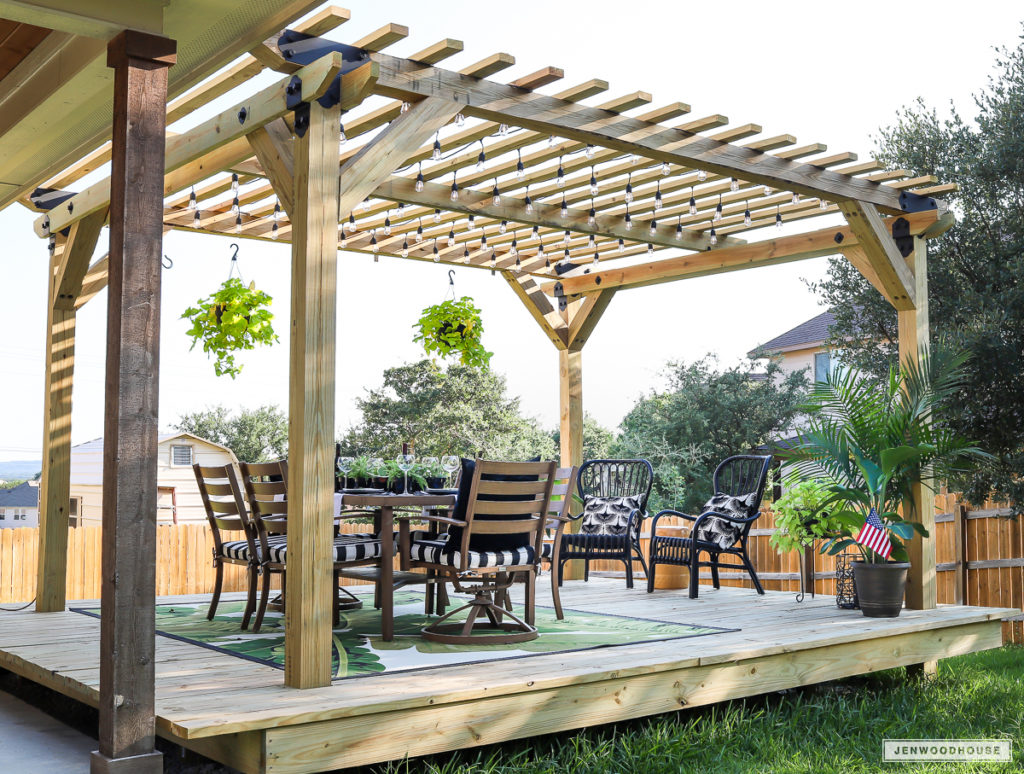
I’m going to split up this tutorial into two parts, first the floating deck and then the pergola. Throughout this entire build, I consulted with several structural engineers and one professional deck builder. We wanted to make sure that this deck and pergola were structurally sound, built to code, and built to last. This thing is solid, sound, stunning, and it ain’t going anywhere anytime soon.
Huge thanks to Simpson Strong-Tie’s own structural engineers as well as my friend and professional deck builder, Jeremy Hill from Jericho Home Georgia. These folks were invaluable resources who helped guide me every step of the way. Okay, let’s get started!
First and foremost, check with your local building codes and acquire permits if necessary. Because we built a deck that wasn’t attached to the house and it was less than 30 inches from the ground, our local code didn’t require a permit. Additionally, our local codes don’t require railings for decks less than 30 inches high. However, if you’d like to include railings, I would recommend these flat rail fence brackets by Simpson Strong-Tie. Be sure to check with your local building codes for specific requirements.
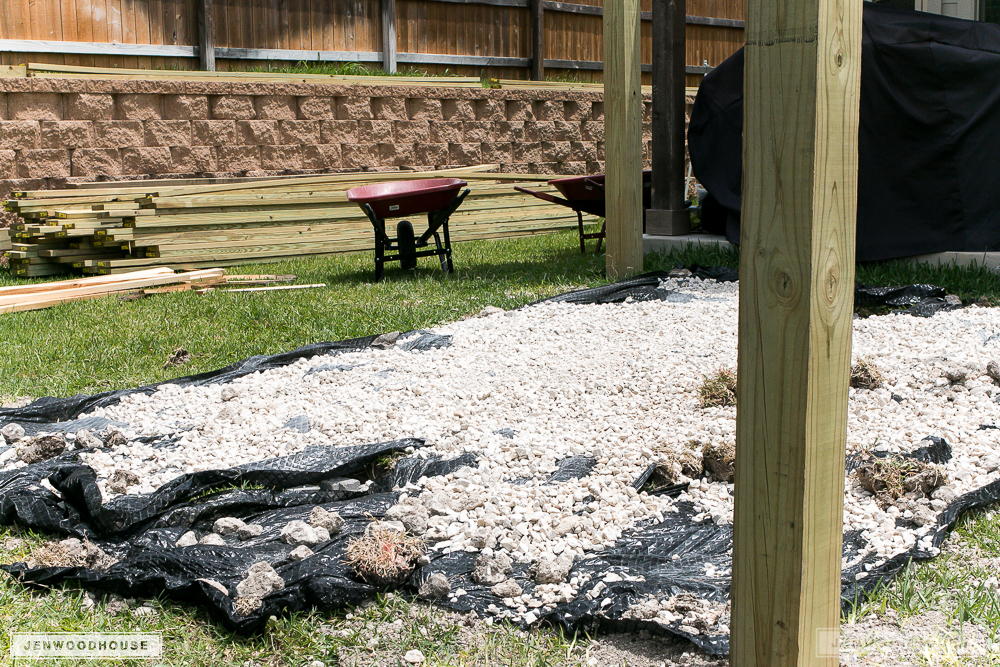
The next thing we did was contact the utility companies and had them come out and mark where any utility lines were running underground so we wouldn’t run into any issues when digging to set the concrete deck blocks. Once we were cleared, we started digging. In the middle of a sweltering Texas summer. It got up to 111º F several days. Whew! Look at my hubby go – he’s a boss!
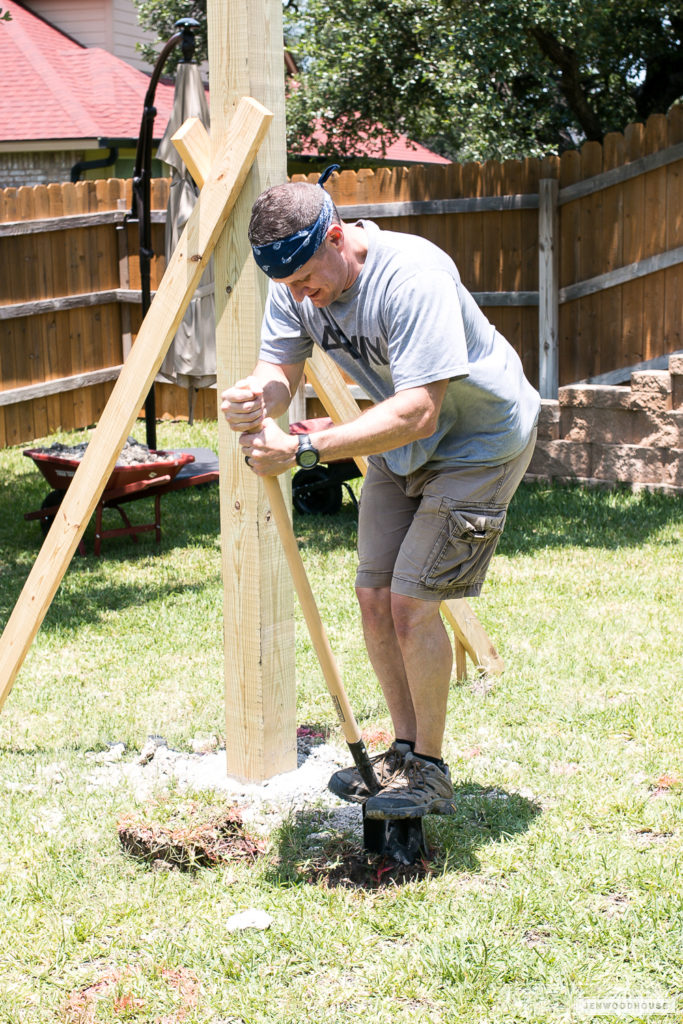
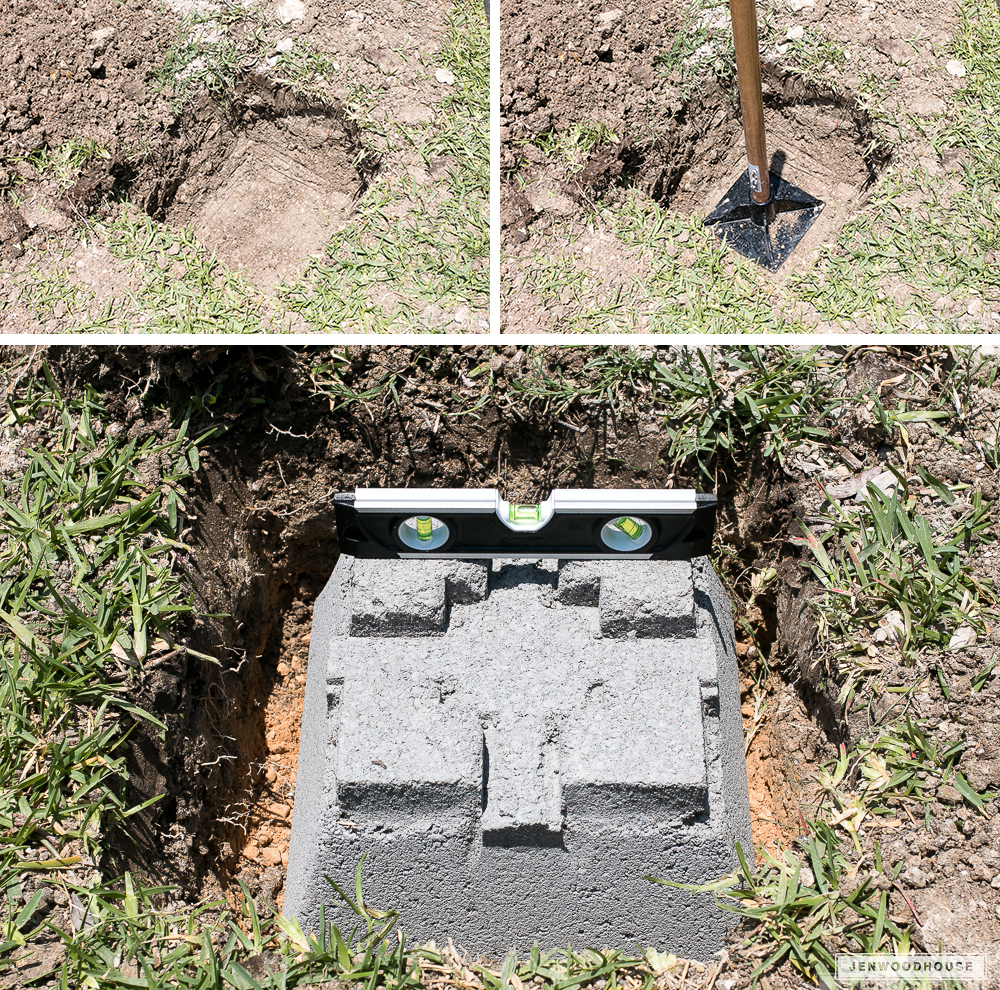
We dug the holes deep enough so that the top of the concrete deck blocks would sit flush with the surface of the ground. I checked with our building inspector to see if we needed to dig below the frost line and he reminded me that we live in central Texas and didn’t have to worry about a frost line. Alright then! If you live in much colder parts, you’ll want to check with your local inspector, as the requirements will vary with location.
We used a tamp to tamp a flat surface at the bottom of the hole and poured a little paver dust if things were uneven, tamped it back down, dropped the deck blocks into the holes, and checked for level. We used a total of 6 deck blocks.
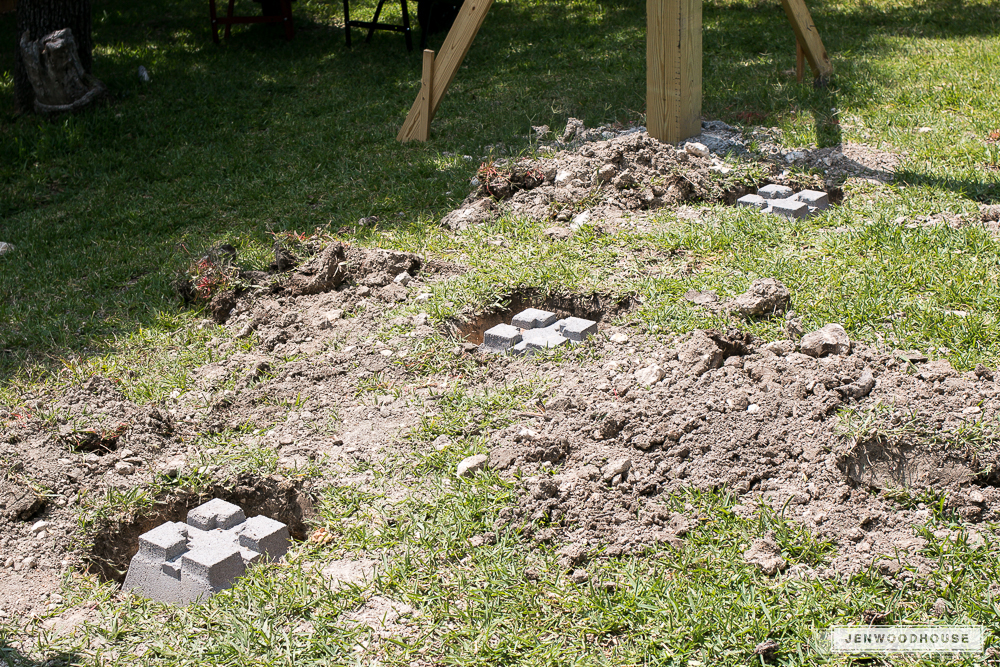
Next, we sprayed the grass with weed-killer, unrolled weed-blocking landscape fabric over the expanse of the deck, and spread all-purpose gravel over that. This is to minimize any grass that may grow under the deck.
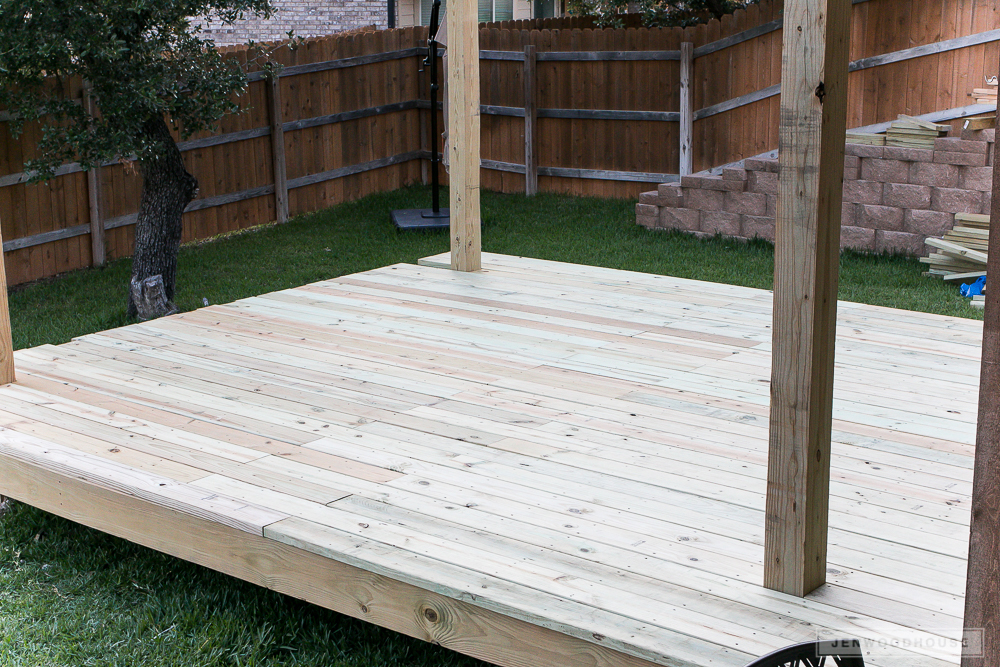
We used these double post cap brackets to secure the beams to the 4x4s. We doubled up 2×6 boards for the beams.
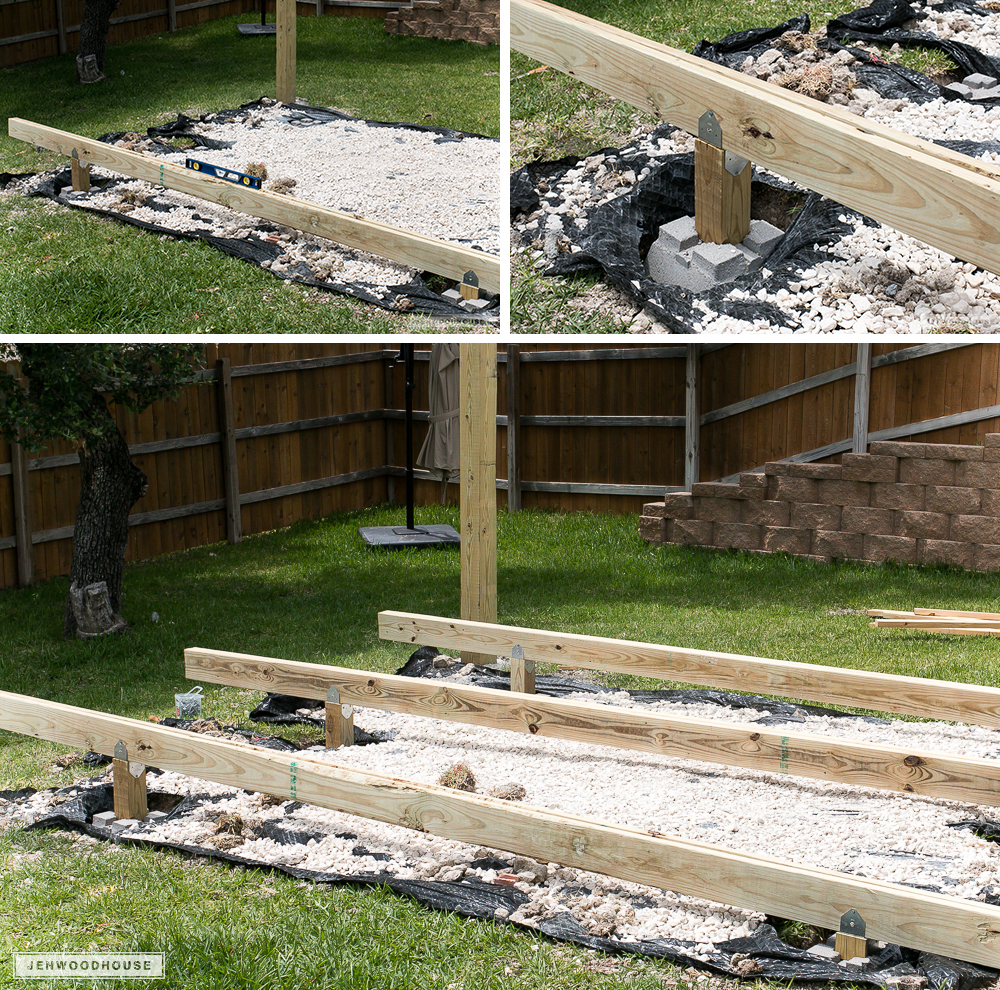
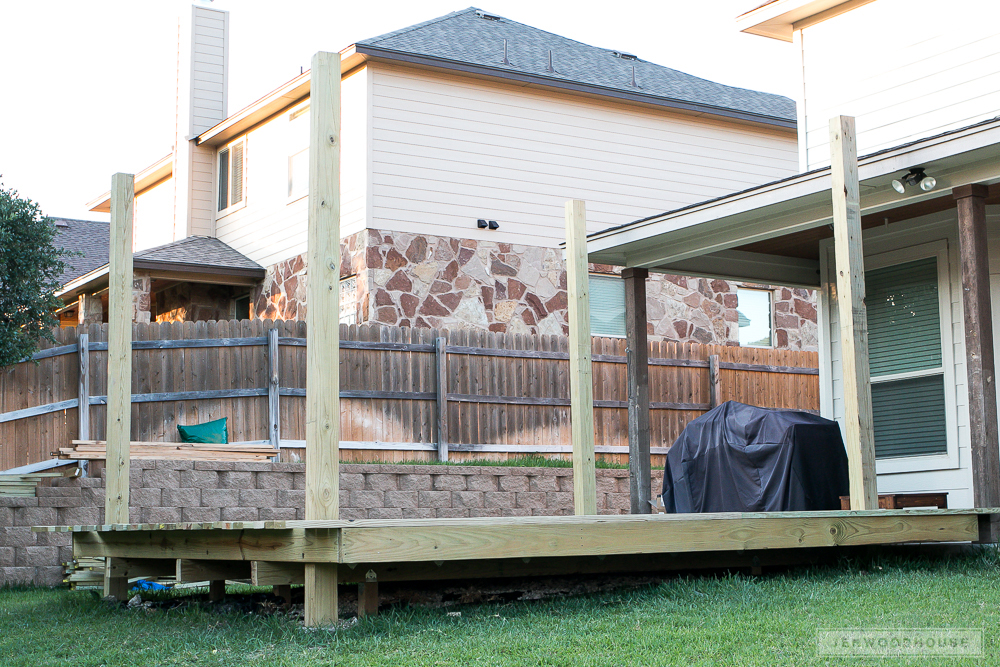
Because the yard was so uneven, we had to use these 4×4 posts to bring the beams that would support the deck up to level. As you can see, the back of the yard sloped down quite a bit, so the 4×4 posts were several inches taller than those in the front.
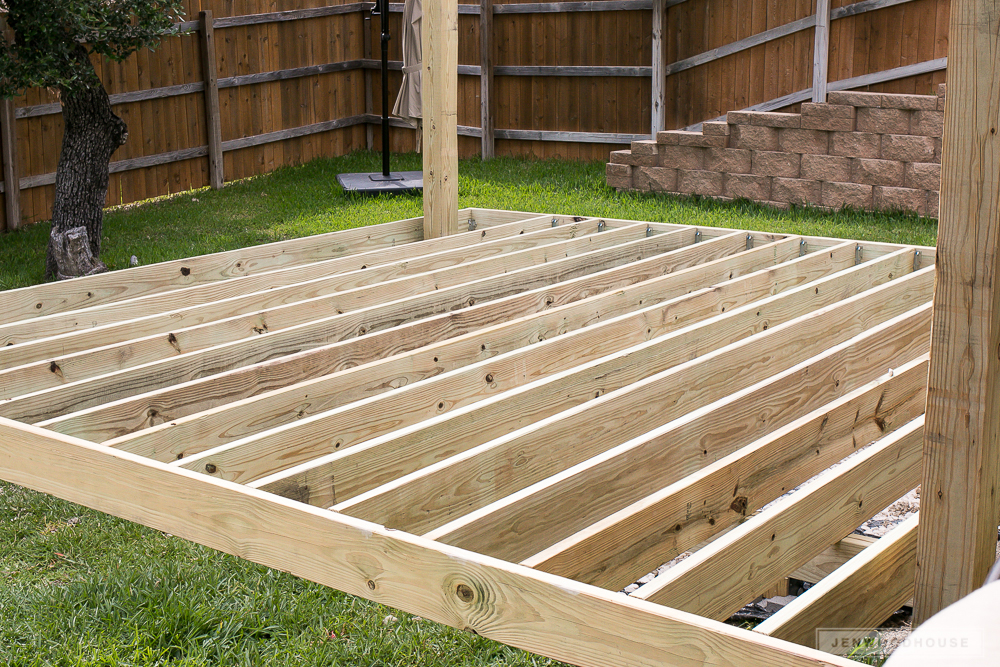
Now it was time to install the rim joists. We used 2×8 pressure-treated boards for this and attached these joist hangers every 12 inches. Then it was a matter of cutting the joists to length, dropping them into place, and securing them to the joist hangers. The joists are spaced 12 inches apart. We also attached every joist to the beams with these hurricane ties.
Next, it was time to attach the 2×6 decking. Simpson Strong-Tie sent us this Quik Drive System and it was a total game-changer. It not only saved so much time, but it saved our backs too! I highly recommend this tool when you’re screwing in a gazillion deck boards. I can’t sing its praises loud enough – it truly is worth the investment.
We used a spare screw to serve as a spacer for the deck boards – this gave us about a 1/8-inch gap between each board, which will allow the wood to expand and contract with temperature and humidity changes.
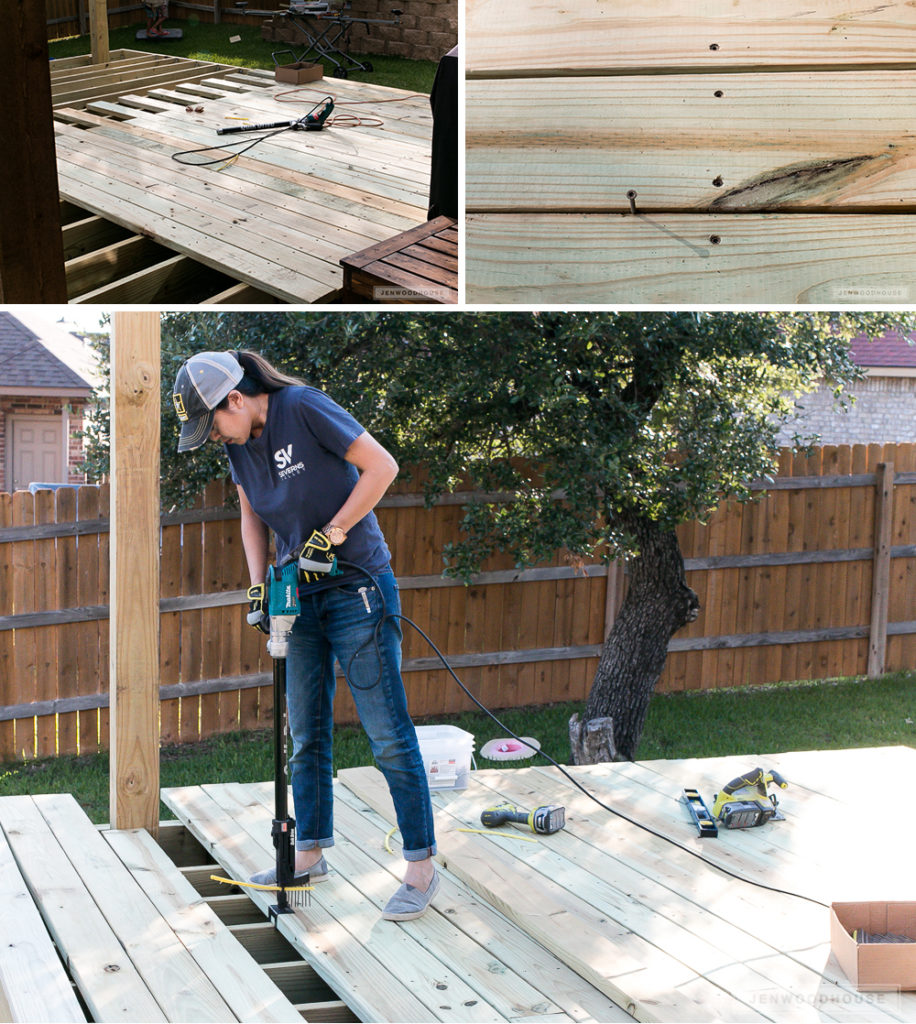
The boards on the back of the deck were at varying lengths, so we used a couple spare boards as a straight edge guide, then cut the excess off with a circular saw. This way, the deck would be nice and square and the back edge would be perfectly straight. We did this for the front end of the deck as well.

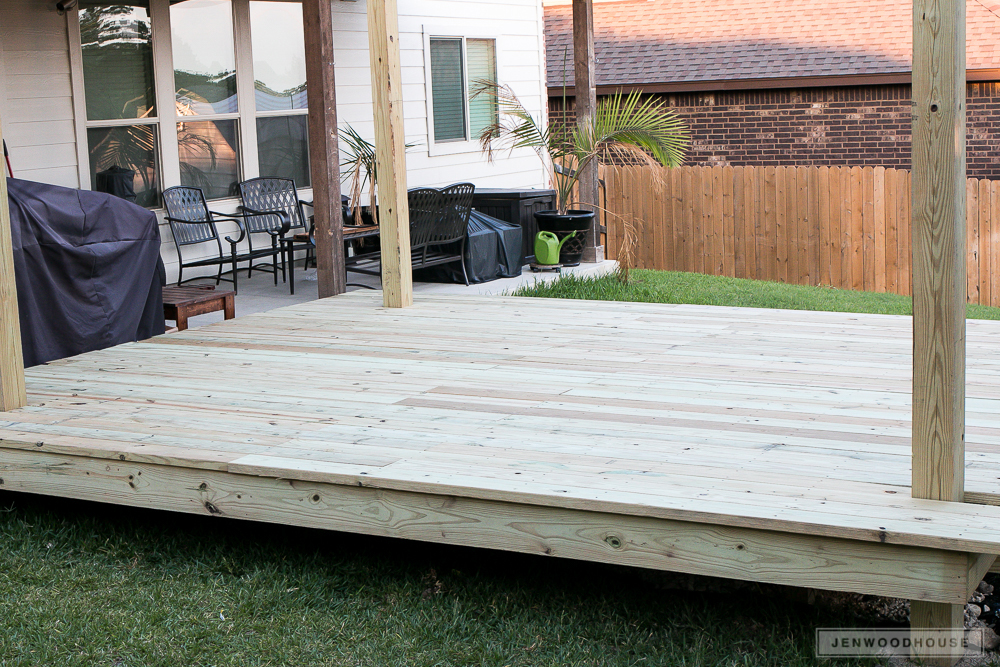
Holy moly, you guys. We built a floating deck! It measures about 14 feet x 16 feet.
Now that the deck is done, the next step is to build the pergola. Check back in a couple weeks for part two in this series for the tutorial on how to build a pergola using the Simpson Strong-Tie beautiful new Outdoor Accents™ hardware line.
OUTDOOR DIY PROJECTS
- How to Build a Cool, Modern Chicken Coop
- How to Build a Floating Deck
- How to Build a Outdoor Accents Pergola
- How to Build a Simple Rolling Planter


