
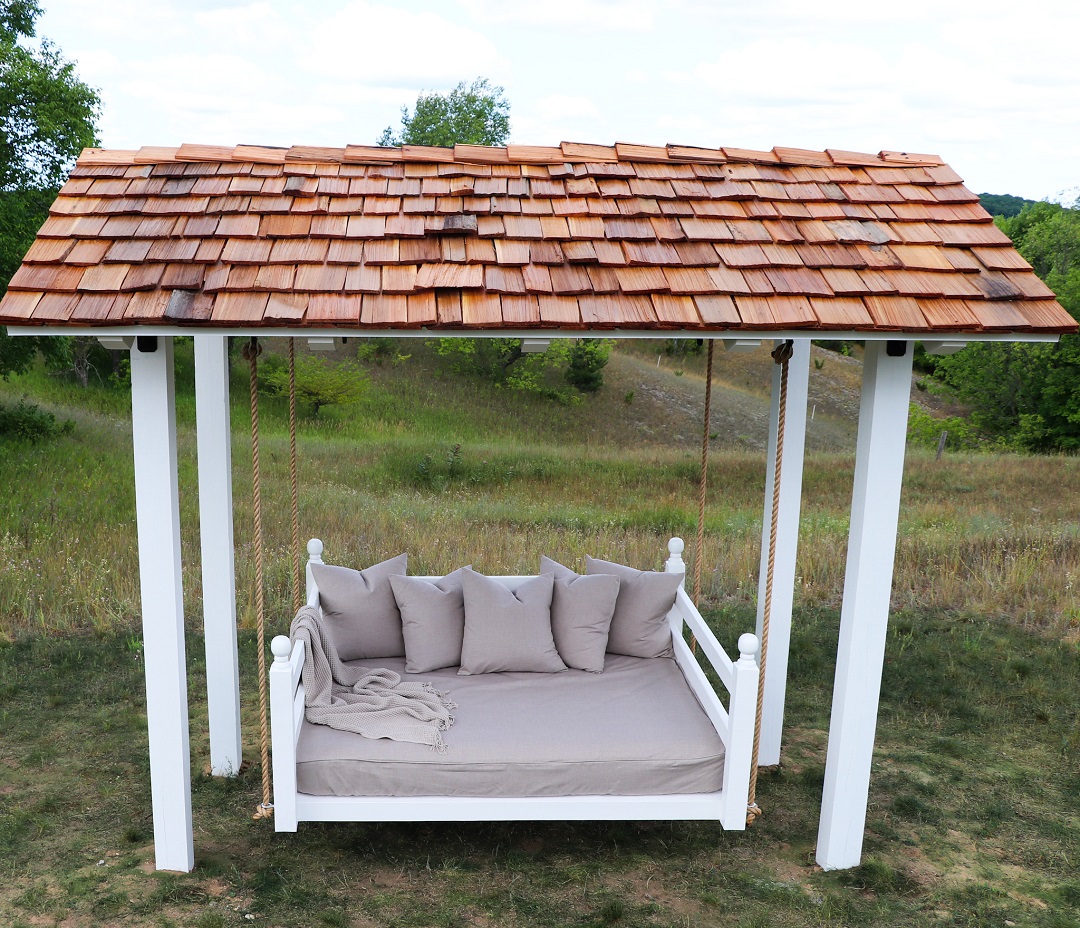
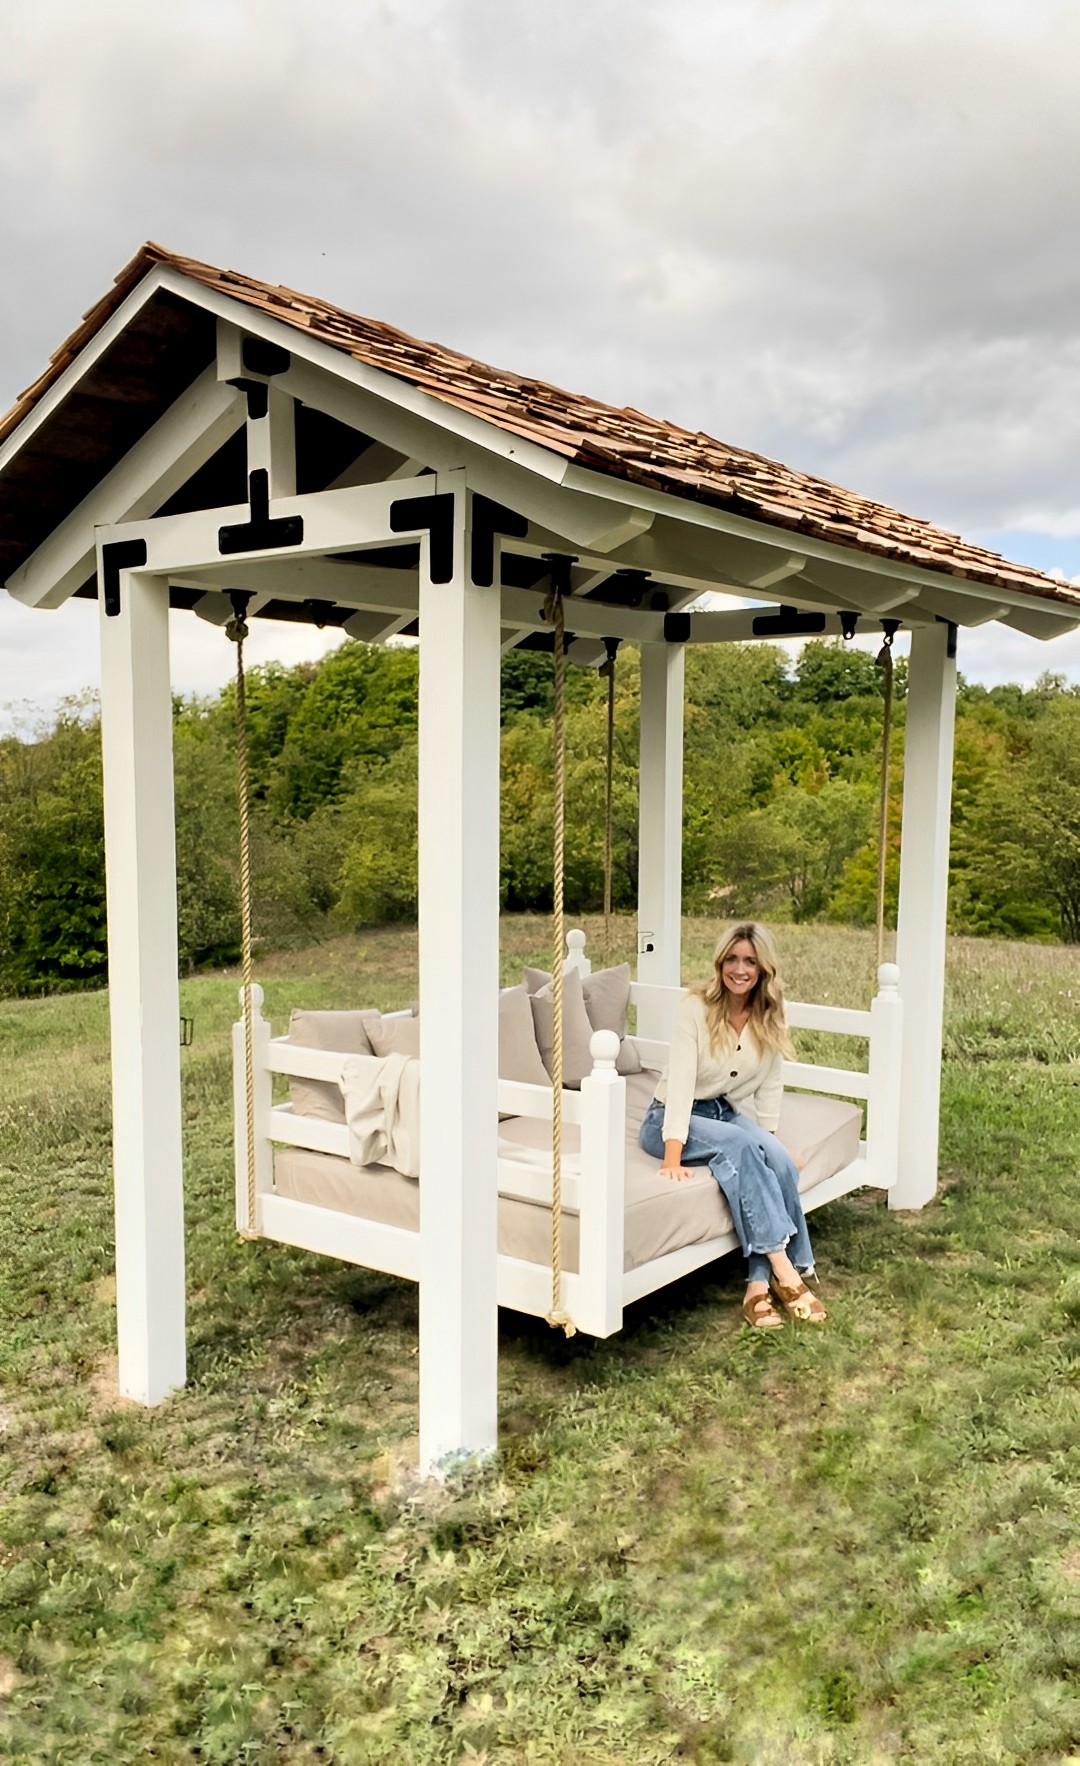
DIY Covered Daybed SwingDo you have a favorite spot in your backyard that invites you to slow down and brings you peace? How often do you find a few quiet moments in your day? This daybed project inspired me to create a beautiful, tranquil space for people to enjoy. Personally, it has become my happy place for relaxing and unwinding from the day. My husband and I built this structure together based on my vision. I designed the structure as a shady spot for the daybed swing with the option to swap the daybed out for four hammock chairs swings when we have family and friends visiting. I’m calling it my “Sunday Swing” because that’s exactly where I’ll be spending my Sunday evenings while watching the sunset and taking a nap.

Foundational and Prep Work
On the first day of the build, my husband Aaron dug four three-foot-deep holes. We misted and poured concrete in before leveling and squaring all four of our 6x6x12 treated posts. We secured them with 2x4s to keep them in place while the concrete cured. Then Aaron cut the posts down to size so we would have the bottom of the roofline at 71/2″ high.
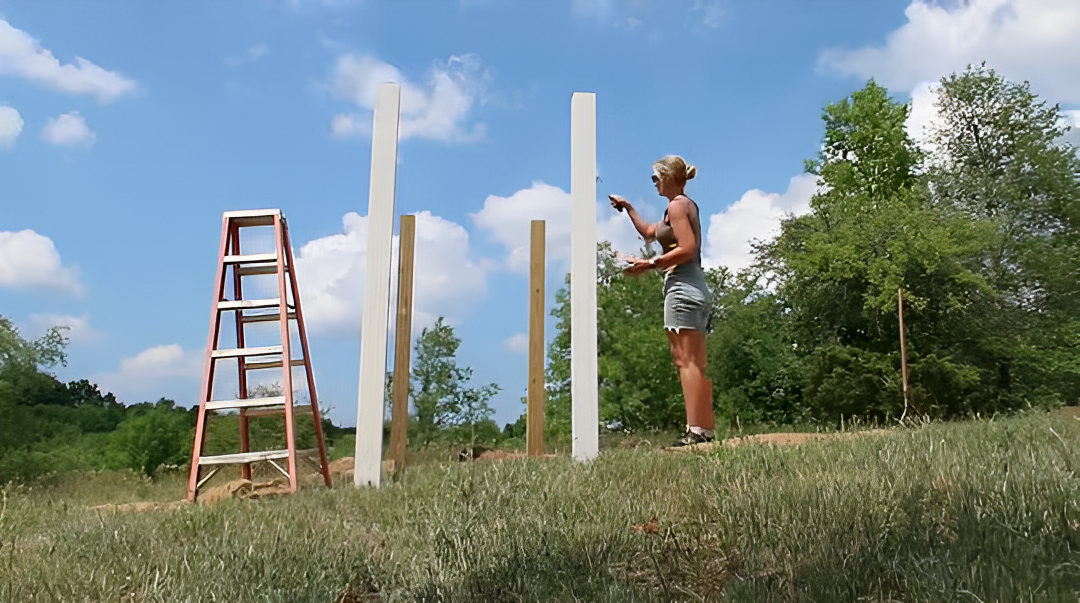
After leaving these treated posts out in the sunshine for a few months to dry, I spent an afternoon priming and painting them in “whisper white.” Aaron cut out notches in the two tip beams before I gave them a coat of primer and paint. We left the paint to dry, and that was a wrap for day one of the build.
Assembling the Framework
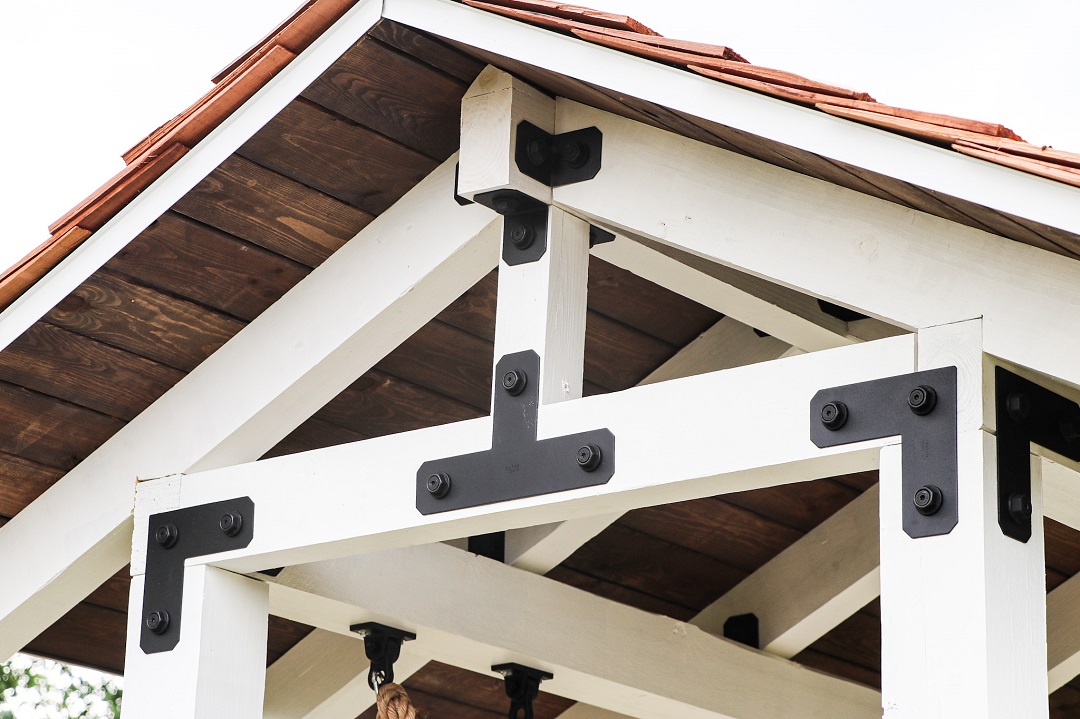
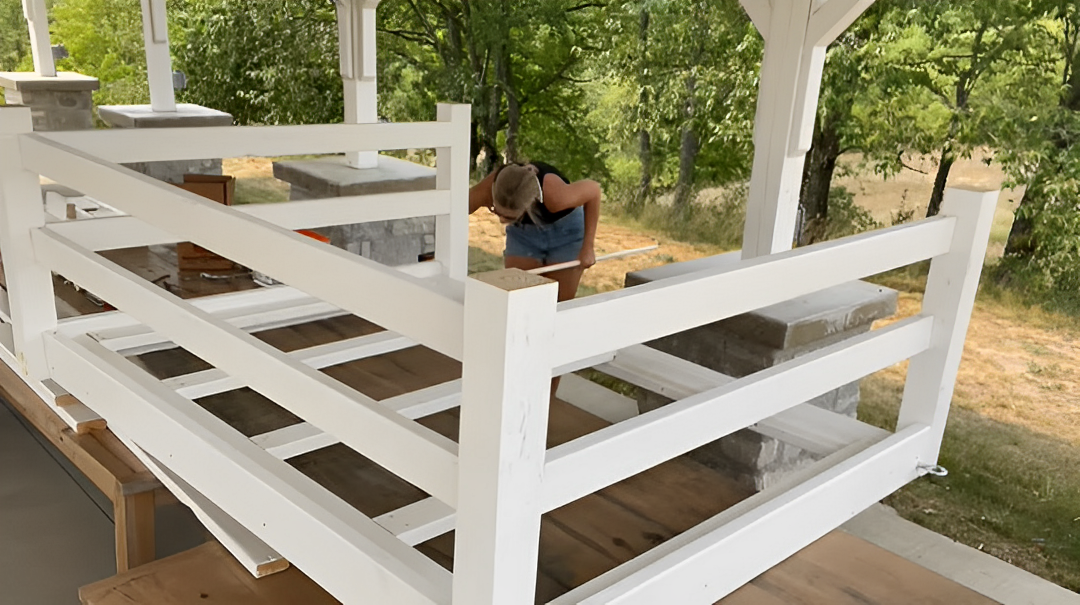
On the second day of the build, we were eager to start assembling the daybed swing. The treated posts were dry and the concrete was cured. The next thing we had to do was to set the four top beams, center post, ridge beam and rafters using decorative hardware from the Simpson Strong-Tie’s Outdoor Accents Avant Collection™. Having used their hardware on previous projects like my new chicken coop shed, garden fence and potting bench in the greenhouse, I knew it would be easy to work with.
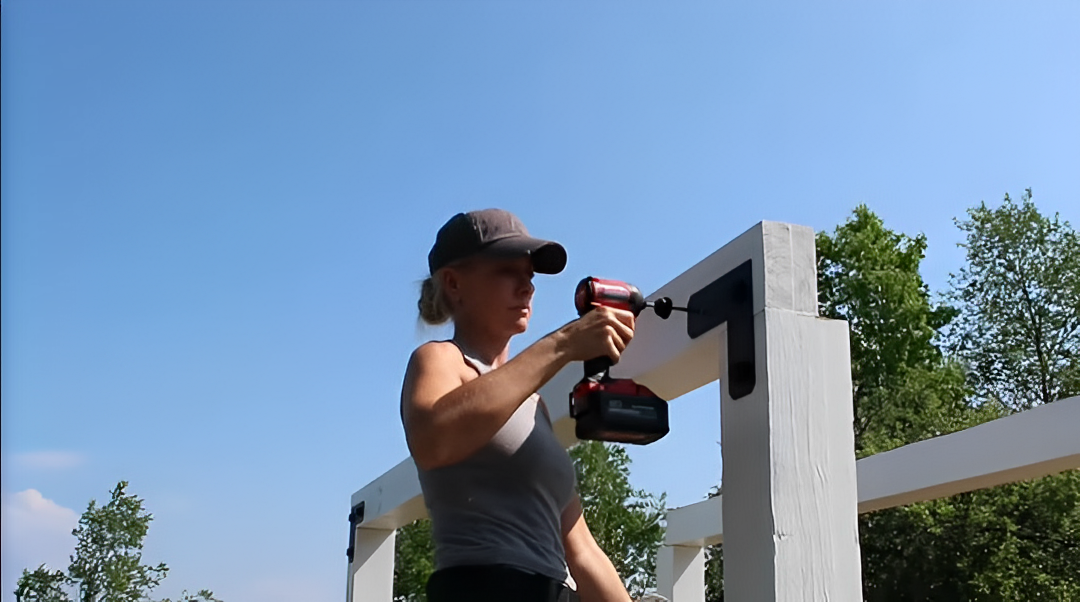
The black powder-coated hardware would also stand out against the white outdoor structure. The hardware I used on this build included the APVL6 L strap tie, APVA 90° angle, Outdoor Accents structural wood screw, Outdoor Accents® hex-head washer and more. When connecting the 6×6 treated beam, the Outdoor Accents L strap made it so simple to fasten the beams together. After assembling the structure together, the covered swing started looking like a pergola.
Building the Daybed Swing
Once the main structure was built, it was time to build the daybed swing. It was raining that day, so I took my project under my pavilion to stay dry. I cut all the lumber to size and used my pavilion table as a workbench, which worked great.
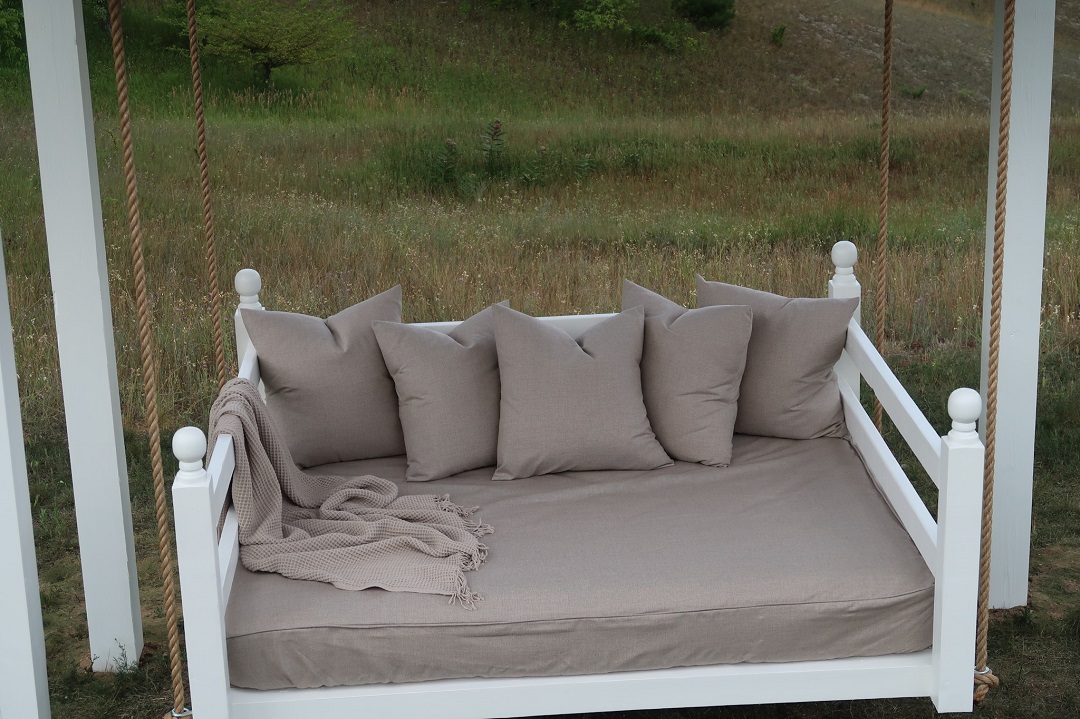
To build the swing, I used Simpson Strong-Ties Deck-Drive™ DSV Wood screws. I filled the holes with a wood dowel rod using my Milwaukee multitool to cut it flush. I used white wood filler to fill all the smaller screw holes. Then I gave it a light sand and one more coat of touch-up paint. I found that for this project an orbital sander was a must-have. I also added for finials on each 4×4 corner post for a little extra detail.
Finishing with the Roof
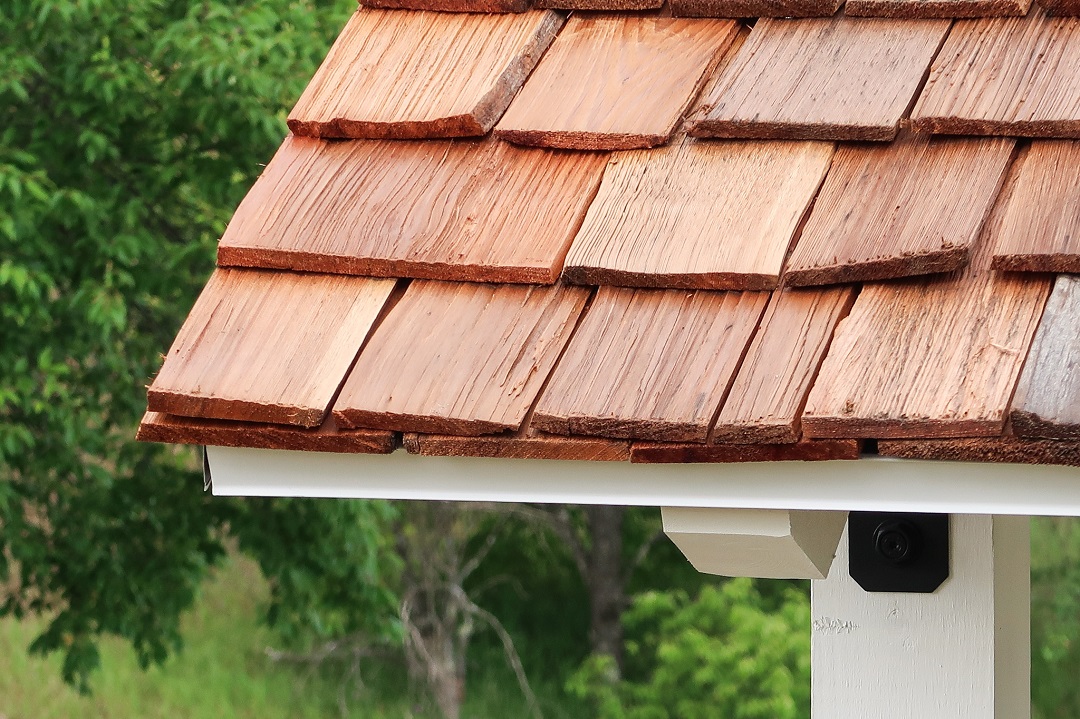
Once I finished the daybed construction, I turned to the roof. I added white drip edge to the edge of the roof all the way around. After that, I laid down the paper before I installed the shingles. I chose cedar shake for the roof. To install the first row, I made a block template to use to keep the overhang constant. Then laid the first row once then another directly on top for a double bottom row. Then I chalked a line and installed the next row until the roof was complete.
Completed Daybed Swing
We found the perfect location for this daybed swing on our homestead. It is located on a hill that gets a lovely breeze throughout the day and has a picturesque view of the rolling hills. This project turned out even better than I hoped. I’m glad we were able to build something for our backyard that we can enjoy and relax in.
Watch Dena’s full video below.


