
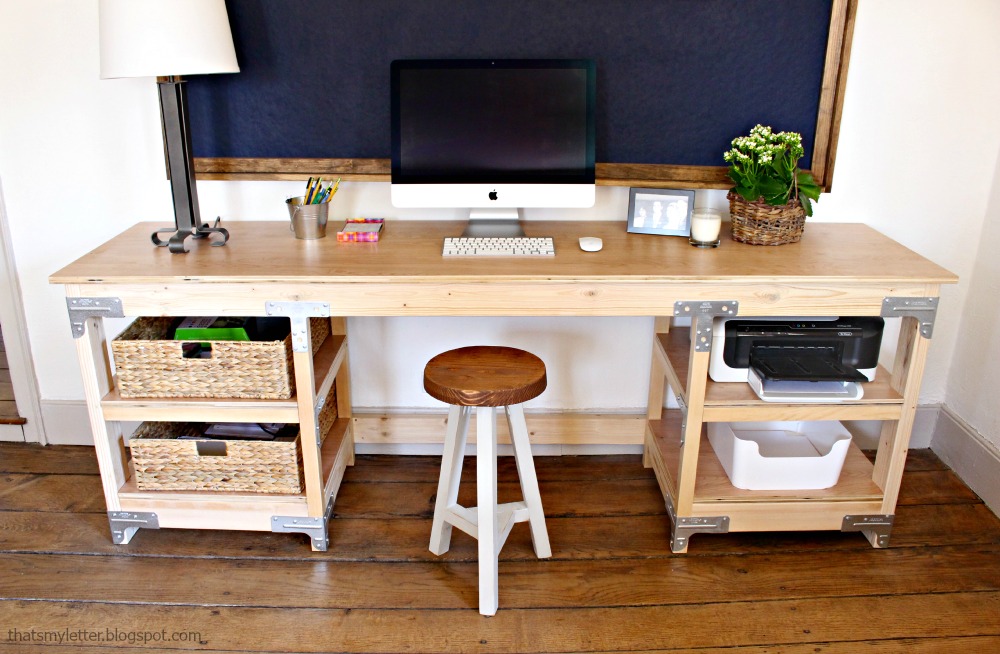
The workbench is perhaps my favorite place to spend time building different projects, so when it came time to build myself a new desk, I knew it had to have that workbench feel with desk-appropriate storage. Today, I’m sharing my industrial-style desk built using the Simpson Strong-Tie® DIY Workbench or Shelving Hardware Kit, plus additional fasteners.
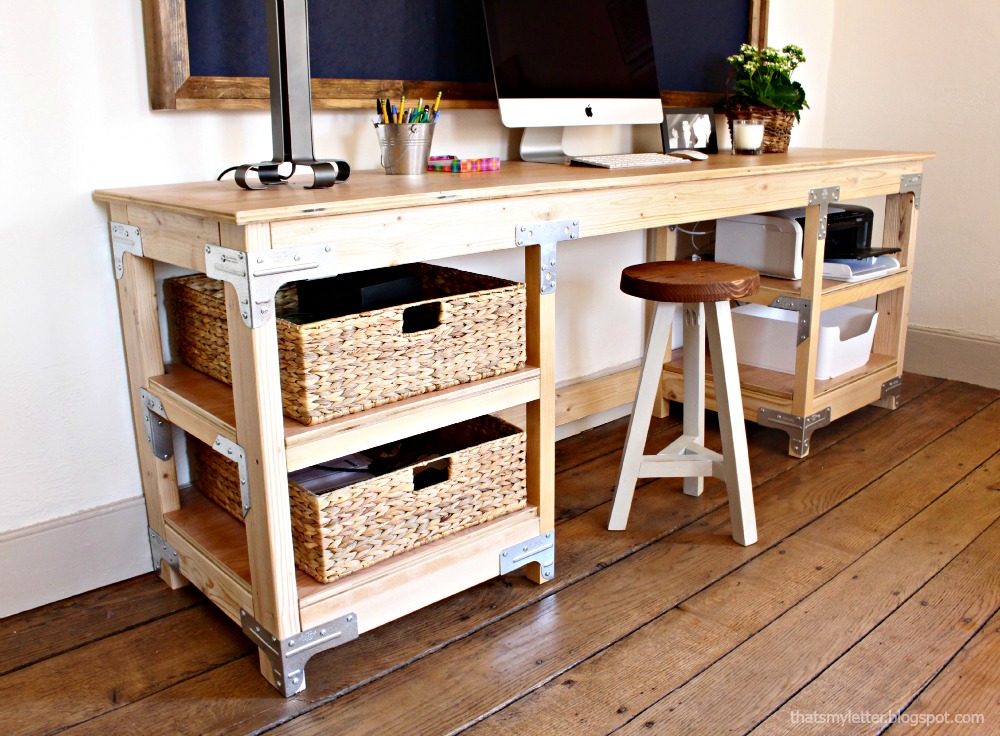
With a giant workspace 7ʹ long by almost 2ʹ deep, this bench offers plenty of workable surface area. I designed the shelves below to fit a printer as well as storage baskets.

I must admit I absolutely love the industrial look and feel of the hardware. This would also be a great desk for a garage or basement work area.
Below you will find the materials, cut list, and step-by-step instructions for building your own desk.
Materials:
(1) ¾”plywood sheet (4ʹx 8ʹ)
(6) 2×4 x 8ʹstuds
(3) 2×2 x 8ʹpine boards
(1) Simpson Strong-Tie®DIY WBSK Workbench or Shelving Hardware Kit
(2) Simpson Strong-TieRigid Tie®RTC2Z connectors
(8) Rigid Tie RTA2Z connectors
(14) A21 angle brackets
(2) 66T T strap ties
(2) Rigid Tie RTR connectors
(1) box 1¼”screws
2½”wood screw
3″wood screws
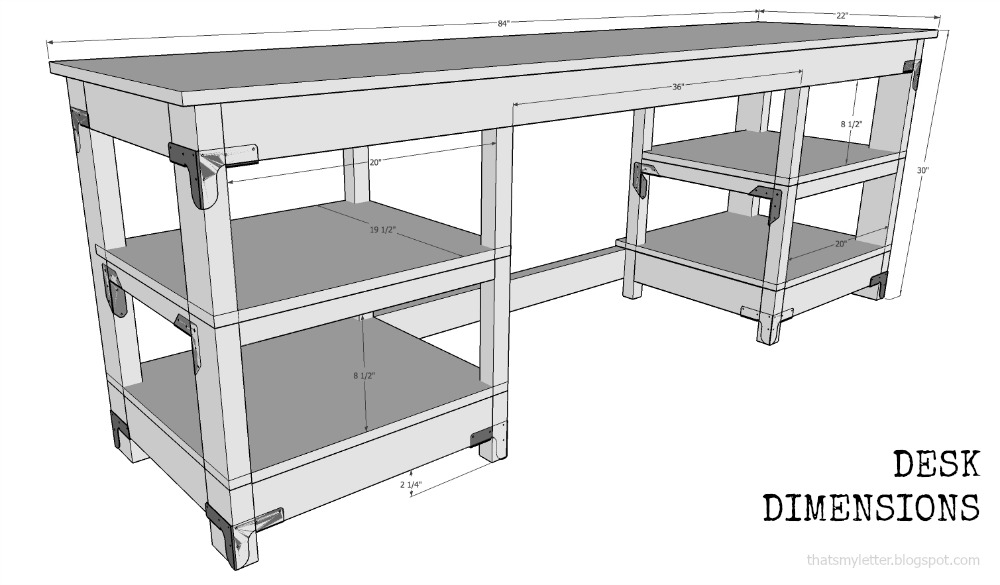
Cut List:
(1) ¾”plywood @ 84″l x 22″w (top)
(2) ¾”plywood @ 19 ½”x 23″(top shelves)
(2) ¾”plywood @ 21″x 23″(bottom shelves)
(4) 2×4 @ 29¼”l (legs)
(3) 2×4 @ 79″l (cross support)
(2) 2×4 @ 20″l (front base supports)
(4) 2×4 @ 14″l (side base supports)
(2) 2×4 @ 16½”l (interior base supports)
(4) 2×2 @ 25¾”l (interior legs)
(4) 2×2 @ 20″l (front and back top-shelf supports)
(2) 2×2 @ 14″l (side top-shelf supports)
(2) 2×2 @ 16½”l (interior top-shelf supports)
(2) 2×4 @ 18″l (interior top supports)
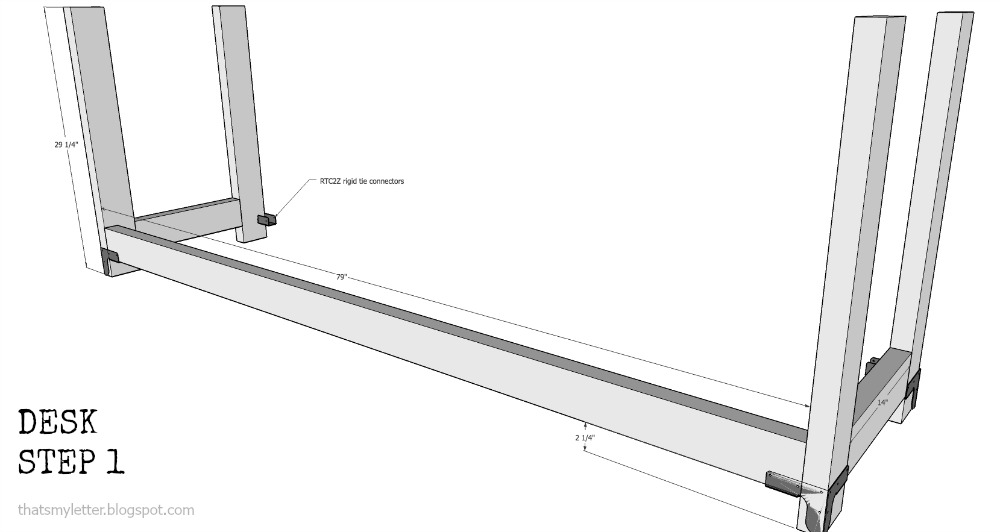
Step 1: Build the base frame using Simpson Strong-Tie® Rigid Tie® RTC2Z connectors as shown above. (Back view.)
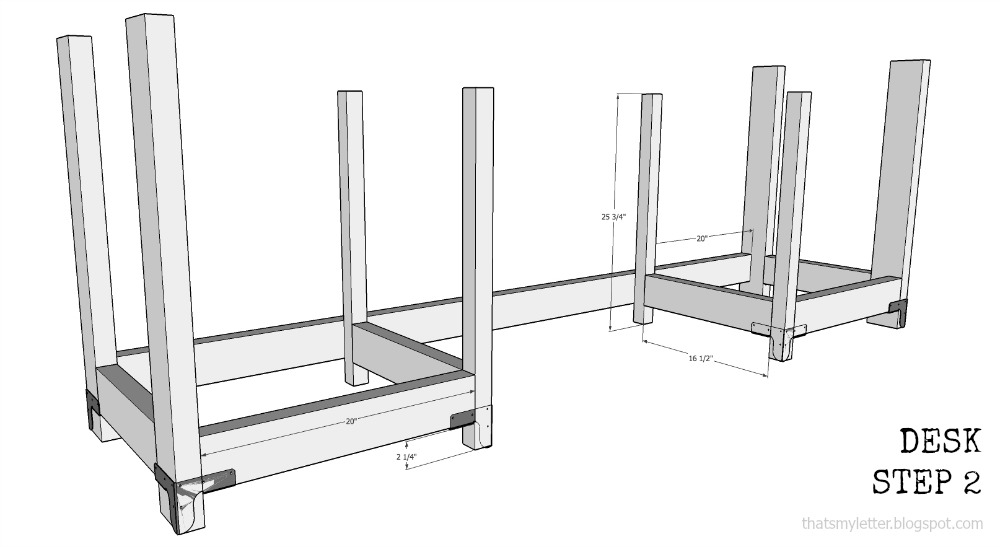
Step 2: Continue building the shelving units by adding the interior legs. Attach back interior legs to shelf support first using 3″screws. Then insert into tie connector and finally secure to back 2×4 cross support with 3″screws.
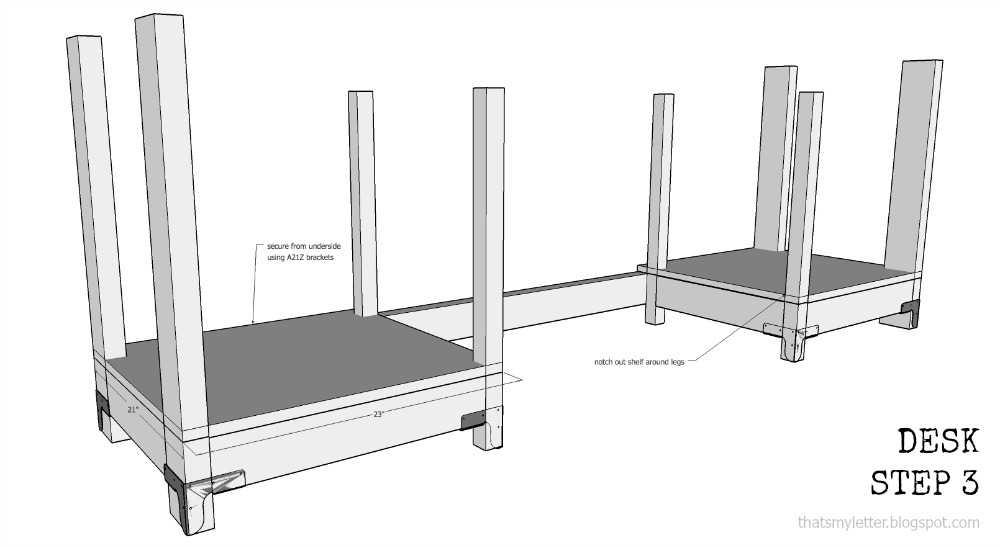
Step 3: Cut bottom shelves to fit by notching out the corners. Attach to supports from underside using RTR connectors.
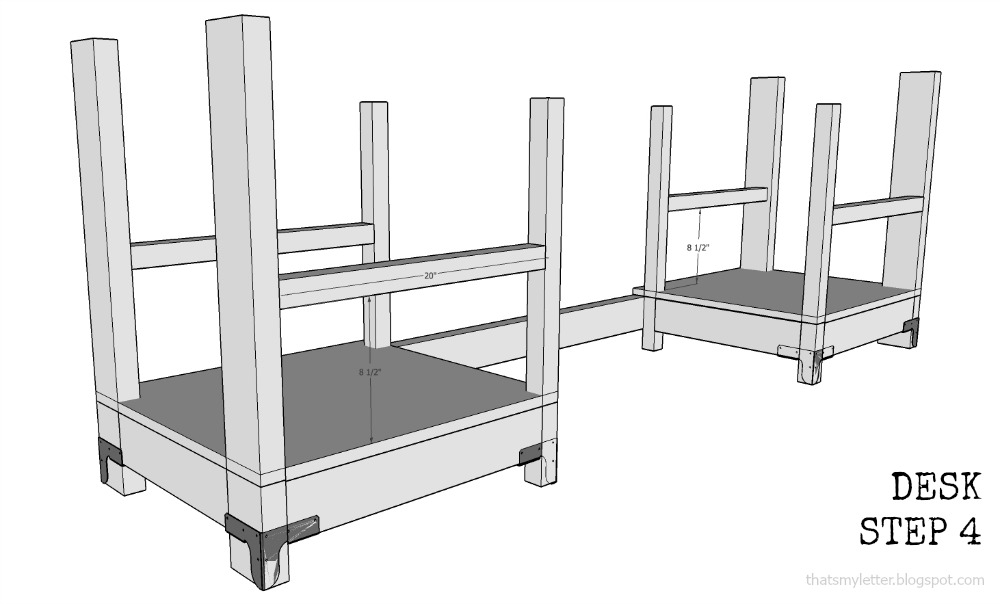
Step 4: Attach front and back top-shelf supports using 3″screws.
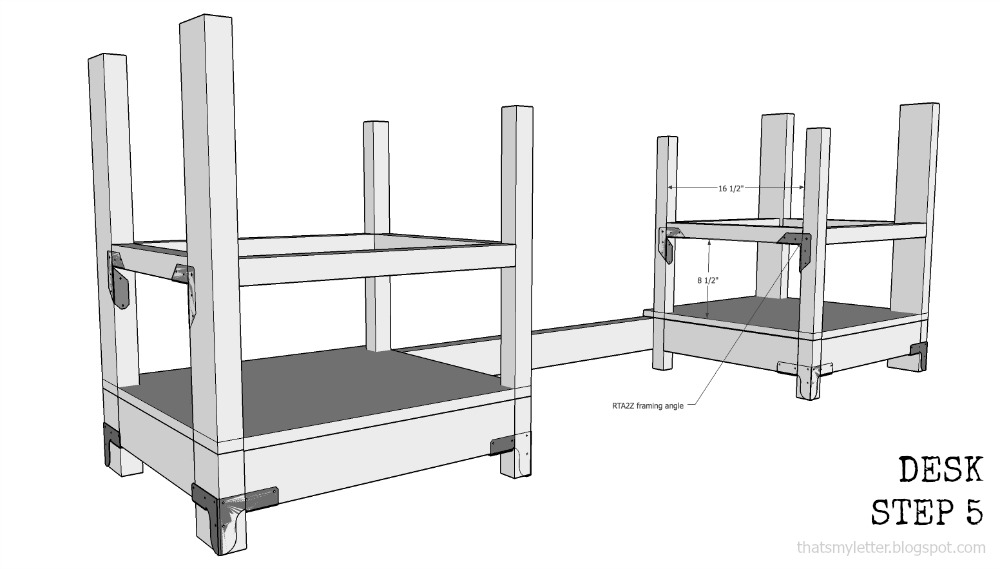
Step 5: Attach remaining top-shelf supports using RTA2Z connectors.
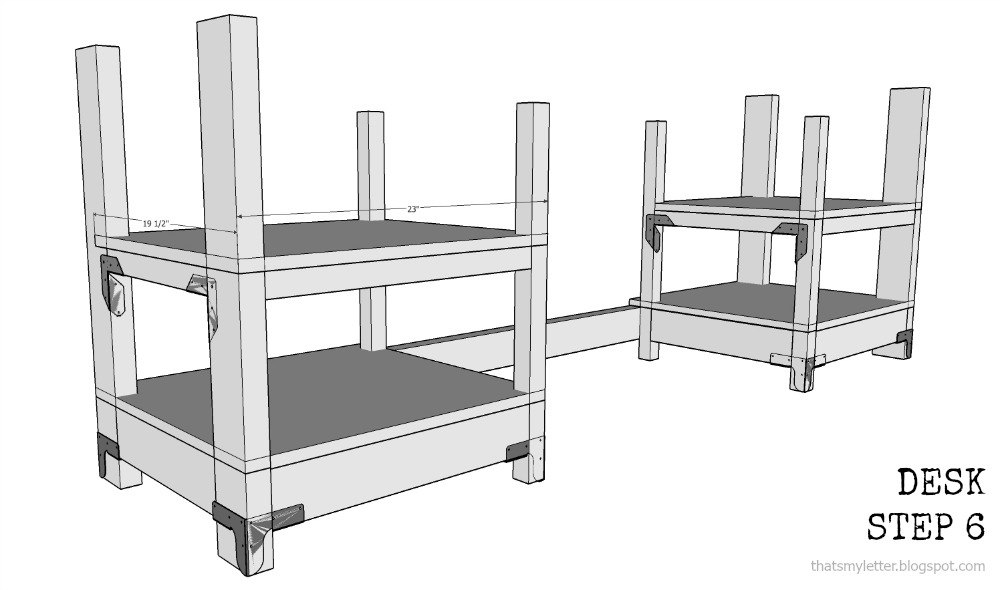
Step 6: Cut top shelves to fit by notching out the corners, then attach them to supports from underside using RTR connectors.
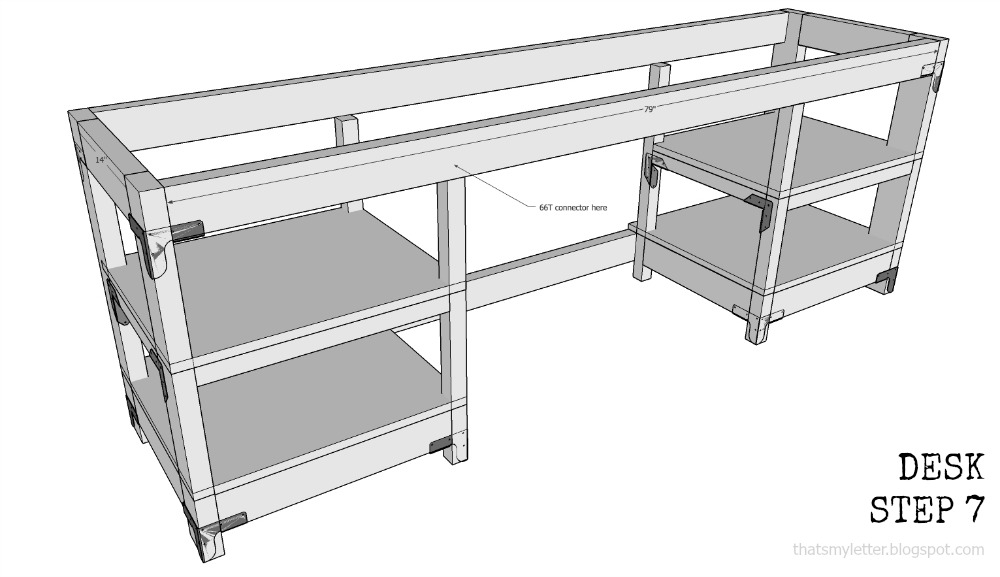
Step 7: Insert front, back, and side 2×4 frame pieces. Secure interior legs at front using 66T T strap ties.
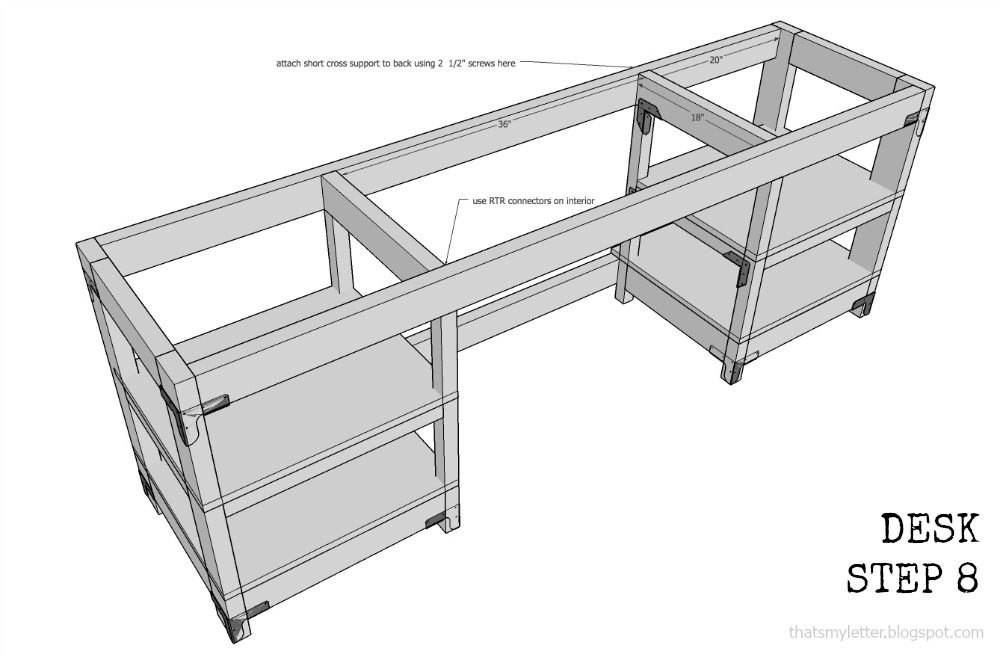
Step 8: Secure interior cross supports with RTR connectors at front and 2½”wood screws at back.
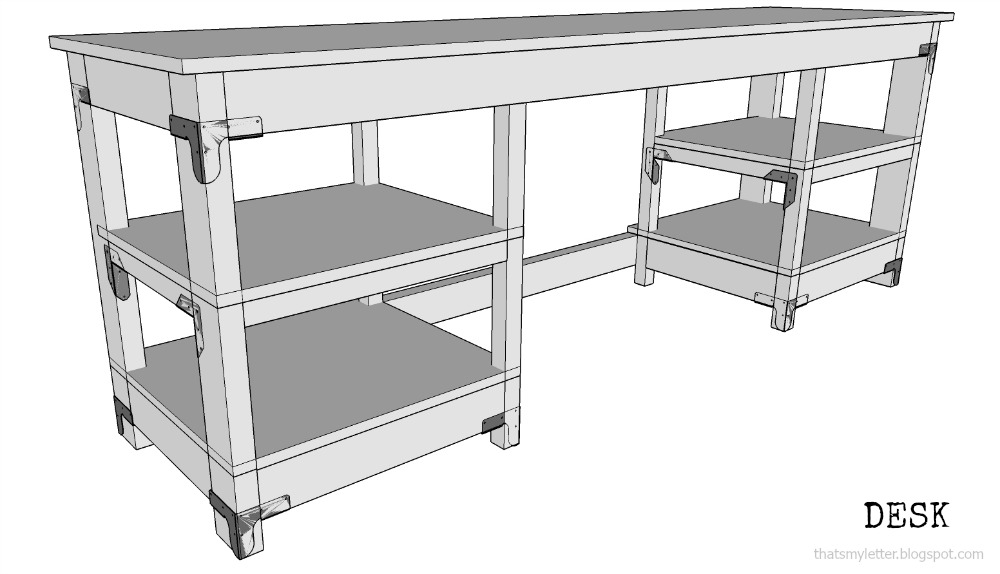
Step 9: Lastly, attach top to base using RTR connectors on underside. Keep 1″overhang at sides and front.
To finish the desk, sand well and use two coats of clear satin polyurethane, sanding between coats.

OUTDOOR DIY PROJECTS
- How to Build a Cool, Modern Chicken Coop
- How to Build a Floating Deck
- How to Build a Outdoor Accents Pergola
- How to Build a Simple Rolling Planter


