
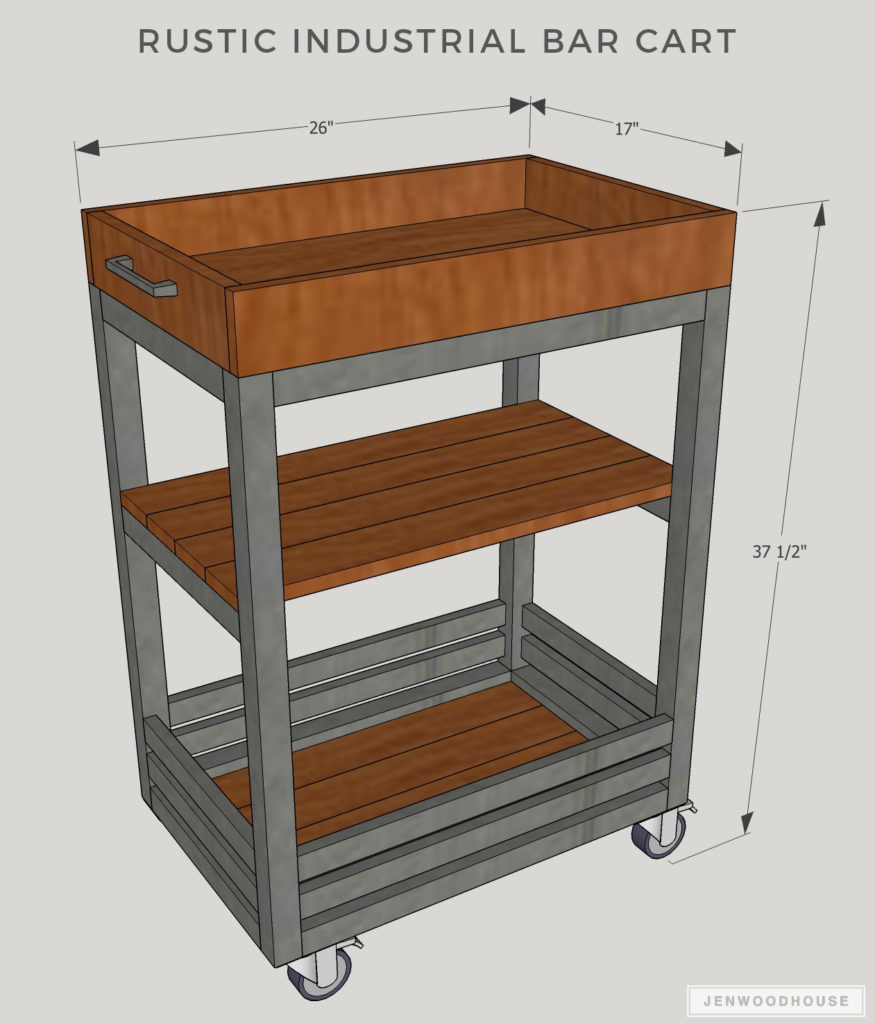
Hello! Jen Woodhouse here, happy to be back on the Building Strong blog, sharing my DIY bar cart just in time for the holidays! Tis the season for entertaining and this bar cart with removable tray is the perfect addition to your festive holiday party.
![]()
This is a simple and straightforward build – you can download the PDF plans here. The only brainteaser moment for me was trying to figure out a way to make the tray removable, but still secure enough when in use. Here’s what I came up with:
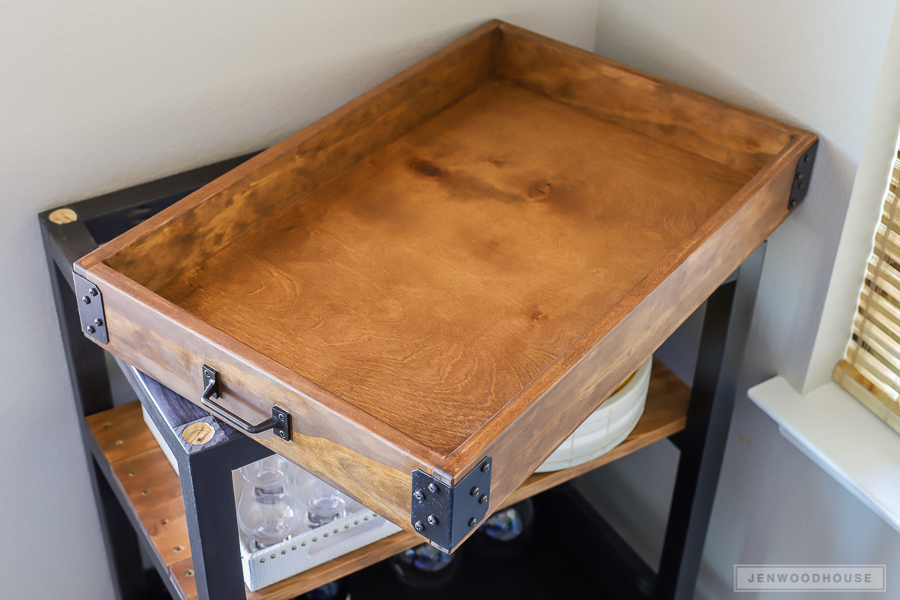
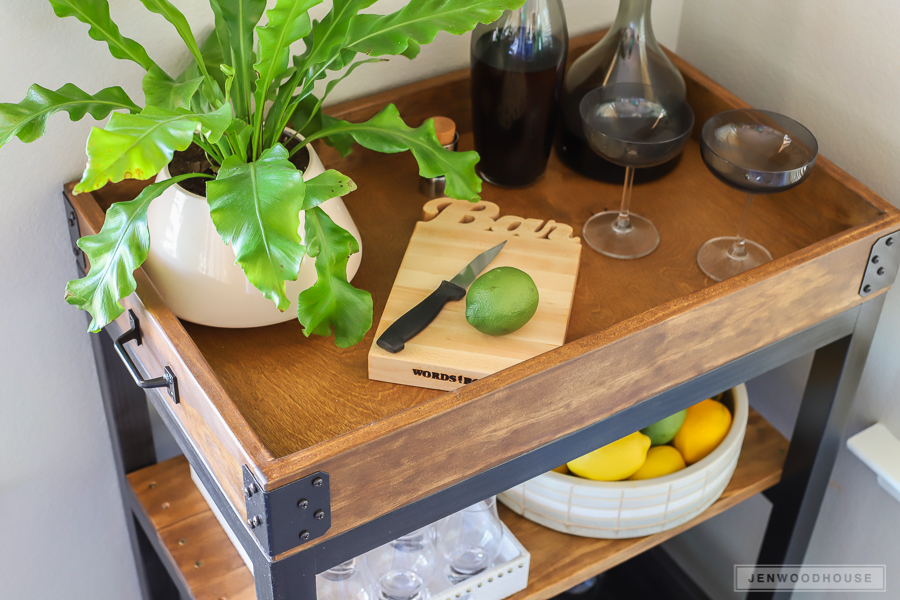
I used a Forstner bit to drill a shallow hole in all four corners of the bar cart and the tray has little dowel ‘feet’ glued on the bottom that sit nicely in these holes. This way, the tray is easily removable, but will stay securely in place when you’re rolling the cart around. So versatile!
These 18-gauge galvanized steel angles are serving a decorative purpose here, but they add a nice, industrial touch to this rustic bar cart. I spray painted the angles black to match the bar cart base.
Materials:
- (4) 2 x 2 x 8 Ft. Boards
- (3) 1 x 4 x 8 Ft. Boards
- (2) 1 x 2 x 8 Ft. Boards
- (1) 2 x 4 Ft. Sheet of 3/4-inch Plywood
- 8 inches of a 1-inch Diameter Wood Dowel
- (4) 3-inch Locking Swivel Casters
- (4) 18-Gauge Galvanized Steel Angles (A23)
- (2) Drawer Pulls
- 2 1/2-inch and 1 1/4-inch Strong-Drive® SDWS FRAMING Screws
- 1 1/4-inch Pocket Screws
- (16) 1 1/4-inch Lag Bolts
Tools:
- Tape Measure
- Pencil
- Carpenter’s Square
- Drill with 1-inch Forstner Bit
- Circular Saw
- Pocket Hole Jig
- Safety Glasses
- Hearing Protection
Cut List:
- (4) 2×2 @ 30 inches (legs)
- (6) 2×2 @ 14 inches (rails)
- (4) 2×2 @ 23 inches (rails)
- (4) 1×4 @ 23 inches (bottom shelf)
- (4) 1×2 @ 23 inches (bottom shelf rails)
- (4) 1×2 @ 14 inches (bottom shelf rails)
- (4) 1×4 @ 26 inches (middle shelf)
- (2) 1×4 @ 26 inches (tray long sides)
- (2) 1×4 @ 15 1/2 inches (tray short sides)
- (1) 3/4-inch plywood @ 24 1/2 inches x 15 1/2 inches (tray bottom)
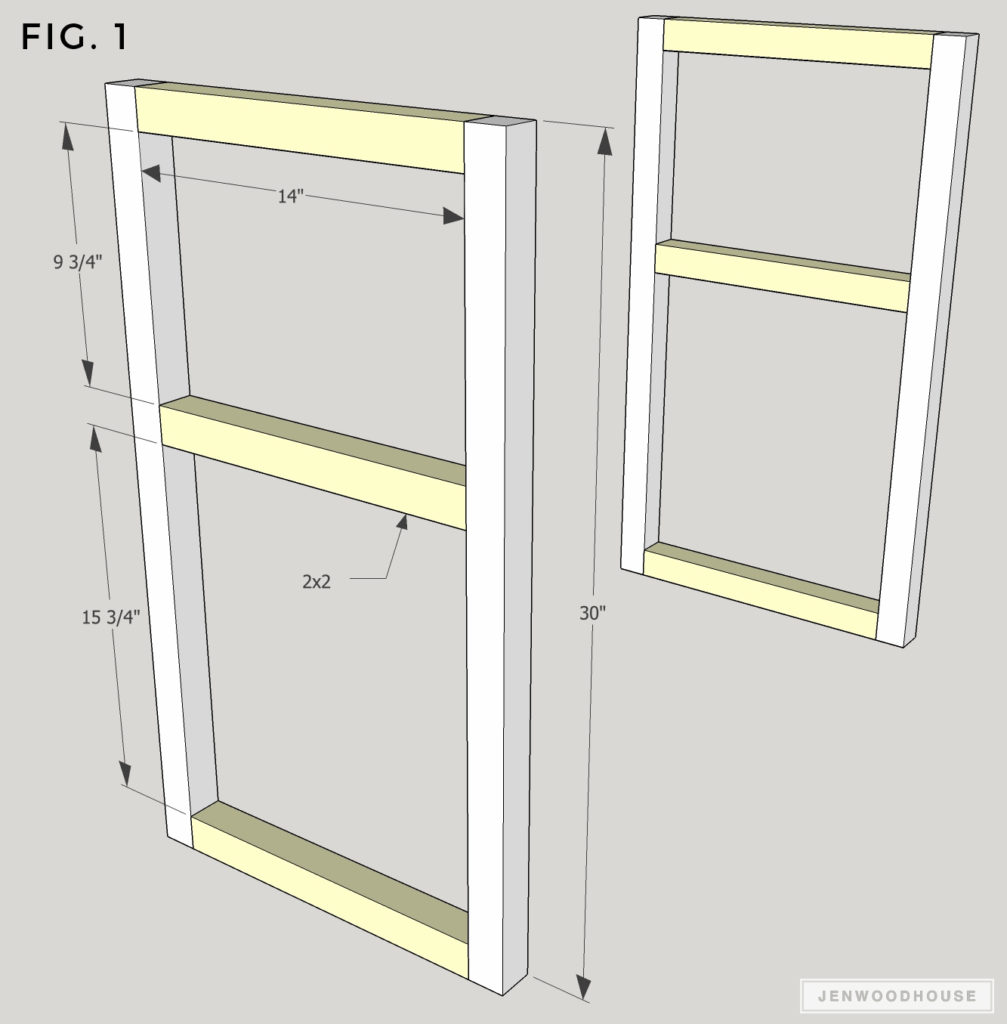
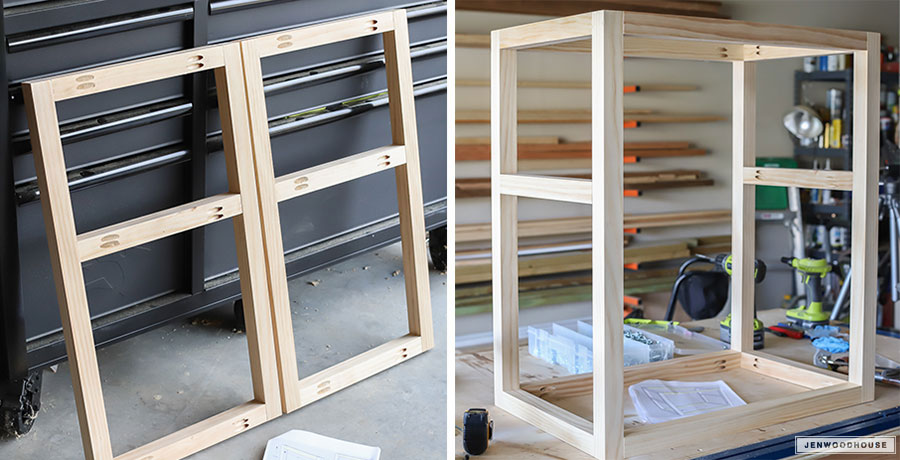
STEP 1 – BUILD THE TWO SIDES
Measure, mark, and cut 2×2 boards to length. Construct as shown with 2 1/2-inch wood screws and glue.
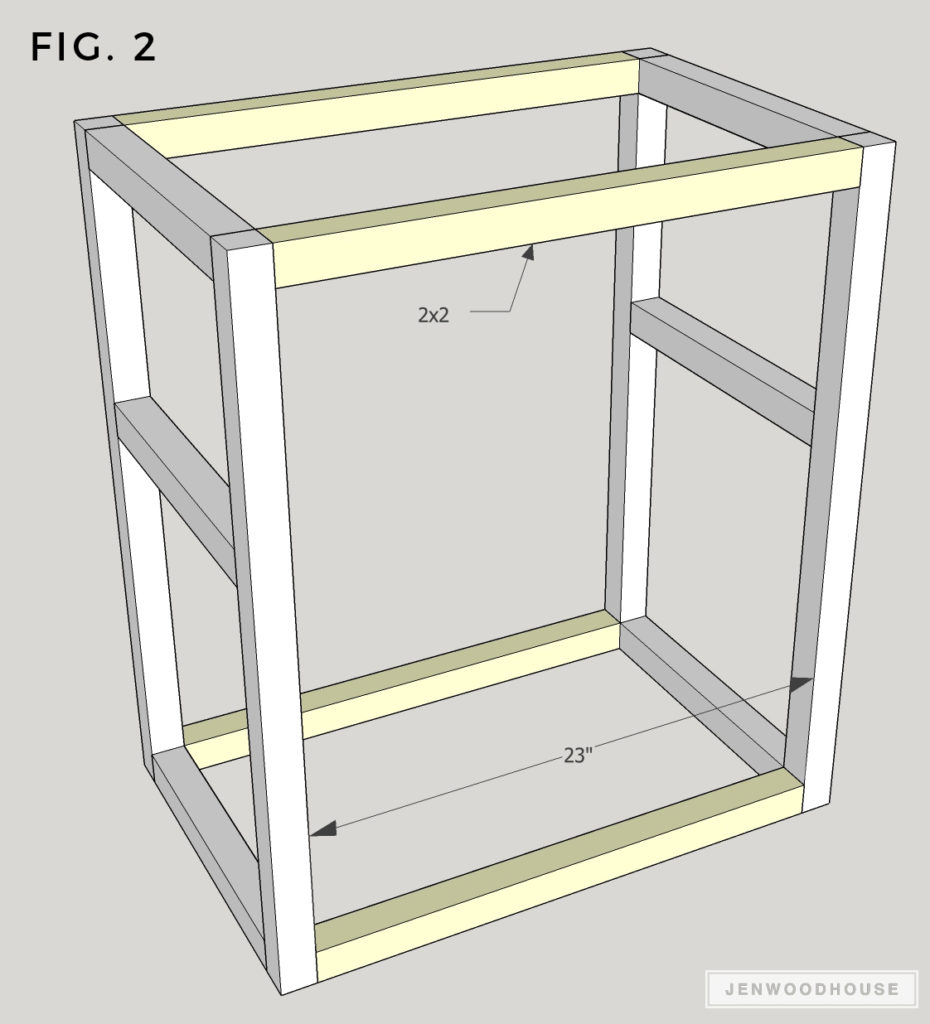
STEP 2 – BUILD THE CARCASS
Measure, mark, and cut 2×2 boards to length. Construct the carcass with 2 1/2-inch wood screws and glue.
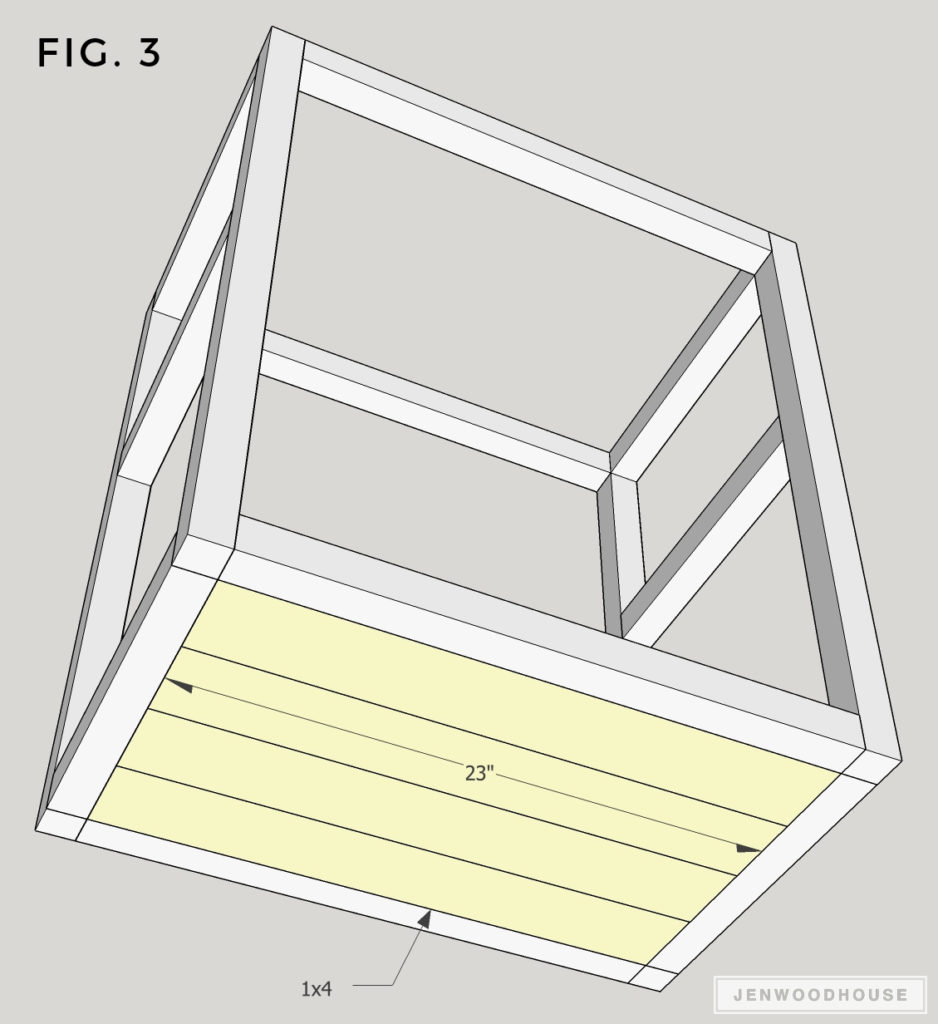
STEP 3 – ATTACH BOTTOM SHELF
Measure, mark, and cut 1×4 boards to length. Drill 3/4-inch pocket holes into the ends and attach the 1x4s to the bottom of the carcass with 1 1/4-inch pocket screws and glue.

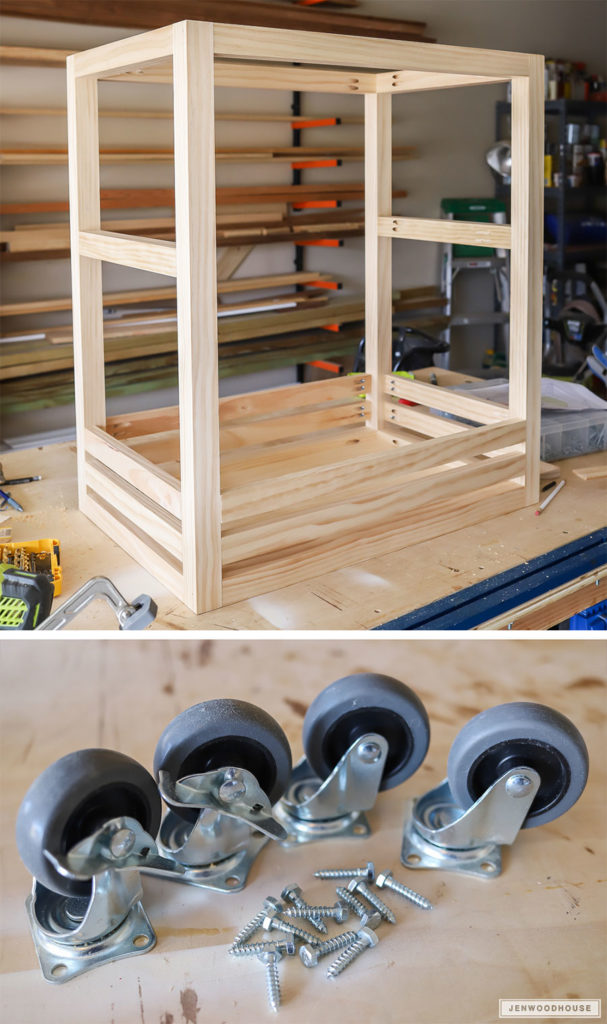
STEP 4 – INSTALL THE CASTERS
Pre-drill pilot holes for the casters and install casters with lag bolts.
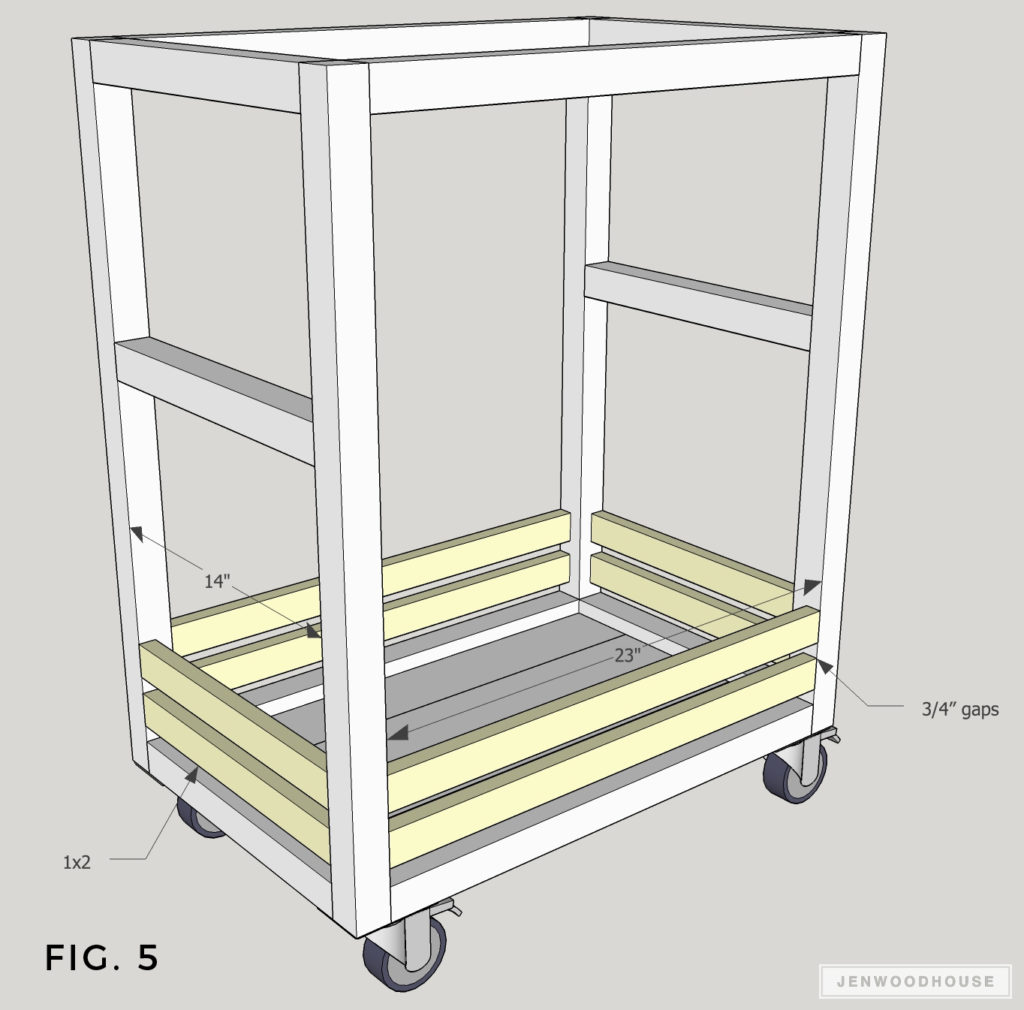
STEP 5 – ATTACH THE BOTTOM SHELF RAILS
Measure, mark, and cut 1×2 boards to length. Drill 3/4-inch pocket holes into the ends and attach them to the bar cart with 1 1/4-inch pocket screws and glue. There should be a 3/4-inch gap between these boards.
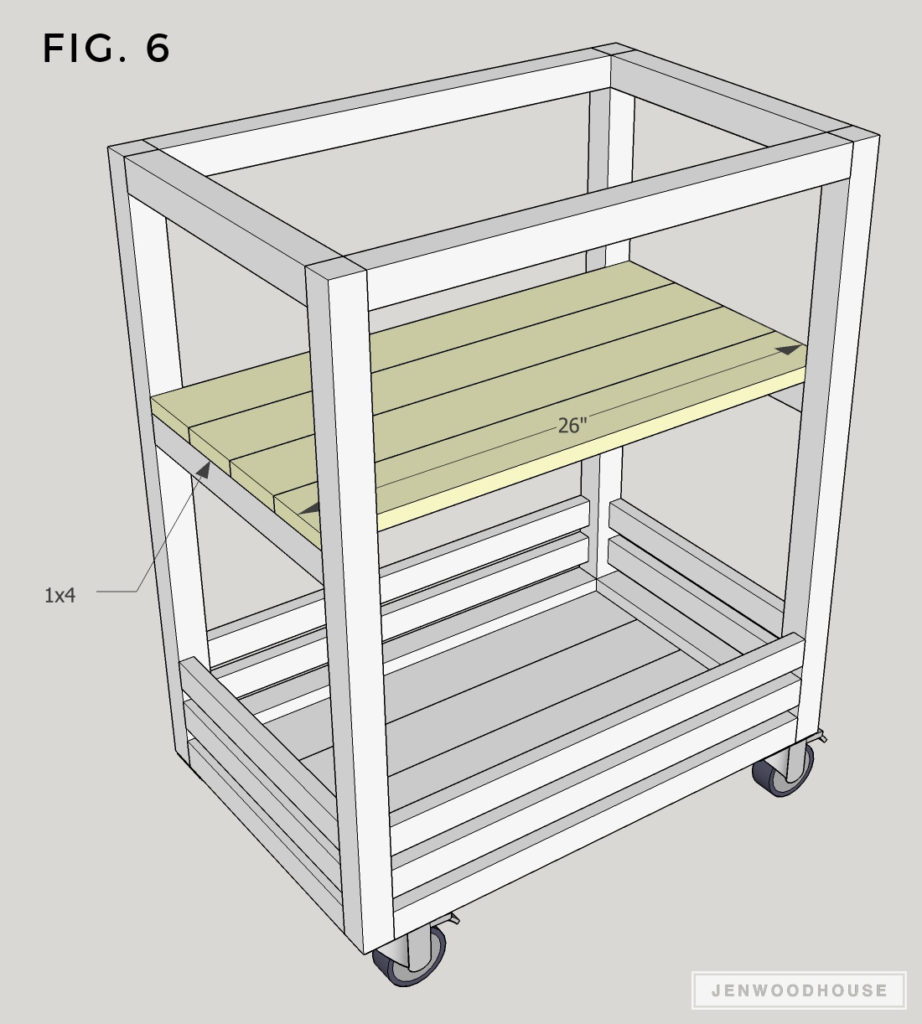
STEP 6 – ATTACH MIDDLE SHELF
Measure, mark, and cut 1×4 boards to length. Pre-drill pilot holes and attach the boards to the bar cart with 1 1/4-inch wood screws and glue.

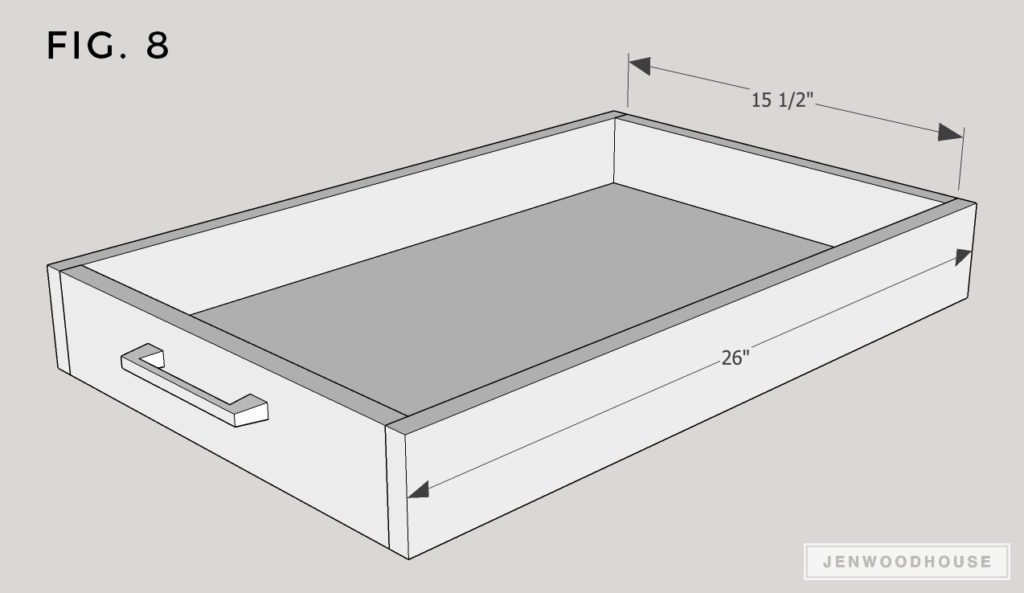
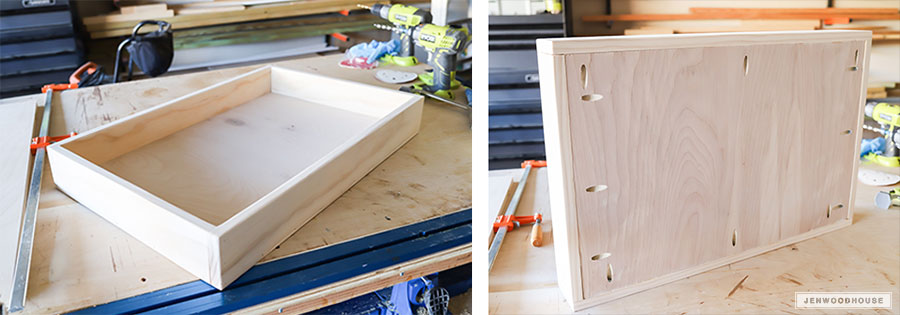
STEP 7 – BUILD THE TRAY
Measure, mark, and cut 1×4 boards to length, and 3/4-inch plywood to size. Drill 3/4-inch pocket holes into the short tray sides and around the perimeter of the plywood bottom. Construct the tray as shown with 1 1/4-inch pocket screws and glue. Install drawer pulls.
STEP 8 – ATTACH TRAY TO BAR CART
The tray is meant to be removable. Using a 1-inch forstner bit, drill 1-inch deep holes into the four corners of the bar cart. Drill a 1-inch deep mating hole into the four corners of the bottom of the tray and glue 2-inch dowels into these four holes. The tray should now have little ‘feet’ (dowels) that will fit into the holes in the bar cart. The tray should sit securely onto the bar cart but will be easily removable as well.
Sand, stain and/or paint, and finish as desired.
I spray painted the base with a metallic, oil-rubbed bronze spray paint, then stained the tray and middle shelf with an American Walnut stain. Lastly, I finished it with 3 coats of a wipe-on satin polyurethane.
You can build this rustic, industrial bar cart in one afternoon and be ready to host your holiday get-together that evening!
OUTDOOR DIY PROJECTS
- How to Build a Cool, Modern Chicken Coop
- How to Build a Floating Deck
- How to Build a Outdoor Accents Pergola
- How to Build a Simple Rolling Planter


