Hi friends! I’m excited to be back to share how we built this gorgeous DIY pergola with Simpson Strong-Tie’s new Outdoor Accents® line. If you’d like to read about how we built the floating deck, click here.
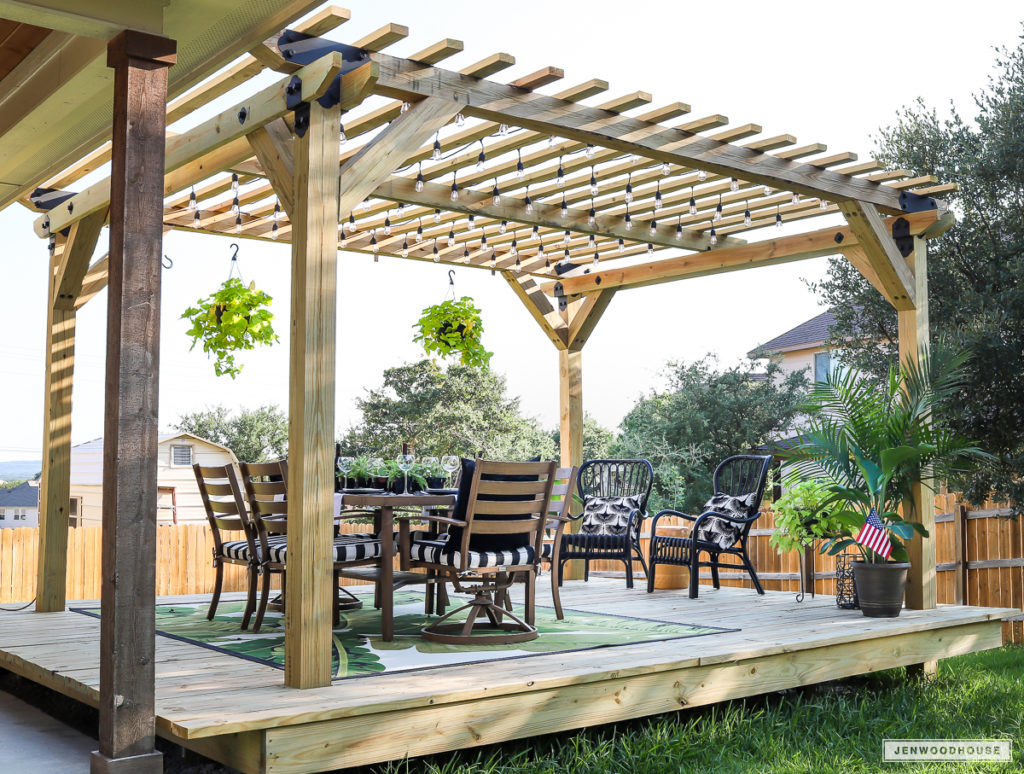
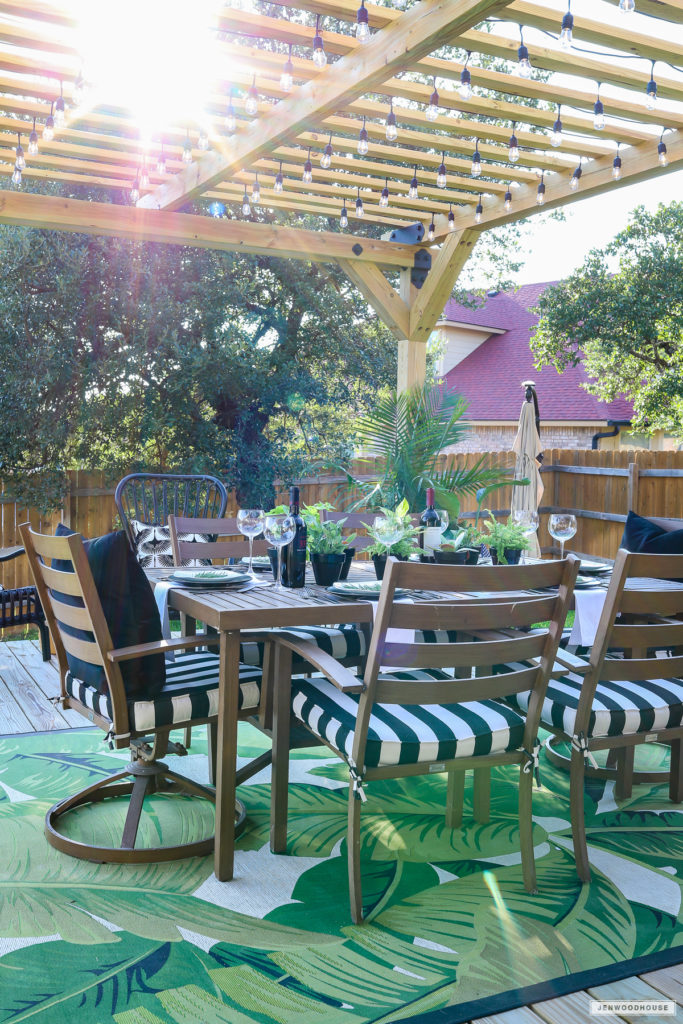
If you recall, we built the floating deck and pergola for our neighbors, who also happen to be a fellow military family. The deck and pergola are our welcome home gift to their deployed soldier. Aren’t they amazing? I’m so thrilled that we were able to work with Simpson Strong-Tie and give our neighbors a beautiful new outdoor space that they can enjoy for years to come.
First and foremost, check with your local building codes and acquire permits if necessary. Because the deck is less than 30″off the ground and isn’t attached to the house, no permit was required. Our local code also doesn’t require railings for decks under 30″high. Be sure to check with your local codes for specific requirements. (If you’d like to add railings, I would recommend these flat fence rail brackets by Simpson Strong-Tie.) We did, however, have to obtain a permit for the pergola. About $36 dollars and a week later, we had a permit for the pergola and could begin our work.
We also contacted the local utility companies and had them come out and mark where the utility lines ran underground, so we knew where to avoid when digging. We had to secure the pergola posts into the ground, so we did that before building the deck around it.
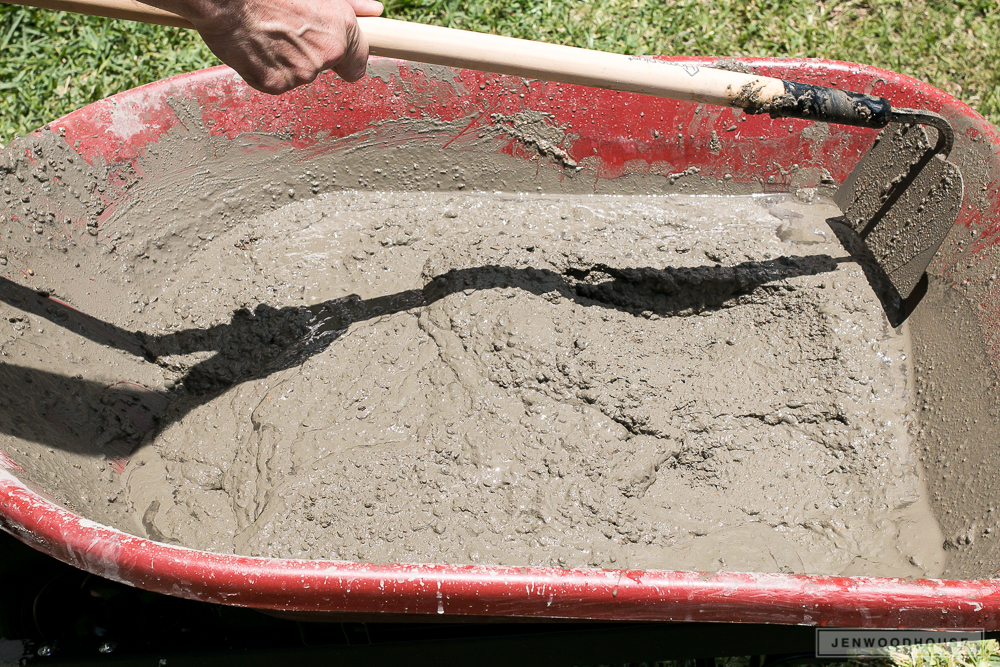
We rented an augur and dug four holes about 2 feet deep and 12 inches in diameter for each pergola post. Then we mixed Quikrete® concrete mix with water in a wheelbarrow until it was the consistency of chunky pancake batter. We used two 60 lb. bags of Quikrete for each hole.
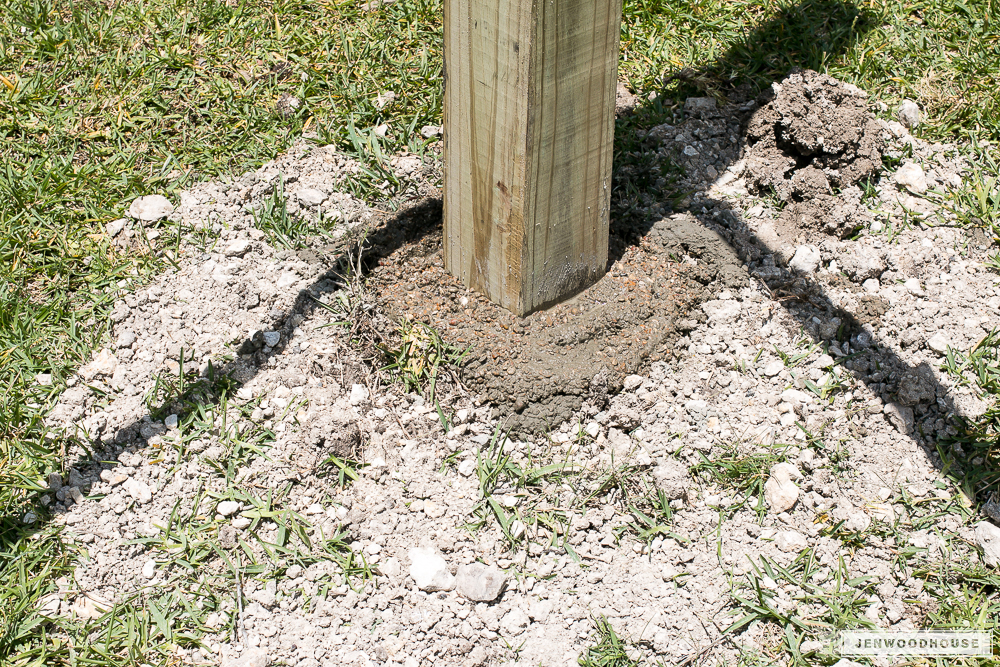
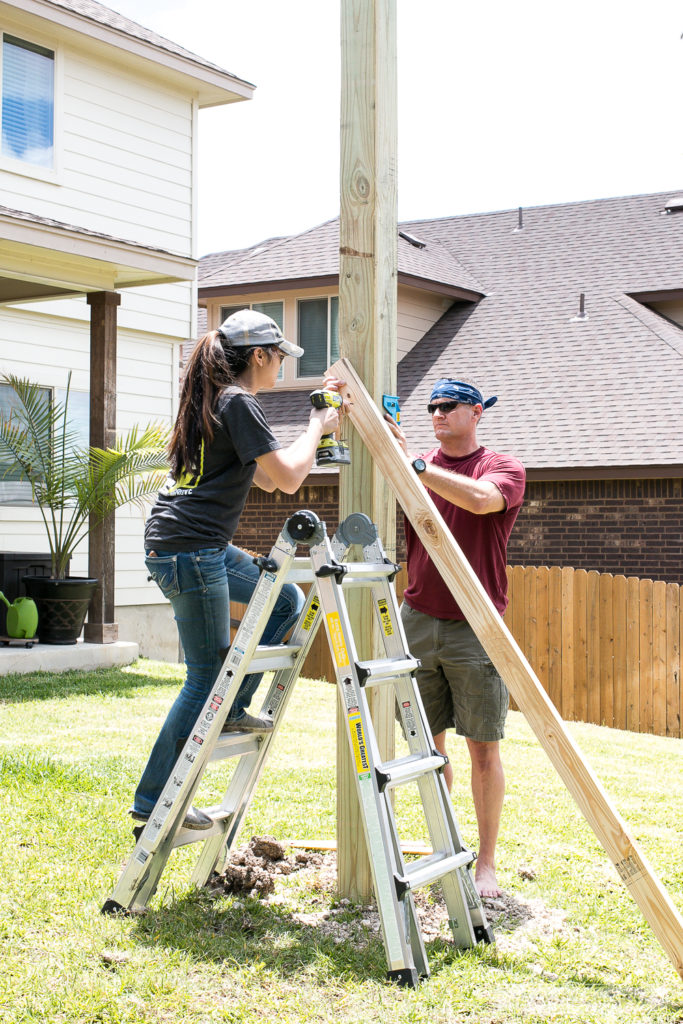
We set the 6×6 pressure-treated posts into the holes and filled the space around each of them with the concrete mix.
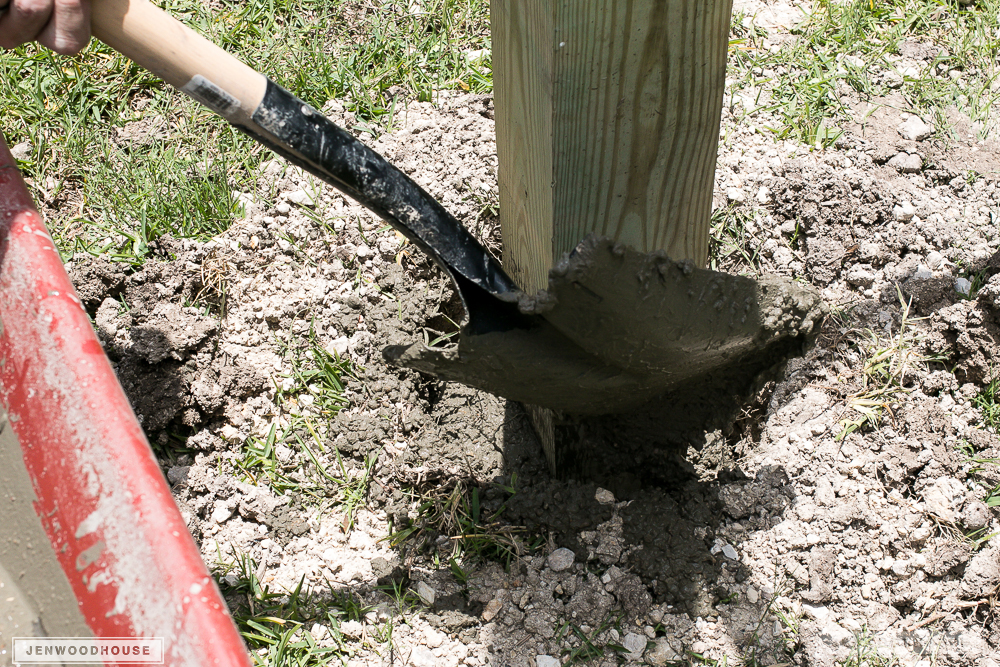
Then we checked to make sure the posts were plumb and level before bracing them with spare 2×4 studs.

The 2×4 braces will hold the pergola posts in place until the concrete sets. Because we were mainly building on the weekends, we were able to let the concrete set for a week; however, the instructions on the bag say to allow at least 48 hours for the concrete to dry.
And just like that, the pergola posts are in the ground!
It made sense to build the floating deck before finishing the DIY pergola. Click here for the tutorial on how we built the floating deck.

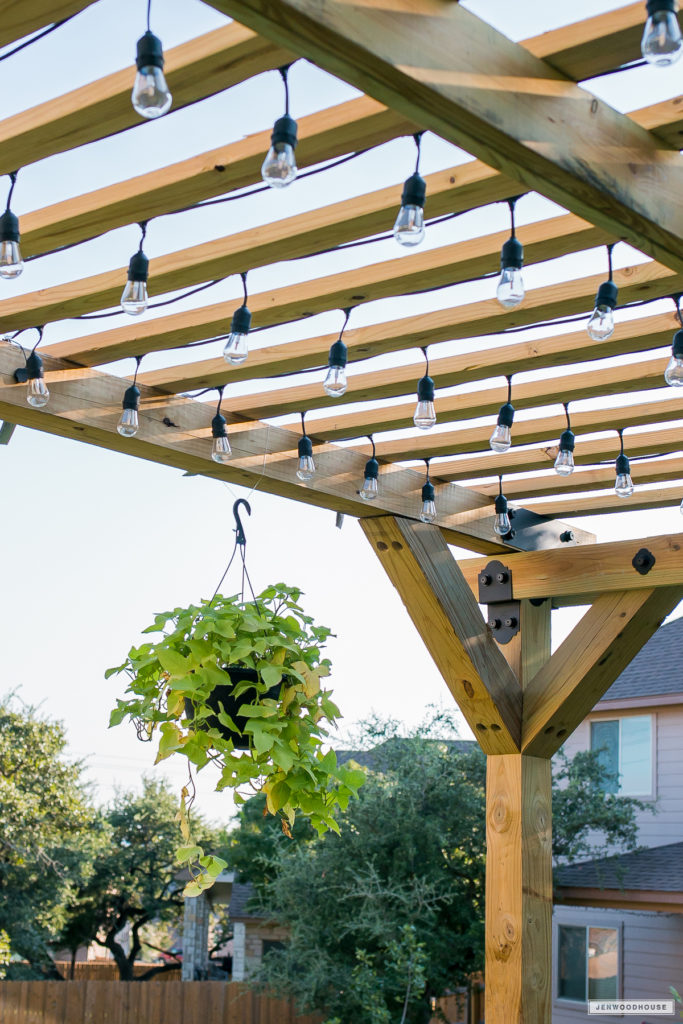
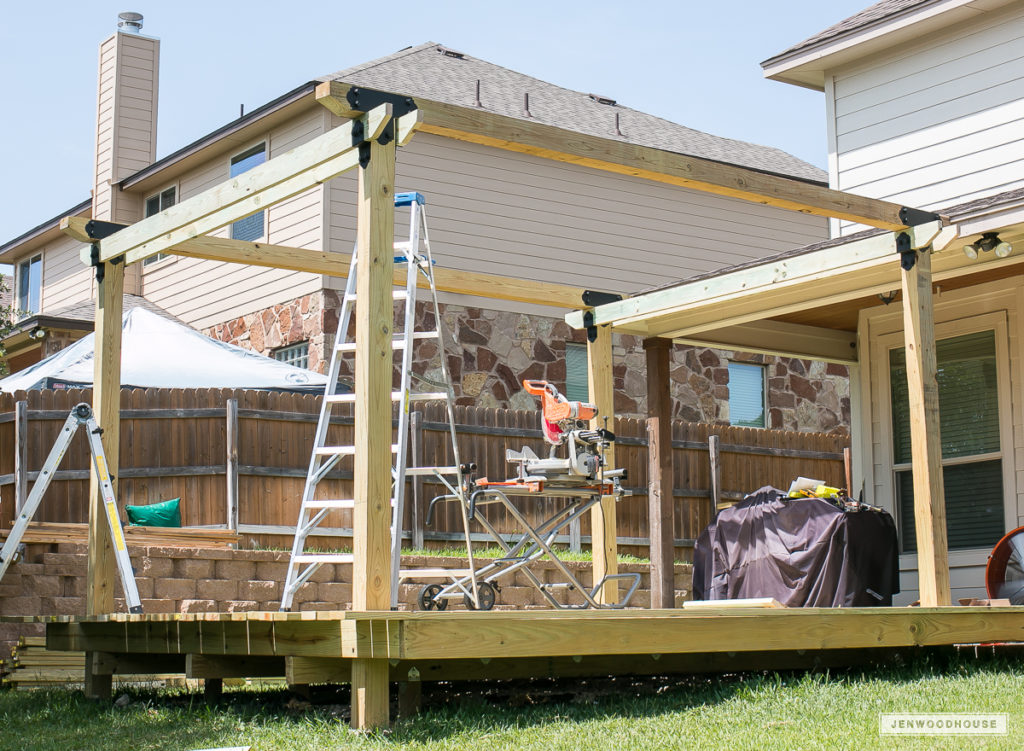
Once the deck was completed, we measured the height from the deck to the roof overhang of the existing patio. This determined how tall our pergola would be. Adam used a chainsaw to cut the top of the pergola posts to the right height. The pergola measures about 9′ tall.
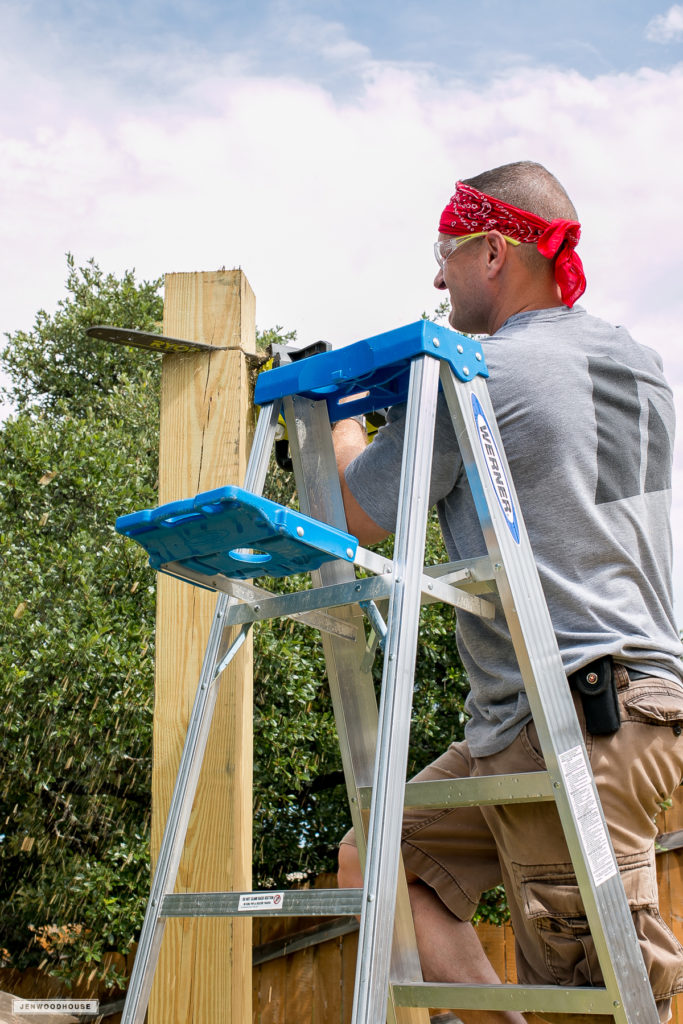
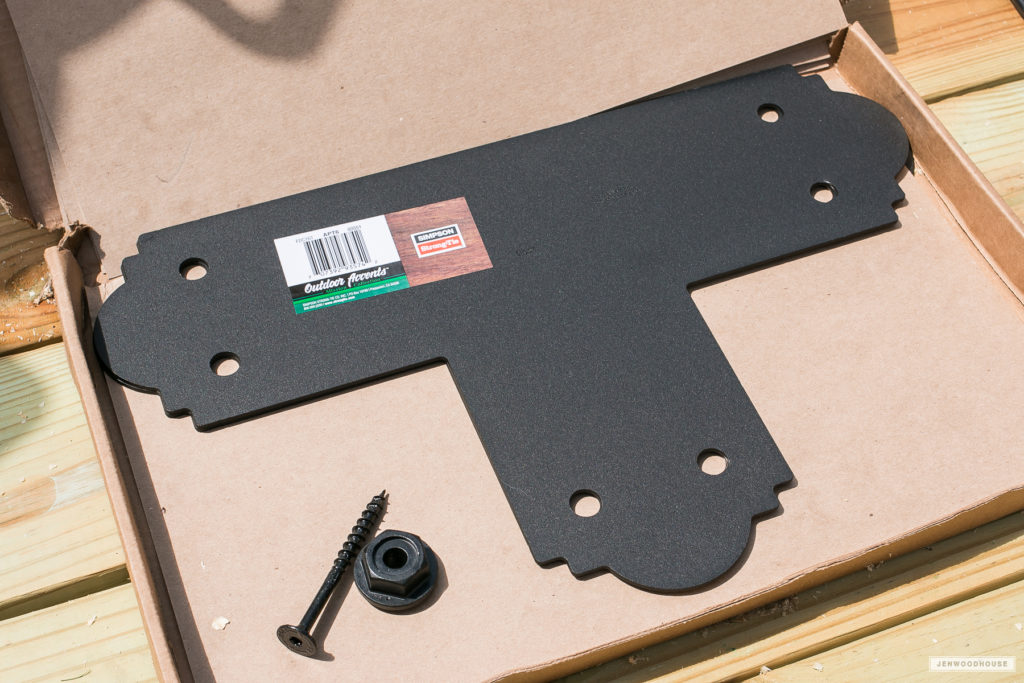
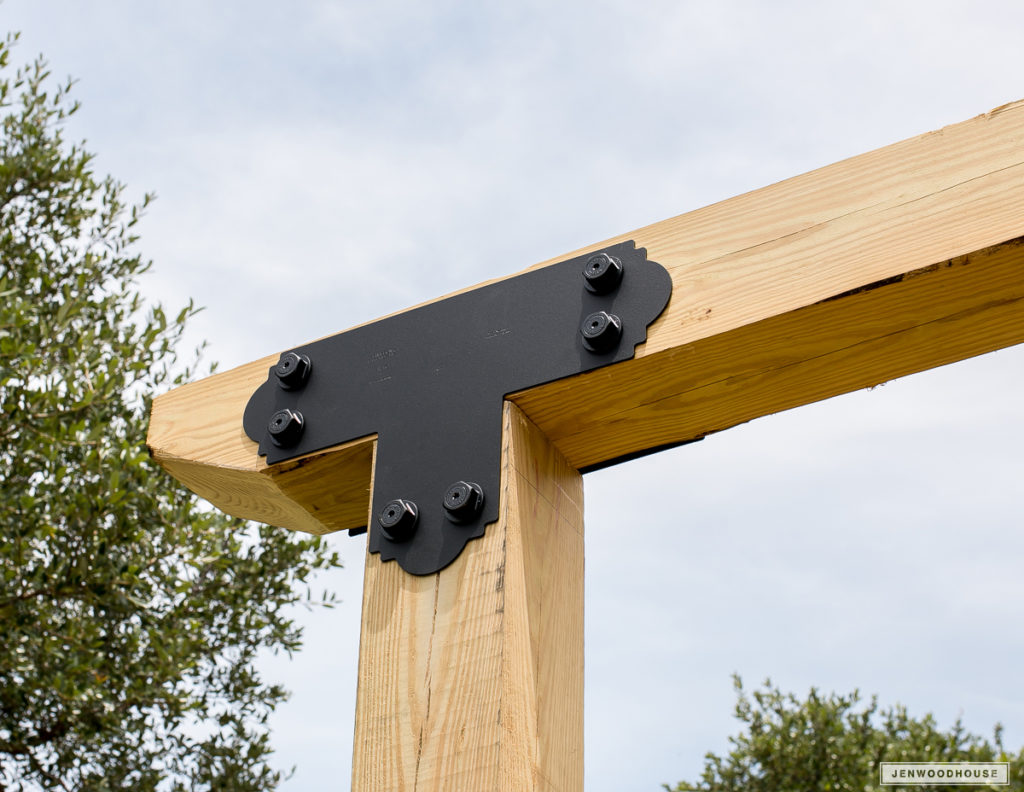
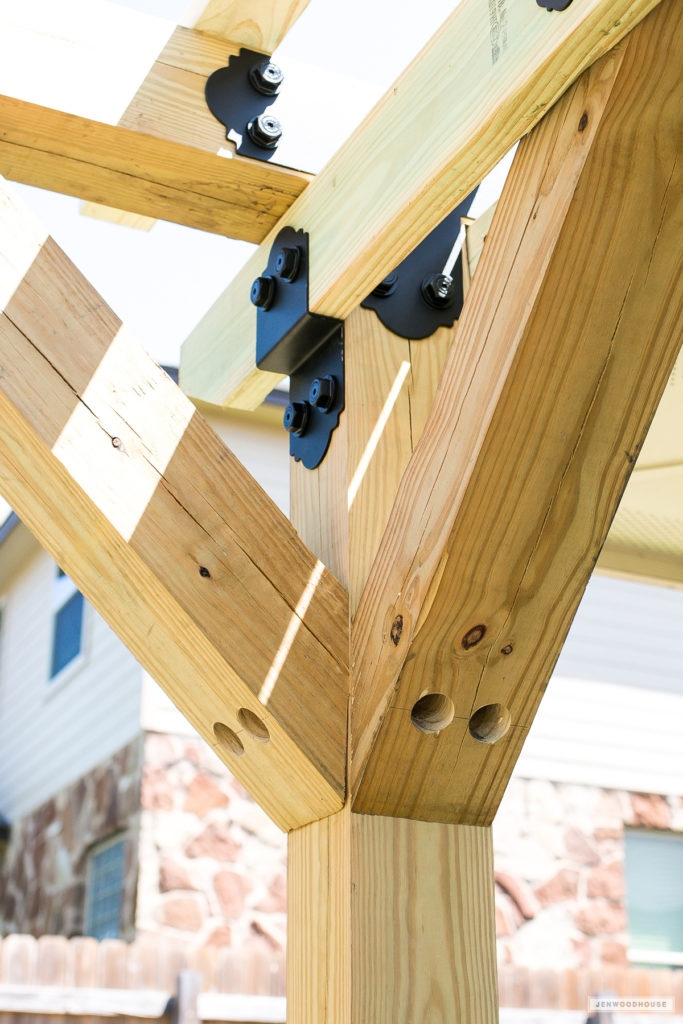
Next, we used these 6×6 Flat T-Straps to join the pergola posts to the 6×6 crossbeams. The entire Outdoor Accents® line is not only decorative but structural, too! We used the 3 1/2“ structural screws and the hex-head washers to attach the T-straps to the 6x6s.
Look how pretty it is already!
Next, we sandwiched the pergola posts with 2×6 boards and used the APDJT2 deck joist ties to secure them in place. Once again, we used the 3 1/2“ structural screw with the hex-head washer.
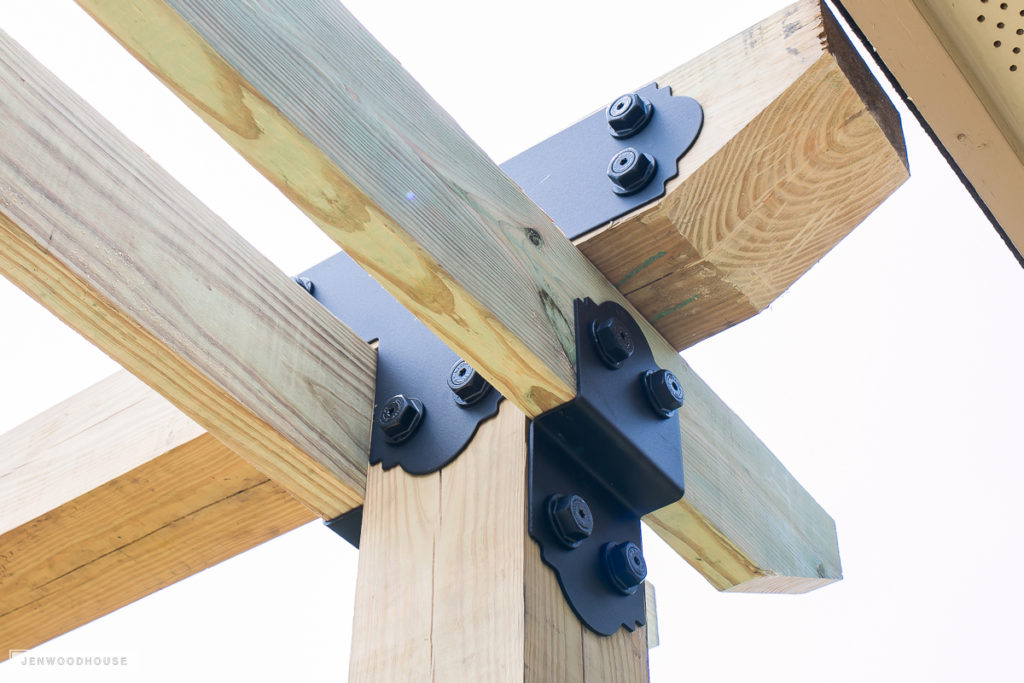
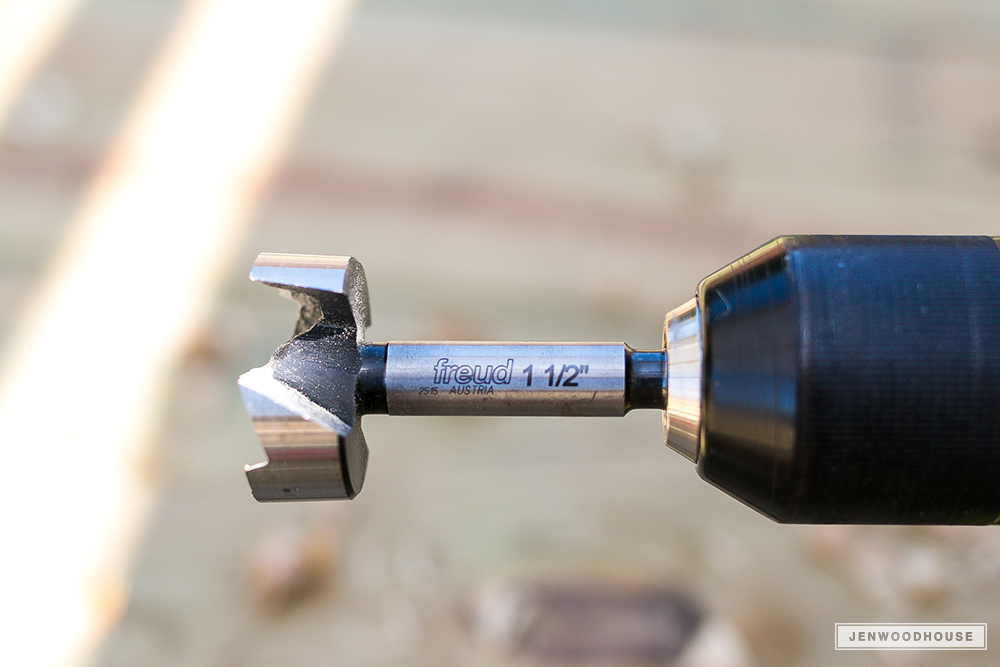
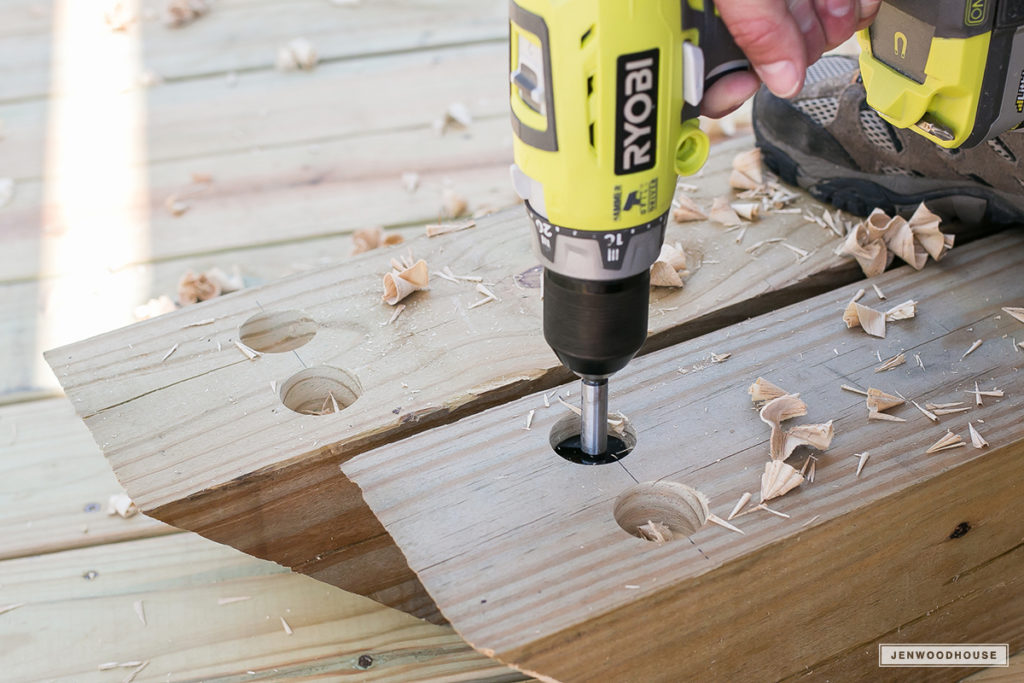
To attach the knee braces to the pergola posts and crossbeams, we used a 1 1/2“ Forstner bit to bore holes for the structural screws and hex-head washers to be countersunk in the braces.
We measured, marked, and cut the knee braces at a 45º angle then used the Forstner bit to bore the holes for the screws.
Here is what they look like attached to the pergola:
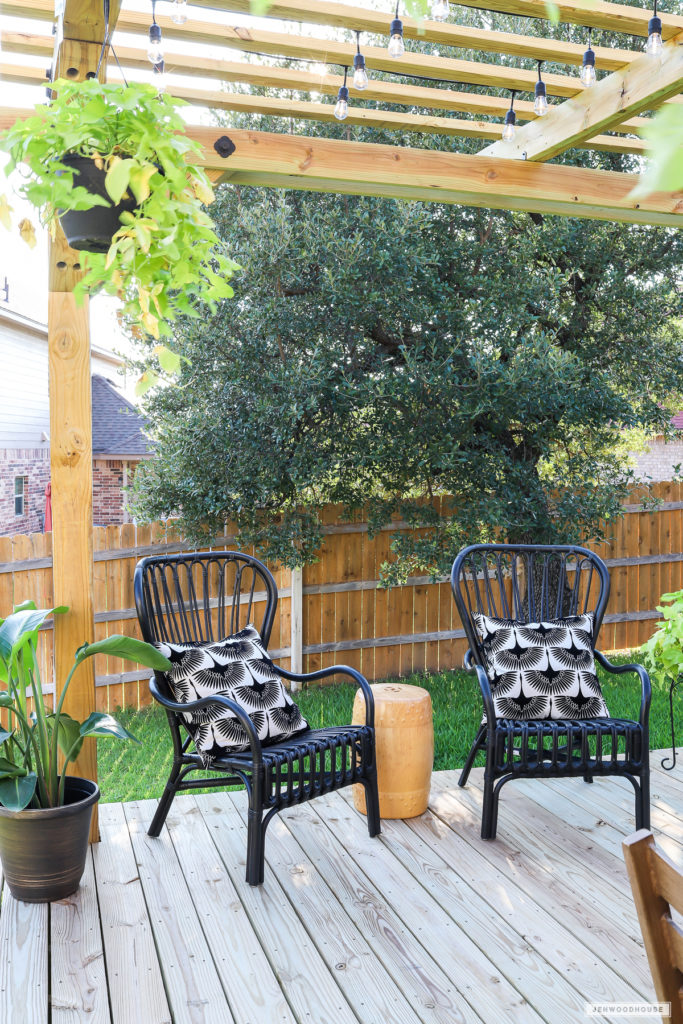
Finally, we attached the 2×4 rafters with 3“ DSV Wood screws, spacing the slats about 7“ apart. We used two scrap 2x4s to act as spacers for the slats so we didn’t have to measure each time.
Now are you ready for some serious eye candy?

OUTDOOR DIY PROJECTS
- How to Build a Cool, Modern Chicken Coop
- How to Build a Floating Deck
- How to Build a Outdoor Accents Pergola
- How to Build a Simple Rolling Planter