
My first day on the job was December 12, 2022 so I’ve been with Simpson for almost two months now. Currently I’m a senior software engineer on the Management Suite/Zoo (CS Director) team. When I was a kid, I did a few projects around the house with my dad, but I didn’t really appreciate it and didn’t so much as pick up a hammer for nearly a decade after graduating high school. Then I met my wife and found that I married into a family of home flippers, renovators, and DIYers and quickly picked up some carpentry skills. Now that I have some skills and our renovations have slowed, I’ve found that I really enjoy building things. Unlike when I work on software at my day job, when I finish a piece of furniture it’s usually done at that point. I don’t have to worry about refactoring a table or bug testing my firewood rack, and the feeling of completing something that you can touch with your own two hands and that people find useful is really appealing to me.
What inspired this DIY firewood holder was the fact that we burn wood as a secondary heat source in our home. We have central heat, but it is provided by mini split systems that don’t handle sub-freezing temperatures very well. They work fine when it gets cold, but I wonder if they are secretly burning dollar bills to generate heat. Also, not much can beat a wood-burning insert with a blower for heating a home and providing a relaxing ambiance on cold winter nights. We’ve been in our current home for about two years now, and firewood storage and preservation has been an ongoing concern. We can only store so much near the house, but we have a 30’ x 40’ workshop a couple hundred feet from the house and we store our freshly cut firewood on one side of the building. Unfortunately, the workshop doesn’t have much of a roof overhang and the 2x4s we were laying the firewood on were turning into our cat’s playground. I had to restack it several times because she would start climbing on it while I was trying to split wood and always knocked something loose.
I really didn’t want to buy something, so I set out to find some plans or come up with some of my own to build a firewood holder. In my search I determined that my holder needed to meet the following criteria:
- It needed a roof so the wood could easily be kept dry.
- It needed to support two stacks of wood front to back.
- It needed to secure the stacks of wood so they can’t easily fall or roll off if the cat decides to pretend to be a mountain climber (or force me to pet her while stacking wood).
- It must be simple to build.
I wound up finding a simple design here. It didn’t meet all my requirements, but it was simple enough that I felt like I could modify it to meet them without compromising the design.
I wound up basically taking the plans described there and building two of them front to back with a single roof covering both and increasing the height to 5’ vs 4’ (to make accessing the back row easier and reducing the odds of hitting my head).
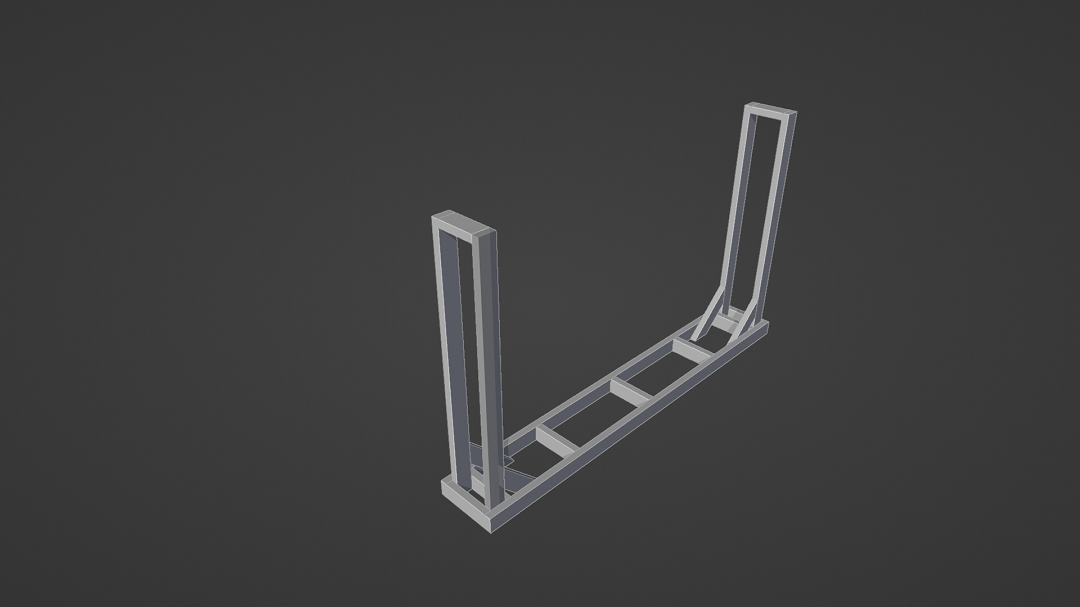
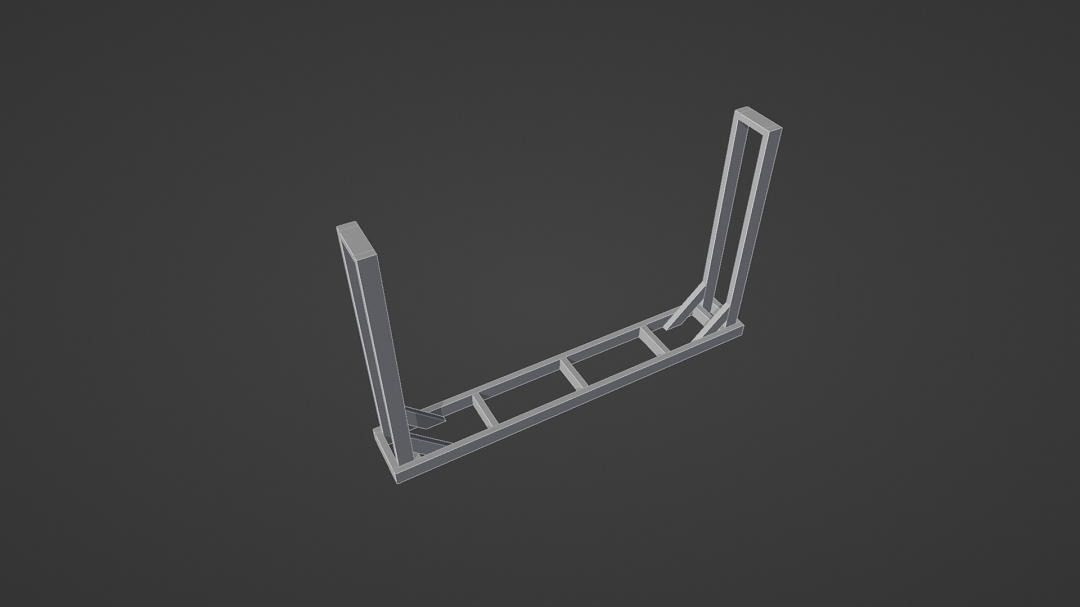
My planning and modifications resulted in this model:
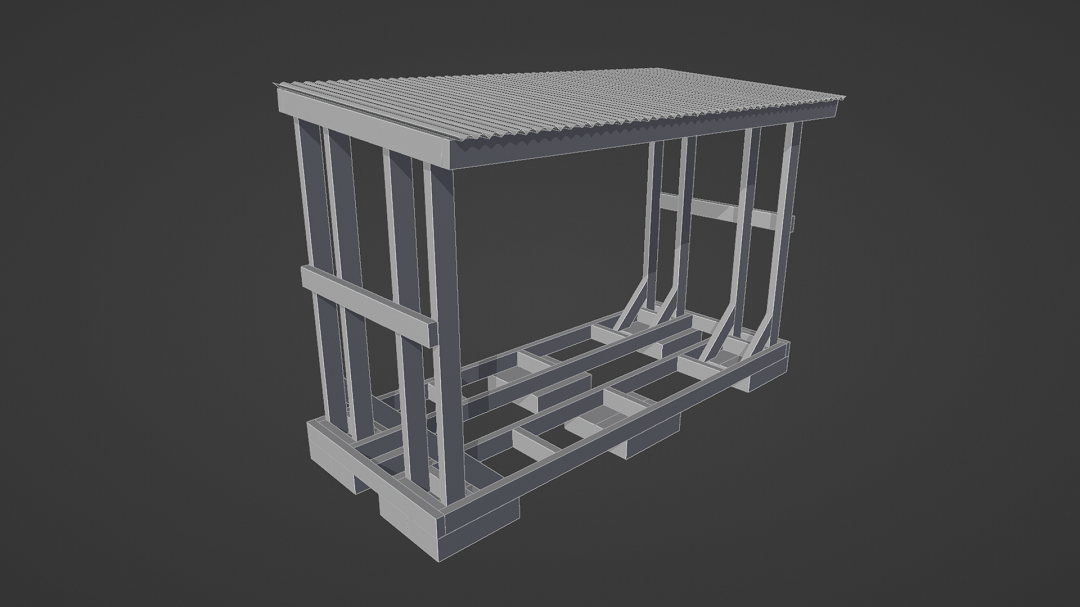
This design can be divided into three components that can be assembled at another location.
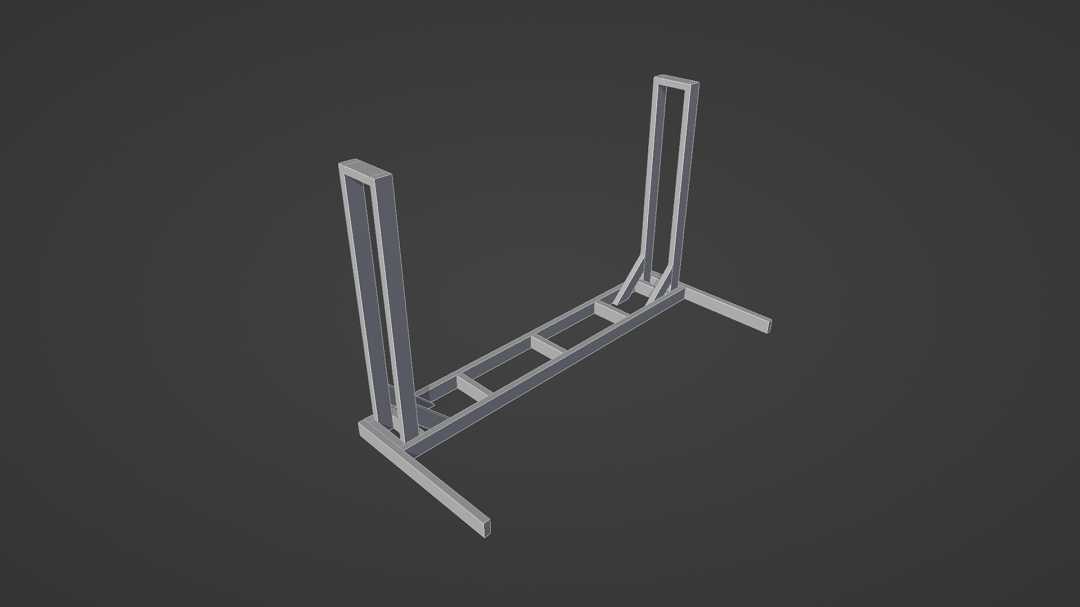
First, is the back rack and the primary boards that connect the two racks:
Then there is the front rack:
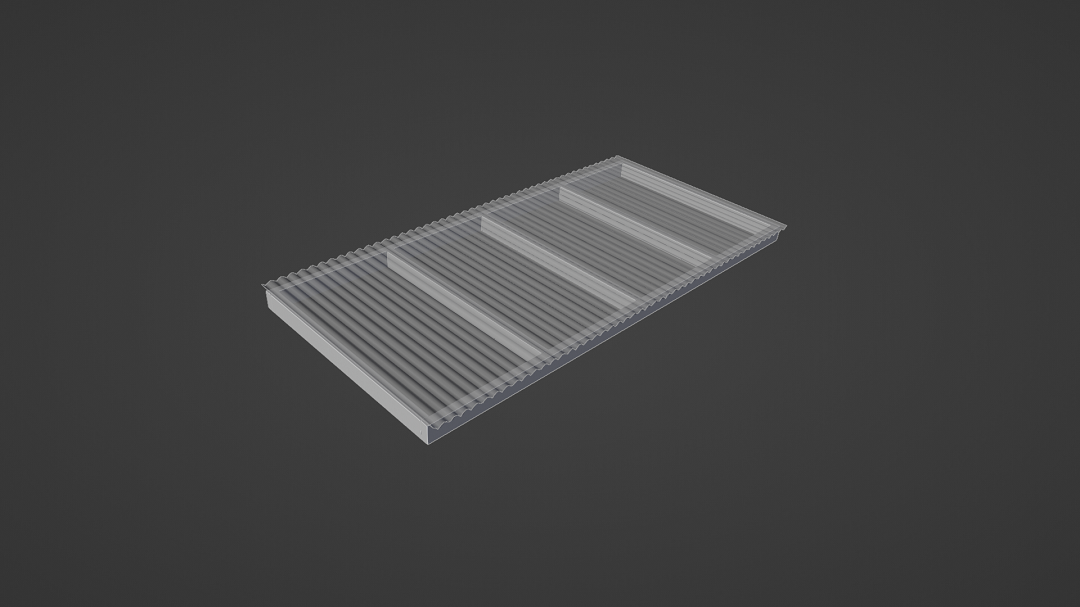
And the roof:
I found myself able to assemble each of these parts on my own, but moving them to their final location and performing the final assembly required a second set of hands. Especially for getting the roof mounted. Below are the tools, materials and cut list for this project.
Tools:
- Measuring tape
- Pencil or other marking tool
- A saw of some sort to cut 2x4s to the required length
- A drill or impact driver for screwing the parts together
- Level – especially helpful if you’re planning to build a “foundation” for the rack like we did
- Tin snips or other appropriate tool for cutting the roofing material
- Hammer for getting the roofing screws started
Required Materials:
- Approximately 200 3” Simpson Strong-Tie® Strong-Drive® SDWS framing screws (SDWS16300QR150 for the 150- count box)
- These worked awesome. I didn’t have to predrill any of my holes, they grabbed beautifully, I didn’t have a single one strip, and not a single screw head was sheared off when driving them rather aggressively with my impact driver.
- About 100 roofing screws
- These are the ones with the rubber gasket around them.
- I found getting these screws started very difficult on the steel roofing panels I bought. I finally settled on whacking them a few times with a hammer before driving them in with my impact driver to get them through the metal.
- Roofing material
- I purchased 2 2’ x 12’ steel roofing panels that I then cut down into 4 2’ x 45” panels.
- Some overlap of the panels is required and desirable so you definitely want to have some extra.
- At least 19 pressure-treated 2×4 x 8’ pressure-treated boards
- Make sure they aren’t excessively warped or twisted; pressure-treated lumber tends to warp more than untreated lumber.
- I recommend bringing a measuring tape with you and confirming that the boards are actually at least 8 feet long before you buy them. I ran into several that were short when I bought my lumber.
- You can purchase fewer longer boards if that winds up being more economical, but you need at least six boards that are exactly 8 feet long.
Optional Materials:
Where we wound up placing the rack was not very level, and we wanted it to be lifted up off the ground some so we acquired a few more materials to allow us to do so.
- 12 8” x 16” x 4” concrete blocks (feel free to substitute for blocks sized according to your needs).
- Several bags of gravel. Handy if you actually need to level out the ground prior to placing the cinder blocks.
The cut lists will be split up by assembly component.
Back Rack:
2 – 2×4 at 8’ – Front and back boards running lengthwise.
2 – 2x at 8” – Connectors for the ends of the uprights.
4 – 2×4 at 60” –Uprights at the corners of the rack.
4 – 2×4 at 16” – Corner braces to help support the uprights.
7 – 2×4 at 11” – Connectors for the front and back boards.
2 – 2×4 at 40” – Connectors for the front and back rack on the bottom.
2 – 2×4 at 38” – Connectors for the front and back to connect the uprights together. They will also be used to help hold up the roof while it is secured.
Front Rack:
2 – 2×4 at 8’ – Front and back boards running lengthwise.
2 – 2x at 8” – Connectors for the ends of the uprights.
4 – 2×4 at 59” –Uprights at the corners of the rack. 1” shorter to make room for the roof to have more of a slope.
4 – 2×4 at 16” – Corner braces to help support the uprights.
7 – 2×4 at 11” – Connectors for the front and back boards.
Roof:
2 – 2×4 at 8’ – Front and back boards running lengthwise.
5 – 2x4x42” – Connectors for the front and back boards that the roofing material will be screwed to.
4 – 2’x45” – Roofing material. Depending on your exact material, you may need to adjust your dimensions to ensure you get sufficient overlap over the cross pieces.
Building the back rack, front rack, and roof separately will help keeps things from getting too complicated. Unless otherwise mentioned, all connection points should receive at least two screws.
Building the Back Rack:
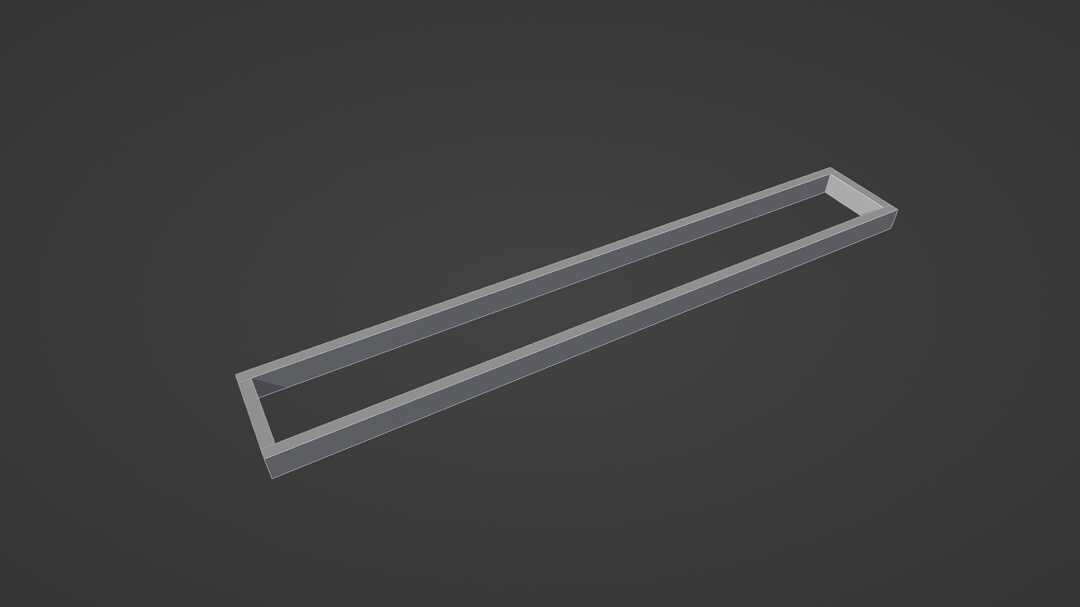
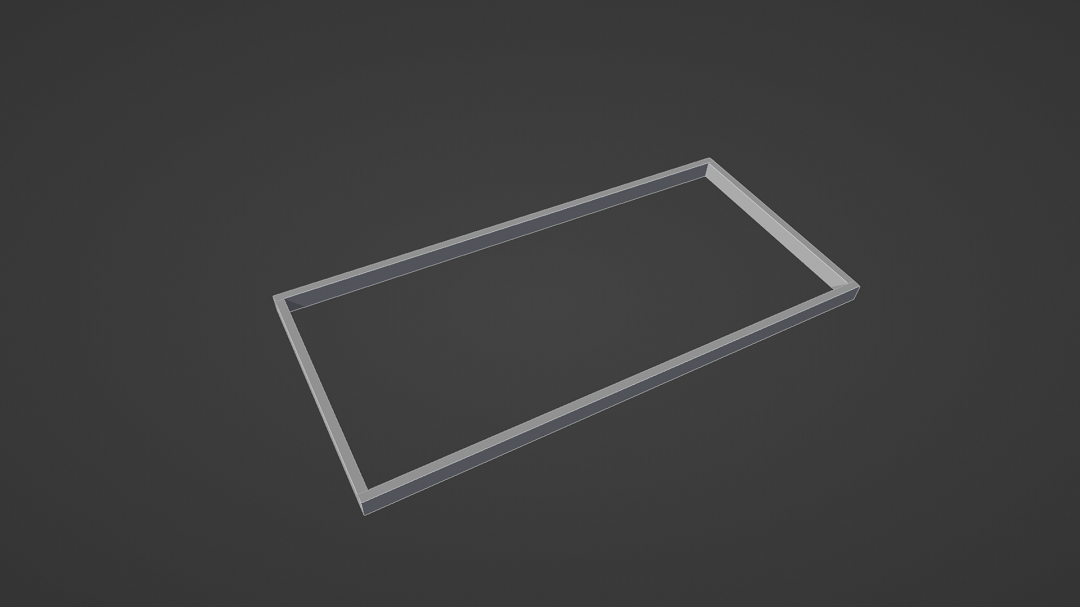
Step 1: Assemble a box using the two boards from (a) and the two boards from (g):
Step 2: Attach the two uprights from (c) at the inside corners of the box and connect the tops of the uprights with the two cap pieces from (b):
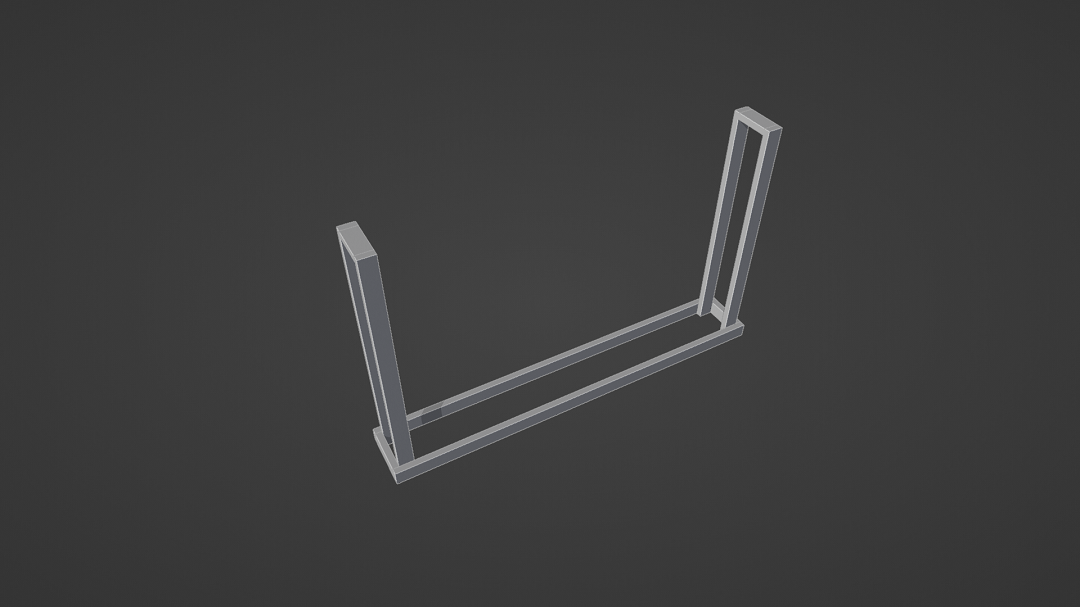
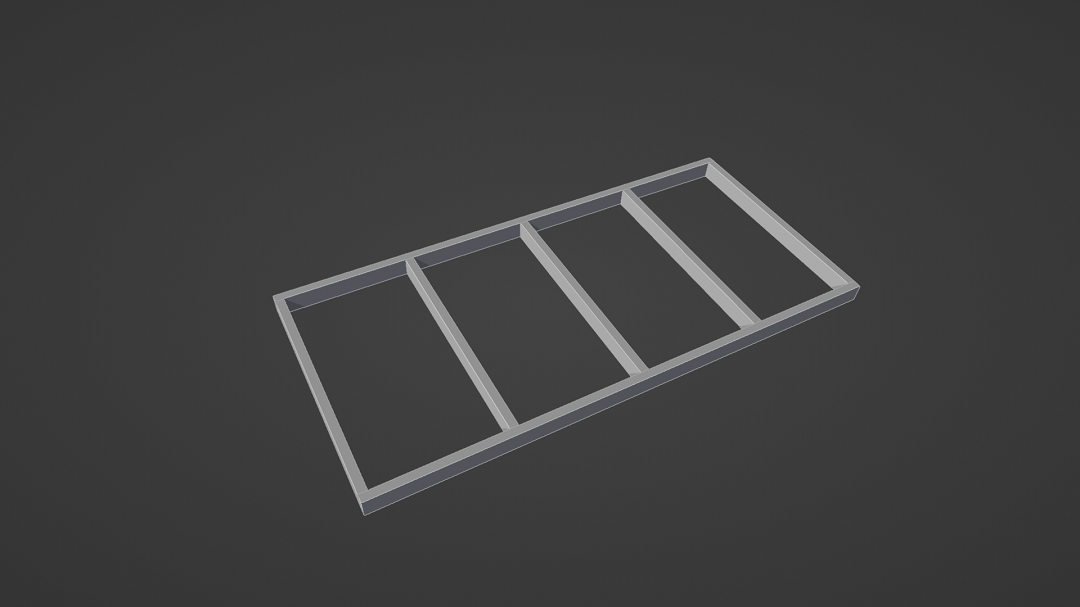
Step 3: Add the remaining cross braces from (e) to connect the front and back, note that there is also a cross brace on the other side of the uprights. Exact spacing doesn’t matter very much here. Dividing the space inside the uprights evenly between them is perfectly fine.

Step 4: Add the braces from (d) to the uprights. Each will need to have the ends cut at an inside 45-degree angle (Step 4, see below). One end should be screwed to the upright and the other to the side of the front or back of the board and basically lay on the ground.

Step 5: Attach the connector boards (f) to the ends of the rack:
Having these attached now will make putting everything together later easier as they can work as guides for positioning the front rack and help you keep track of which is which.
Building the Front Rack:
Building the front rack is very simple: Simply repeat Steps 1-4 for the back rack, but use the cut list for the front rack. The only difference is that the uprights are 1” shorter.
Building the Roof:
Step 1: Build a box from (a) and 2 of (b):
Step 2: Evenly distribute the rest of (b) as cross braces connecting the front and back of the roof:
Step 3: Attach the roofing material (c). Be very careful cutting metal roofing material as it typically has edges that are very sharp. Even with gloves I still wound up getting some scratches while cutting it to size. The roofing panels need to overlap each other over a roof cross brace and should hang off the edges of the roof some. I found it easiest to lay out and position the panels before screwing any of them down.
Final Assembly:
- Move the three components where you want the rack to be. We found moving the front and back rack with a furniture dolly down our drive way to work very well. Moving the roof took a bit more care; we had to carry it and be very careful to not grab an edge of the metal roof panels.
- Prepare the site for the back rack; leveling the ground and placing the cement blocks (if necessary).
- Place the back rack.
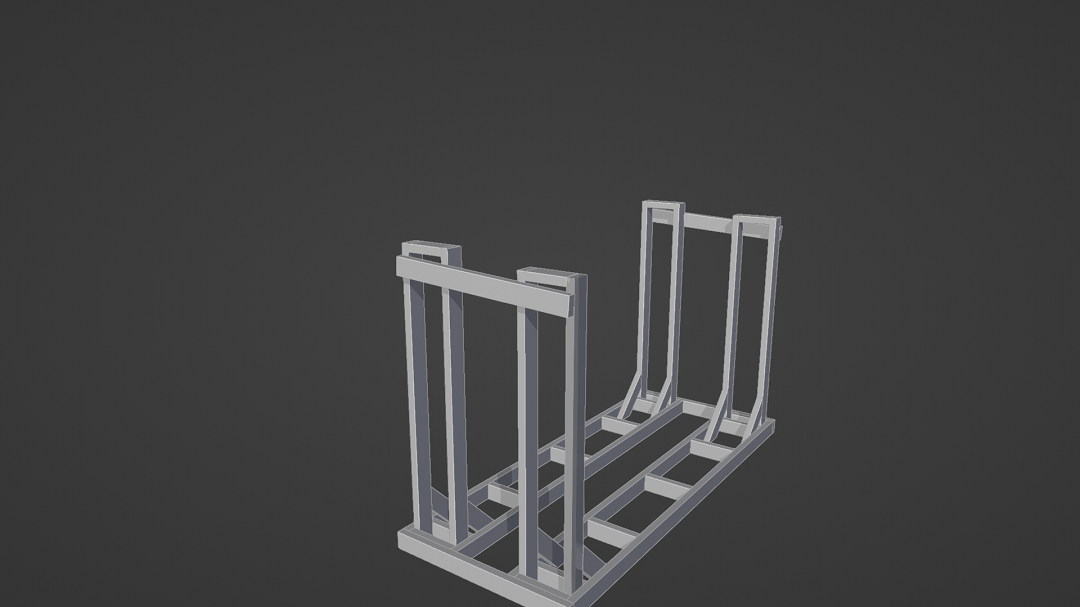
- Use the connectors on the end of the back rack to figure out where the front rack will be placed.
- Screw the ends of the back rack connectors to the ends of the front rack

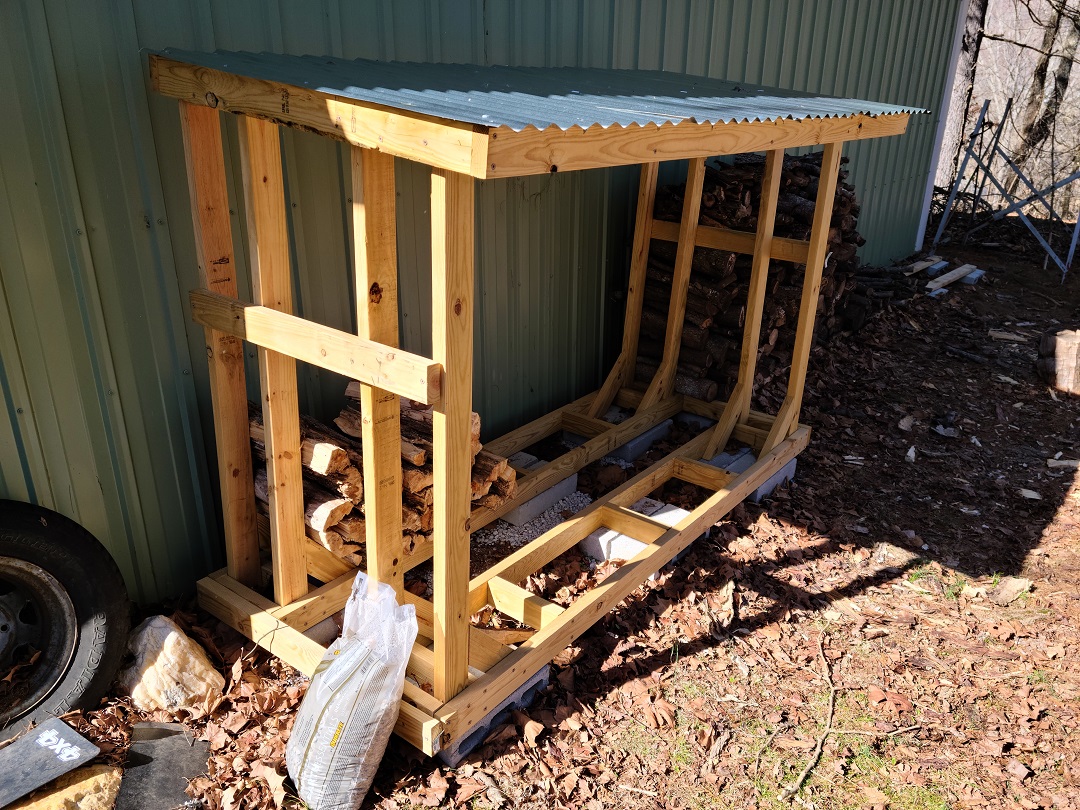
6. Taking the two other connectors (g) from the back rack cut list, screw each to the outside of the uprights an inch or two from the top with a slight slope. This will hold the roof on until it can be fully secured itself. Unfortunately I did not measure exactly where these wound up when I built this; it should be far enough down that both sides of the roof can be screwed into the sides of both the front and back uprights without the uprights hitting the underside of the roof. It should wind up looking something like this:
7. With a second set of hands lift the roof on top of both rack and set it on top of the braces we screwed on in step 6. Be mindful of fingers when dropping the roof on, and if you happened to get some slightly warped wood like I did, some pushing may be necessary to get it to go on completely. You can slide it all the way down till the back of the roof rests on the back of the back rack’s uprights
8. Fasten the roof to the uprights.
9. Remove the braces we added in step 6 and reattach them straight about half way up the uprights on both ends.
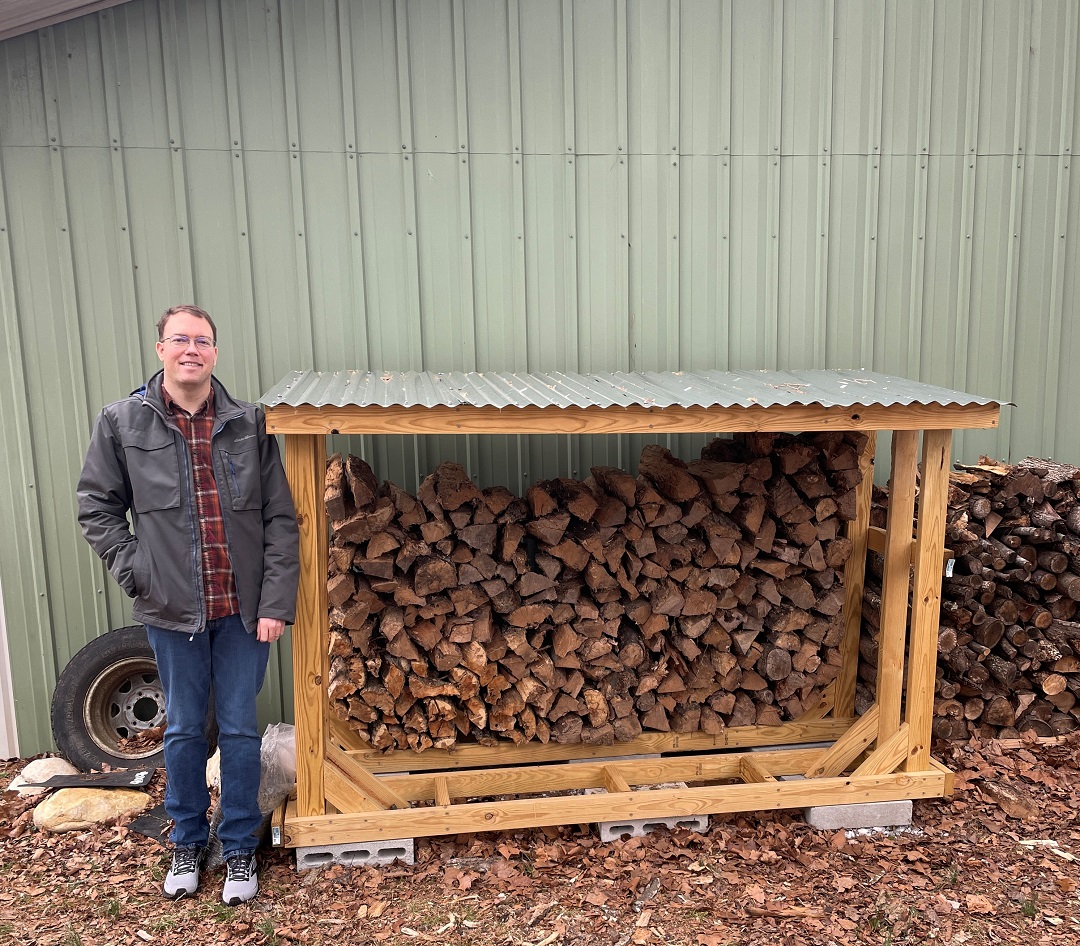
How do you think the project turned out? I think it turned out great!
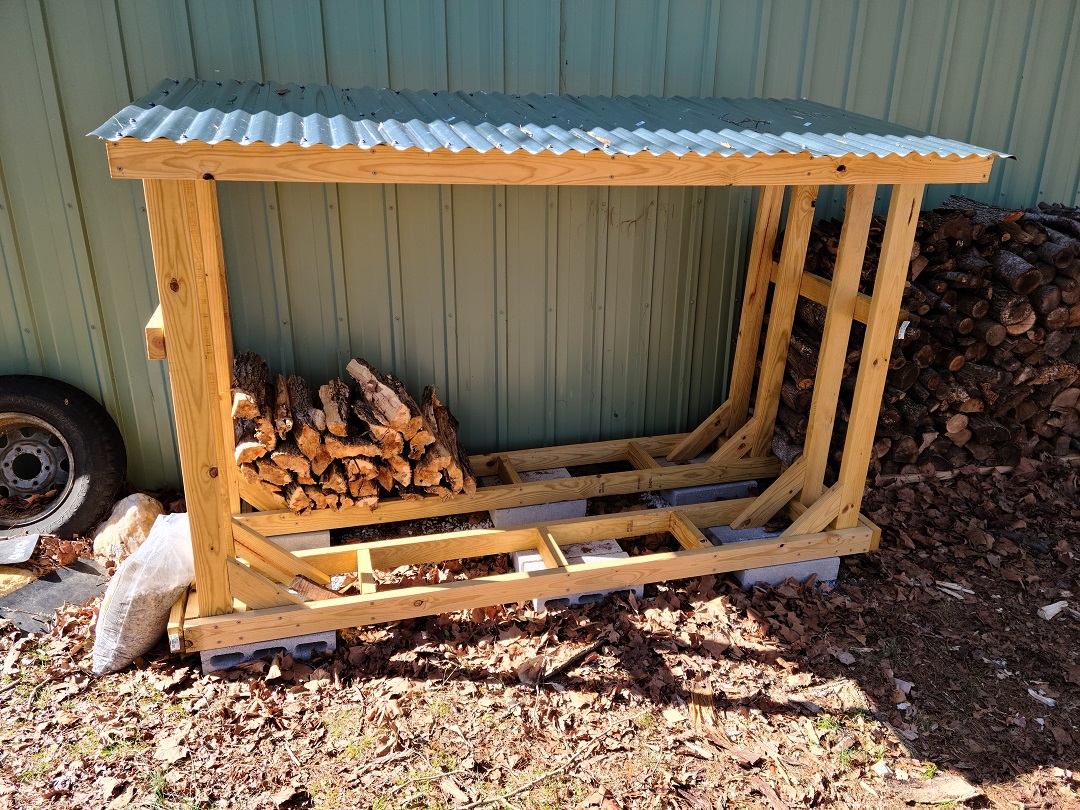
The firewood holder is in our backyard. It is currently about half full (the back stack is mostly full), and over time we have plans to build two more to maximize our reserve firewood storage and drying capacity.
As for future projects, the workshop the firewood rack is behind doesn’t have power yet, but we are working on getting it installed. Once it has power, we can start building shelves, workbenches and other workshop and storage furniture to make best use of the space.


