
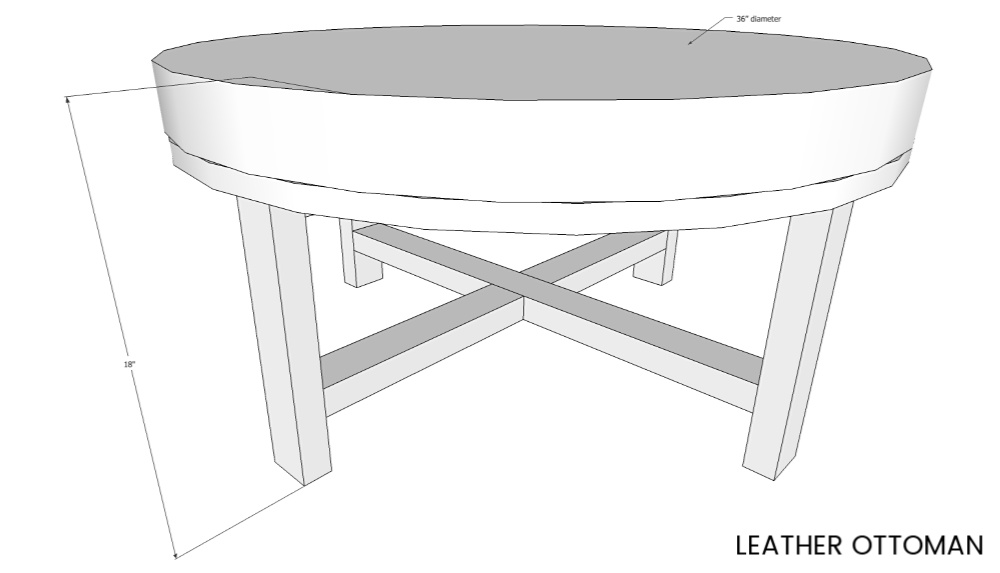
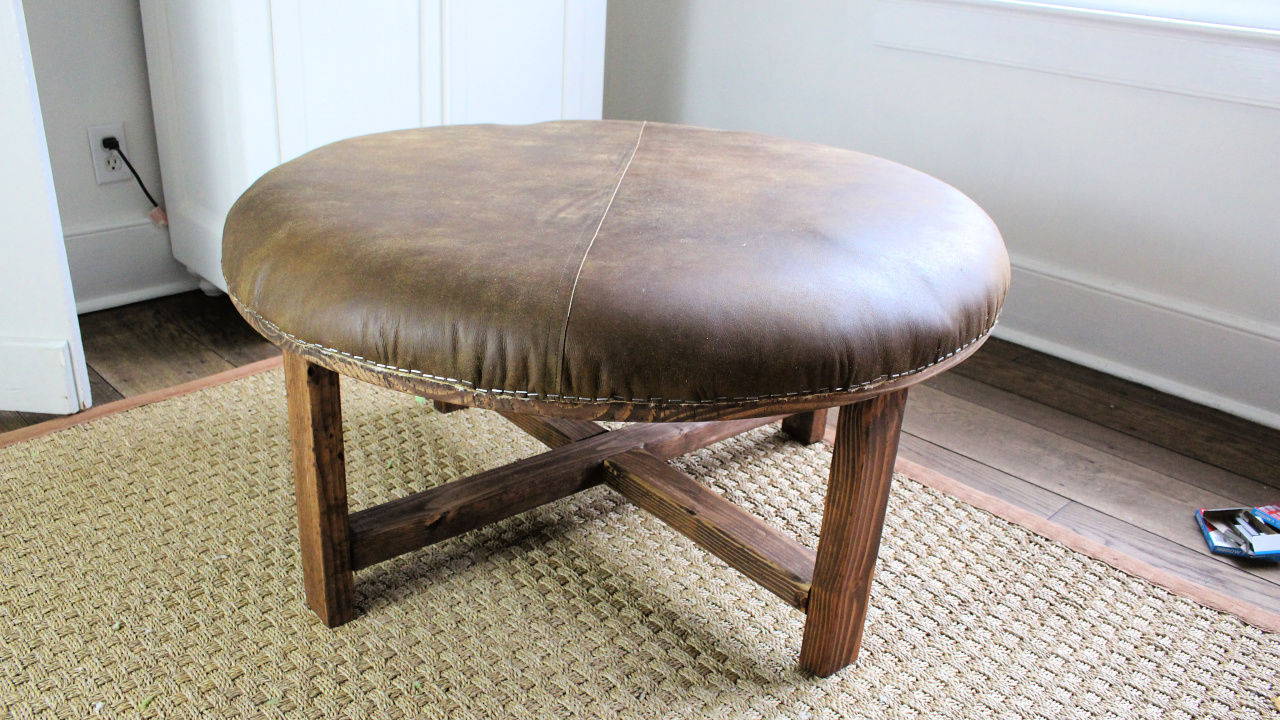
The coffee table does double duty as an ottoman when paired with a leather cushioned top. And since it’s an ottoman, you can put your feet up without anyone yelling at you to get your feet off the table. Let’s build this round leather ottoman and upholster the top so you can take full advantage.
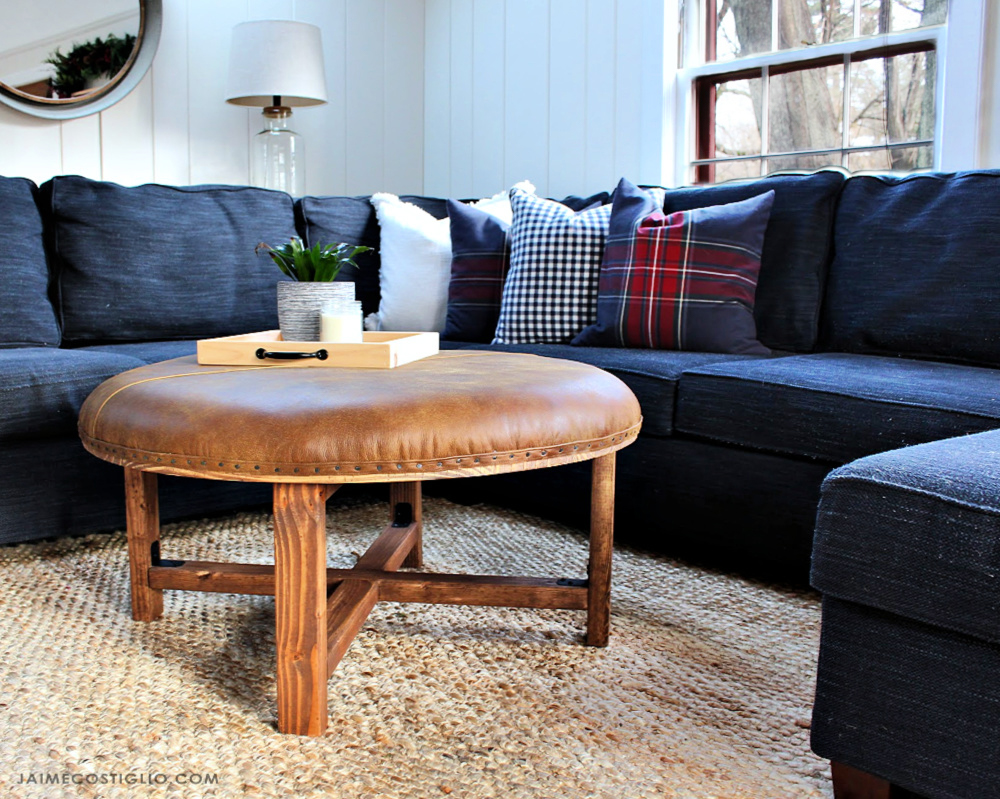
This simple X-design ottoman with a circular top adds tons of angular character to our otherwise rather boring sectional couch. Plus, the warmth of the wood and softness of the leather introduce additional textures to an overwhelmingly navy blue space.
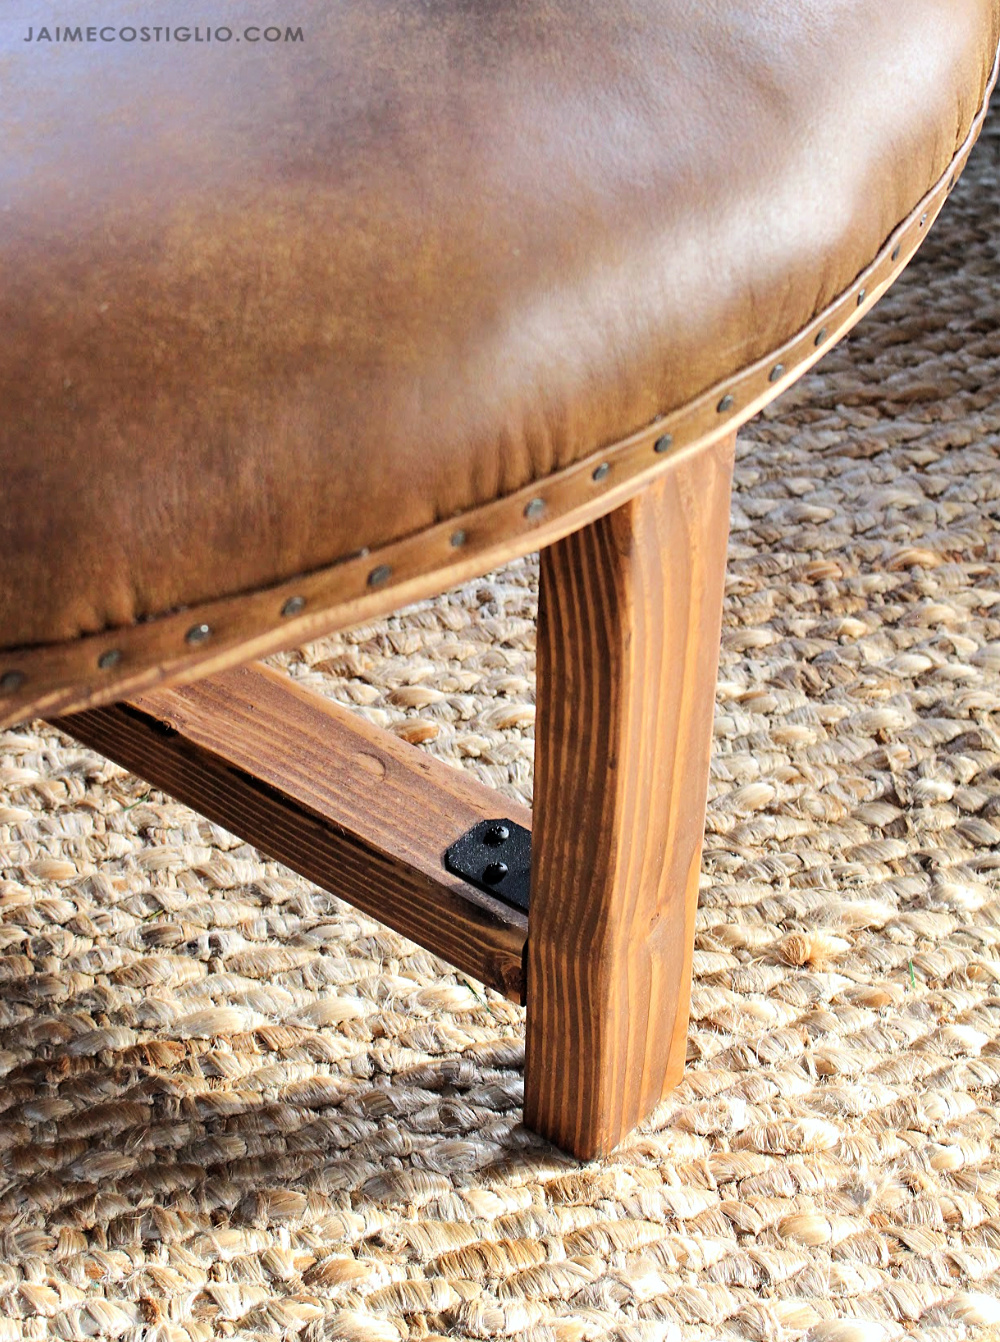
The icing on the cake is the angled hardware and carpet-tack trim detail that so effortlessly provide strength, contrast and charm.

The secret to this project is to use a premade 36″ round wood top readily available at home stores. The top is 1 ½” thick which provides plenty of space to attach the leather upholstery while leaving the wood edge partly visible.
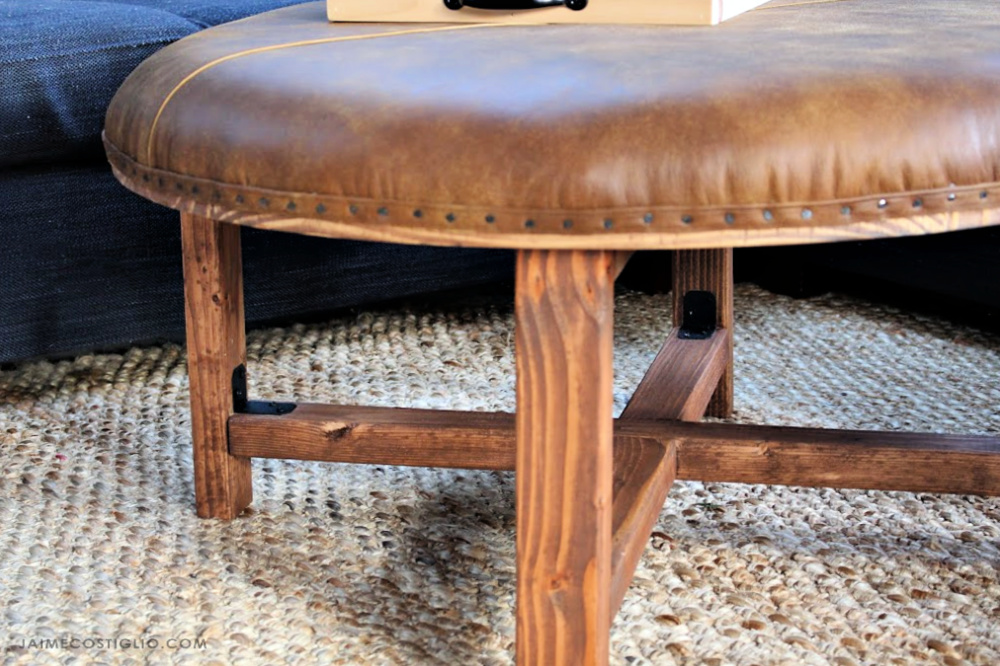
The standard A21 angles from Simpson Strong-Tie are available in the galvanized steel grey color. I preferred to spray paint the angles, however, to coordinate more seamlessly with the wood tints.
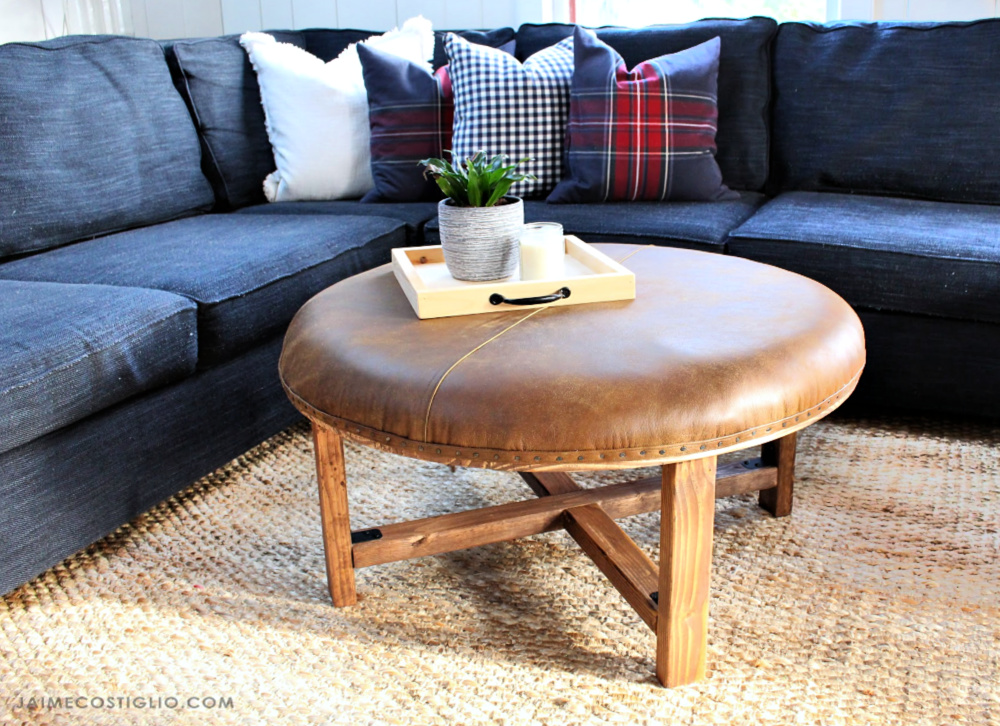
The generous 36″ diameter provides plenty of space for standard coffee-table items like books and remote controls — and with the added cushioning and easily wipeable leather, we can also put our feet up with a comfortable conscience.
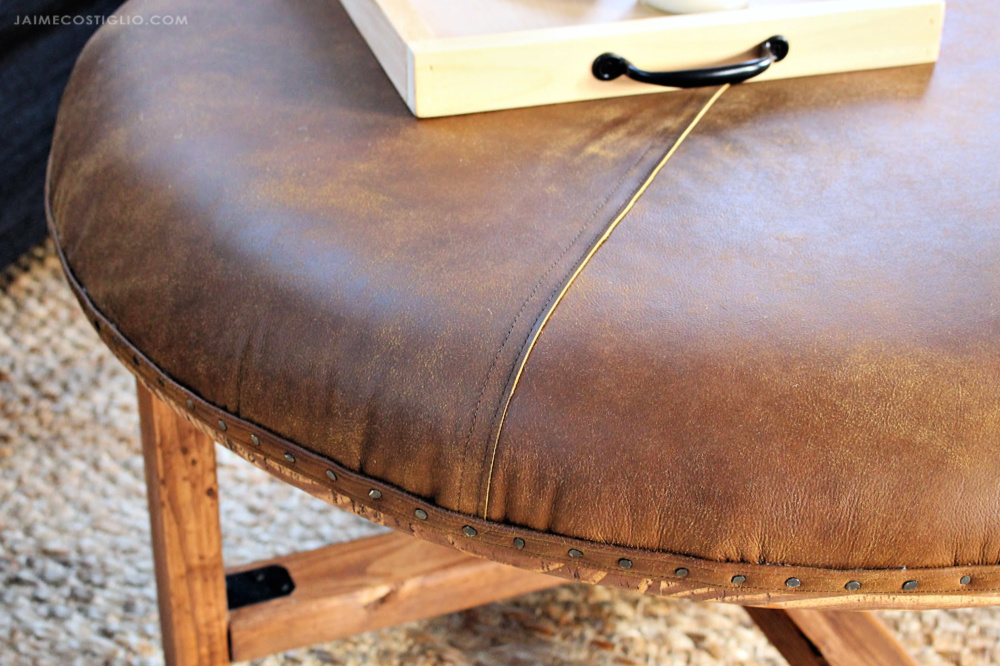
I opted to seam the leather down the middle but I’m positive you could find a solid piece to fit the entire ottoman. Secretly, I wish I had seamed it in both directions to make a pie because I love the way the seam break up the monotony of the solid leather.
Below you will find the step-by-step instructions on how to build this round ottoman and how to attach the leather top. Be sure to read through entirely before beginning.
Cut List
- (1) 36″ round premade panel @ 1 ½” thick (top)
- (2) 2×3 @ 30″ (long cross supports)
- (4) 2×3 @ 13¾ ” (short cross supports)
- (4) 2×3 @ 14″ (legs)
Supplies
- (1) 36″ round premade panel @ 1½” thick
- (2) 2×3 x 8ʹ stud boards
- (4) Simpson Strong-Tie® A21 angles
- (16) 1¼” dark wood screws
- 2½” pocket-hole screws
- 2½” wood screws
- 3″ foam (enough to cover 36″ diameter)
- Batting (crib size)
- Leather (or other upholstery-weight fabric) 48″ diameter
- Carpet tacks
- Quilting thread
- Sewing machine and denim/leather needle
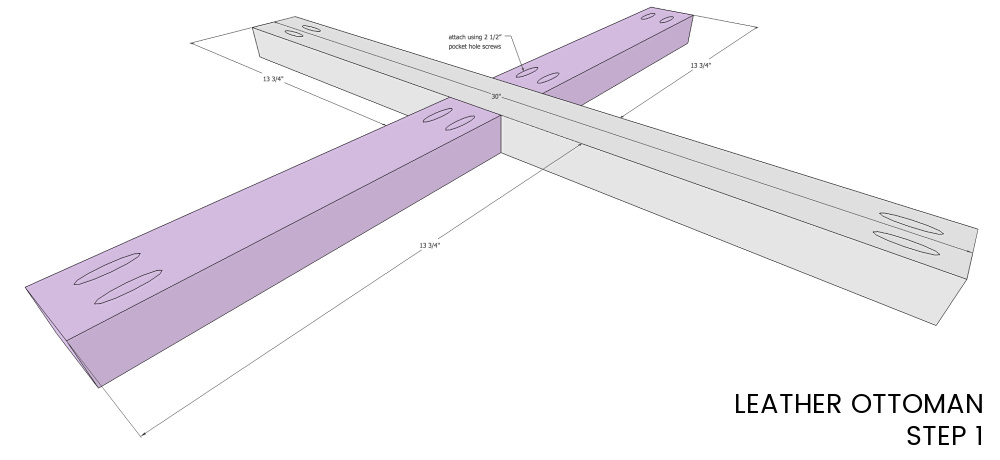
Step 1: Attach short cross supports to long support at center using wood glue and 2½” pocket-hole screws. Make two sets.
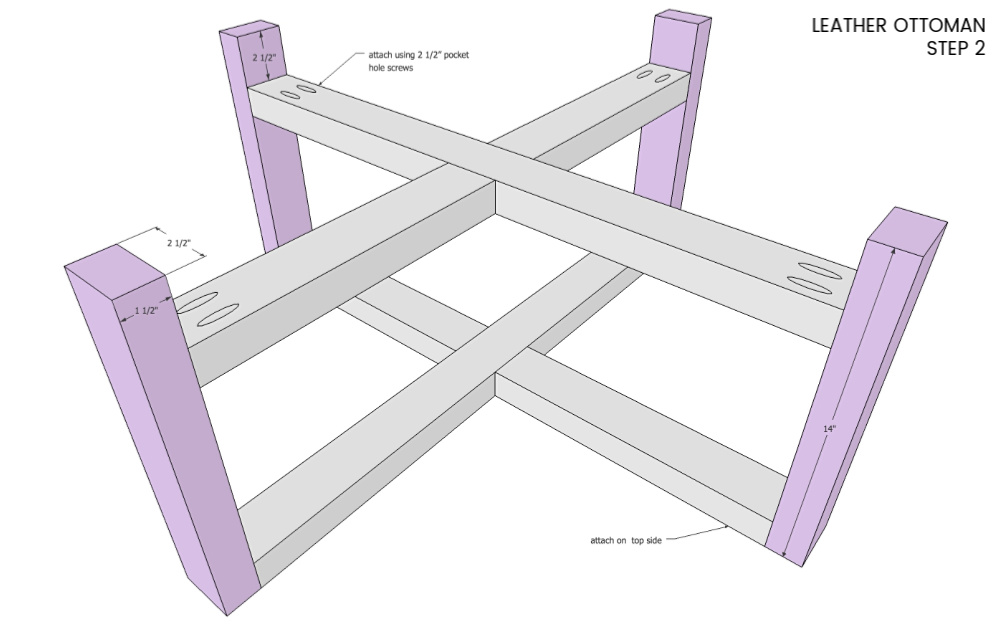
Step 2: Attach cross support sections to legs using wood glue and 2½” pocket-hole screws. Keep pocket holes hidden on top and underside. NOTE: For maximum support, be certain long support boards run perpendicular to each other.
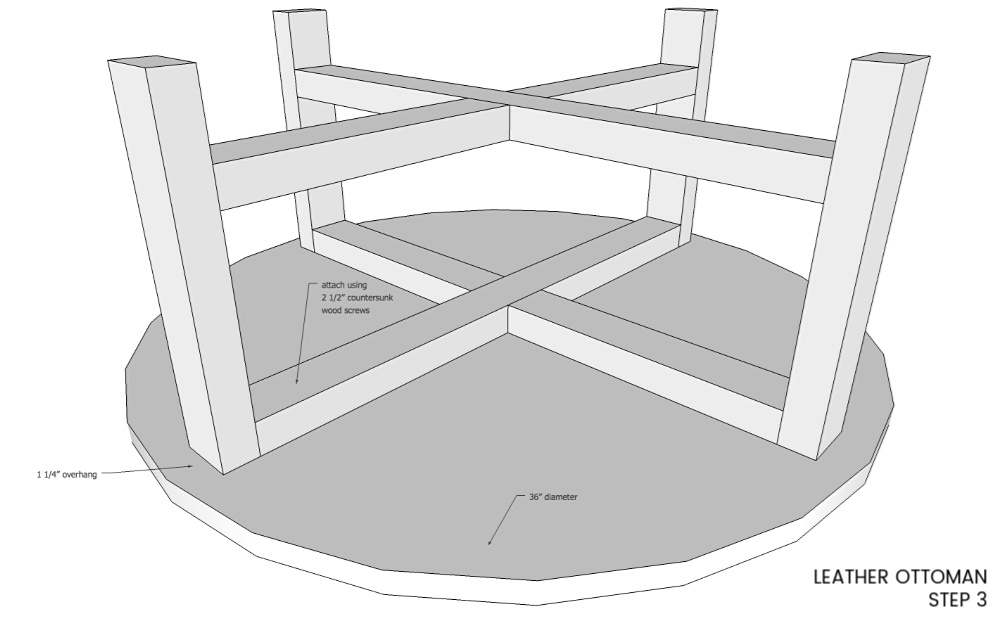
Step 3: Attach top to base using 2½” countersunk wood screws.
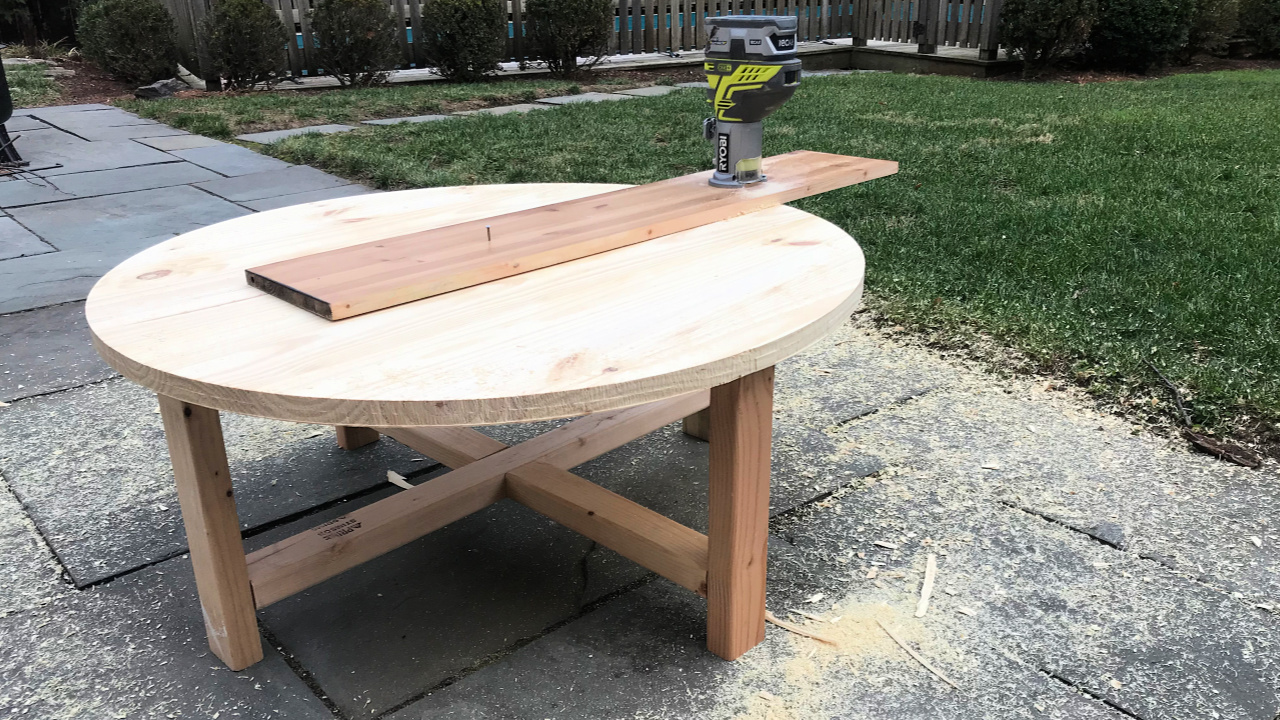
Step 4: The premade panel comes with a very rounded edge which is undesirable for this application. Square off the edge using a circle jig and an upcut spiral bit in your router.
Sand well and stain as desired.
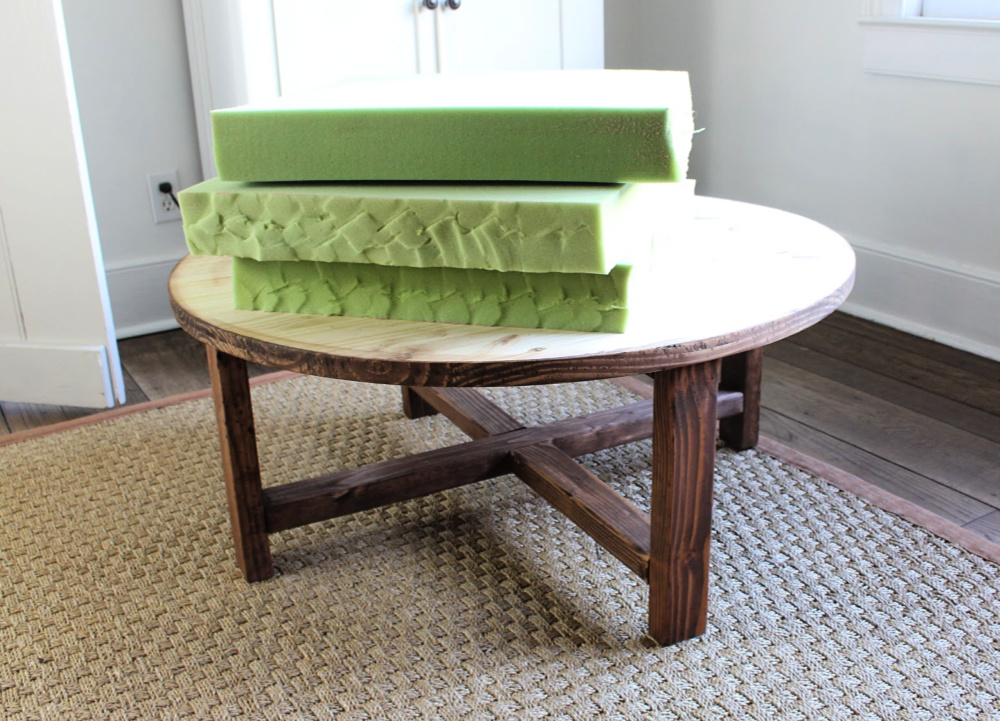
Step 5: Cut the 3” foam to fit over the entire top panel. It can be pieced, but keep it snug and fully covered.
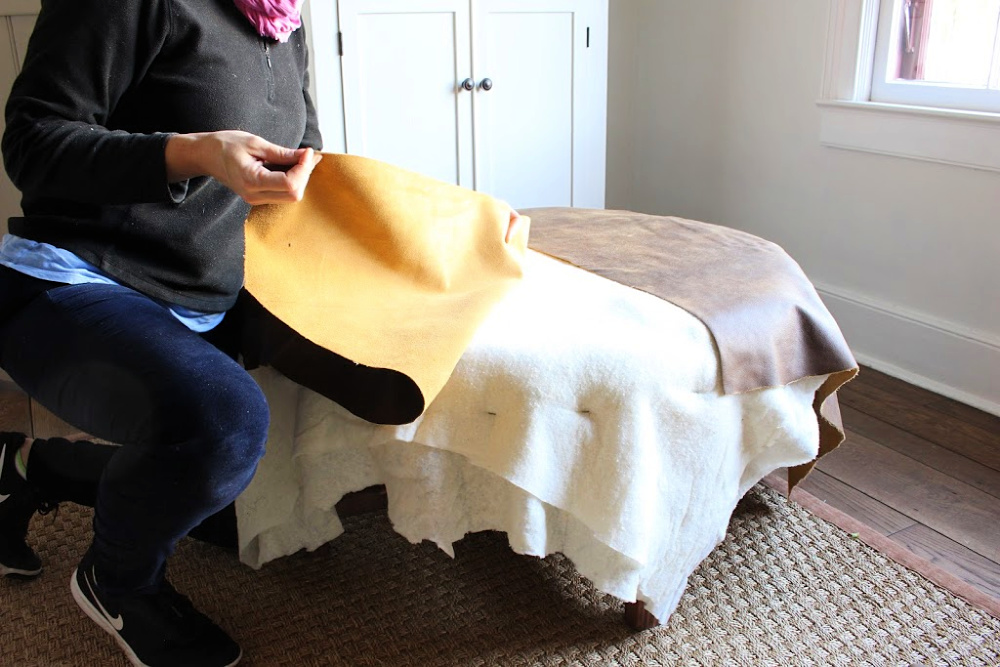
Step 6: Place the batting over the foam, pull tight and staple into the edge of the top. This secures the foam in position while working on the leather upholstery.
Step 7: Seam together the leather pieces at the middle.
Step 8: Attach the leather to the ottoman base by stapling it into the top.

Step 9: Spray-paint the A21 angles a matte textured black.
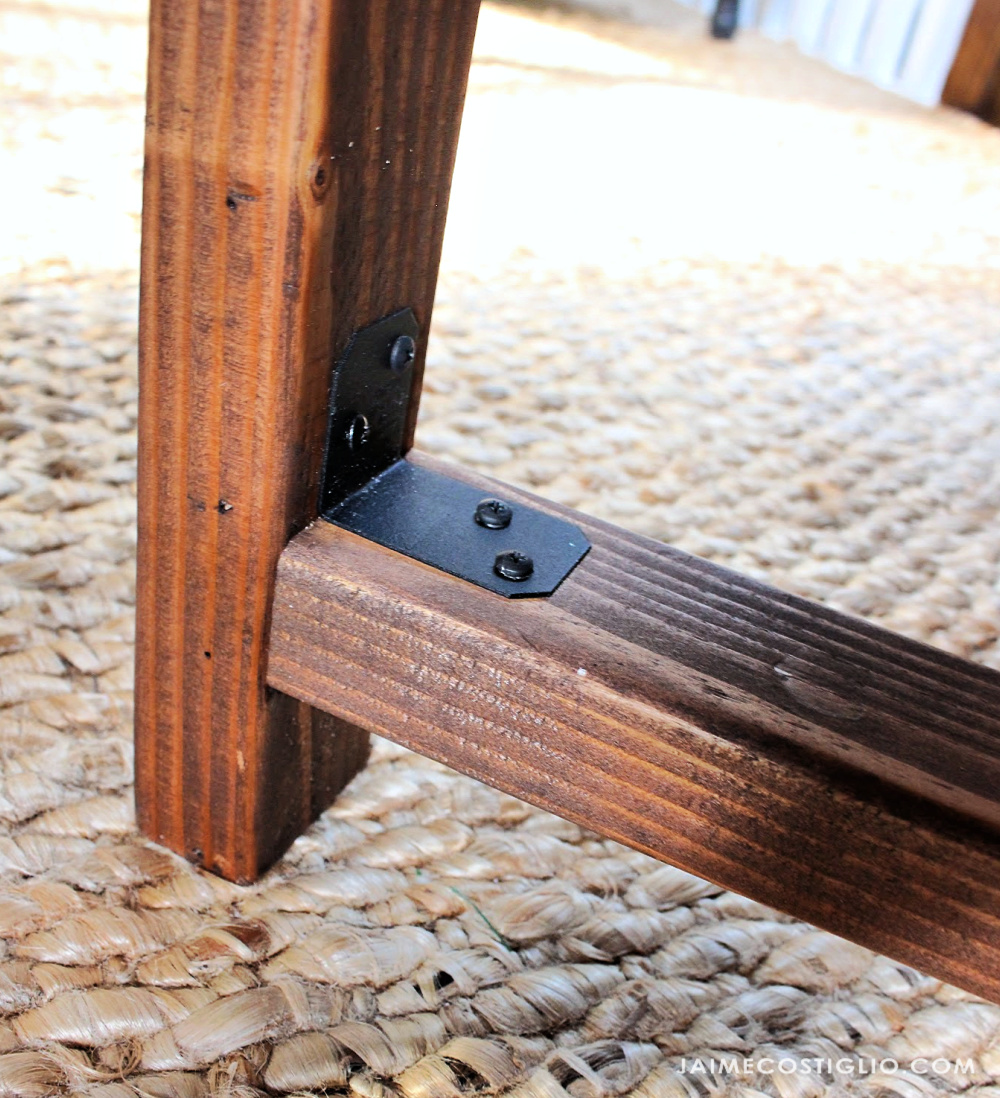
Step 10: Install the angles on the interior of the leg where it meets the cross support.
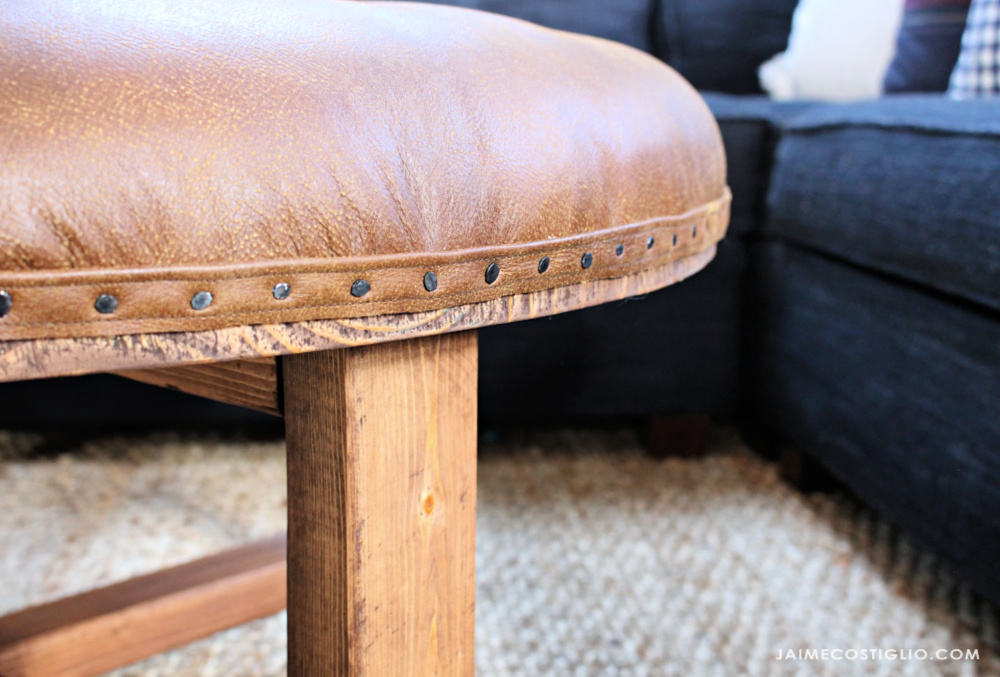
Step 11: Attach the trim to cover the staples. Fold over a piece of leather in half and sew it, then attach it to the top using hot glue. Insert carpet tacks every inch straight into the trim and wood top.
And there you have a round leather ottoman just perfect for your family to enjoy while relaxing on the couch. Please feel free to put your feet up — you deserve a little break after all your hard work!


