Looking to hide an unsightly object or conceal part of your yard? Build a wood screen without digging holes or pouring concrete, and you can cover up that AC unit, trash can area or pool equipment. Whatever it is you need to hide, we can make a beautiful wood screen that is easy on the eyes and makes the item more discreet.
We have an AC unit on the side of our home similar to many homes. However, it was completely visible from the side door and is something I like much better felt than seen.
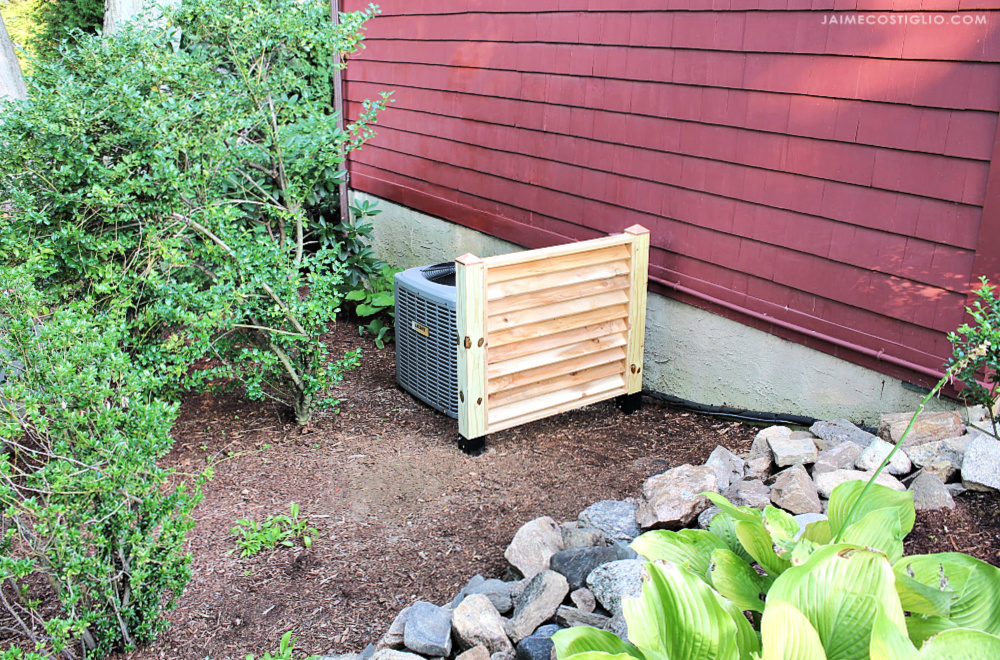
My solution for this eyesore was to build an AC screen that blocks the view but doesn’t impede access or airflow.
The slatted screen has plenty of air ventilation, and I placed it about 12″ from the unit to allow easy access for service.
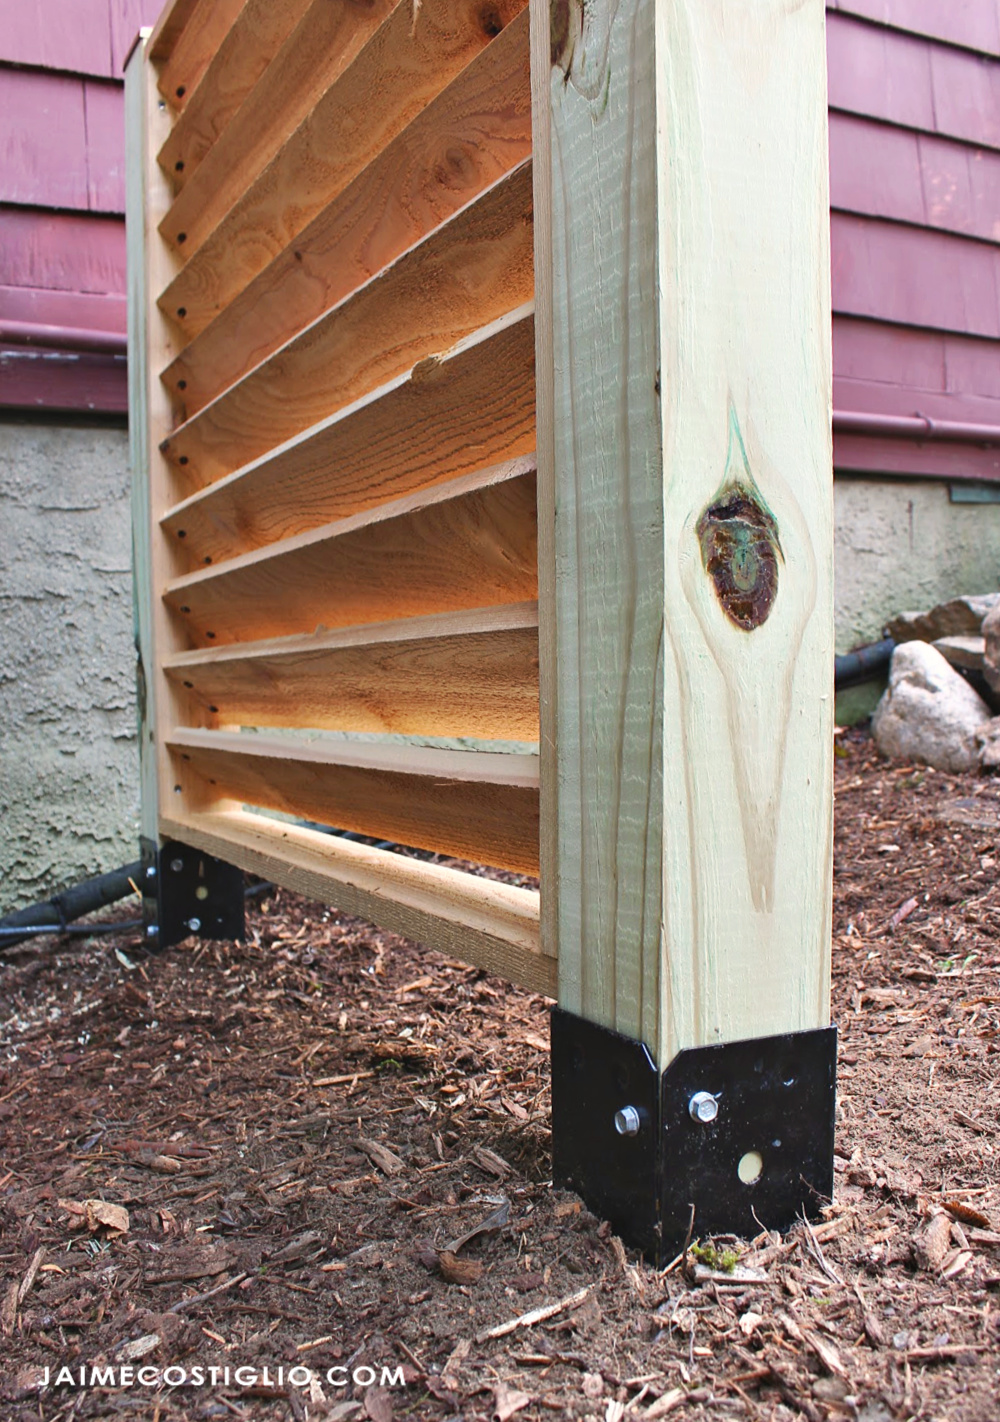
This AC screen was fairly simple to construct and install using the Simpson Strong-Tie® E-Z Spike™ fence post spikes to secure the posts. These spikes are useful for various applications such as this where you need easy installation and don’t need concrete setting to carry a structural load.

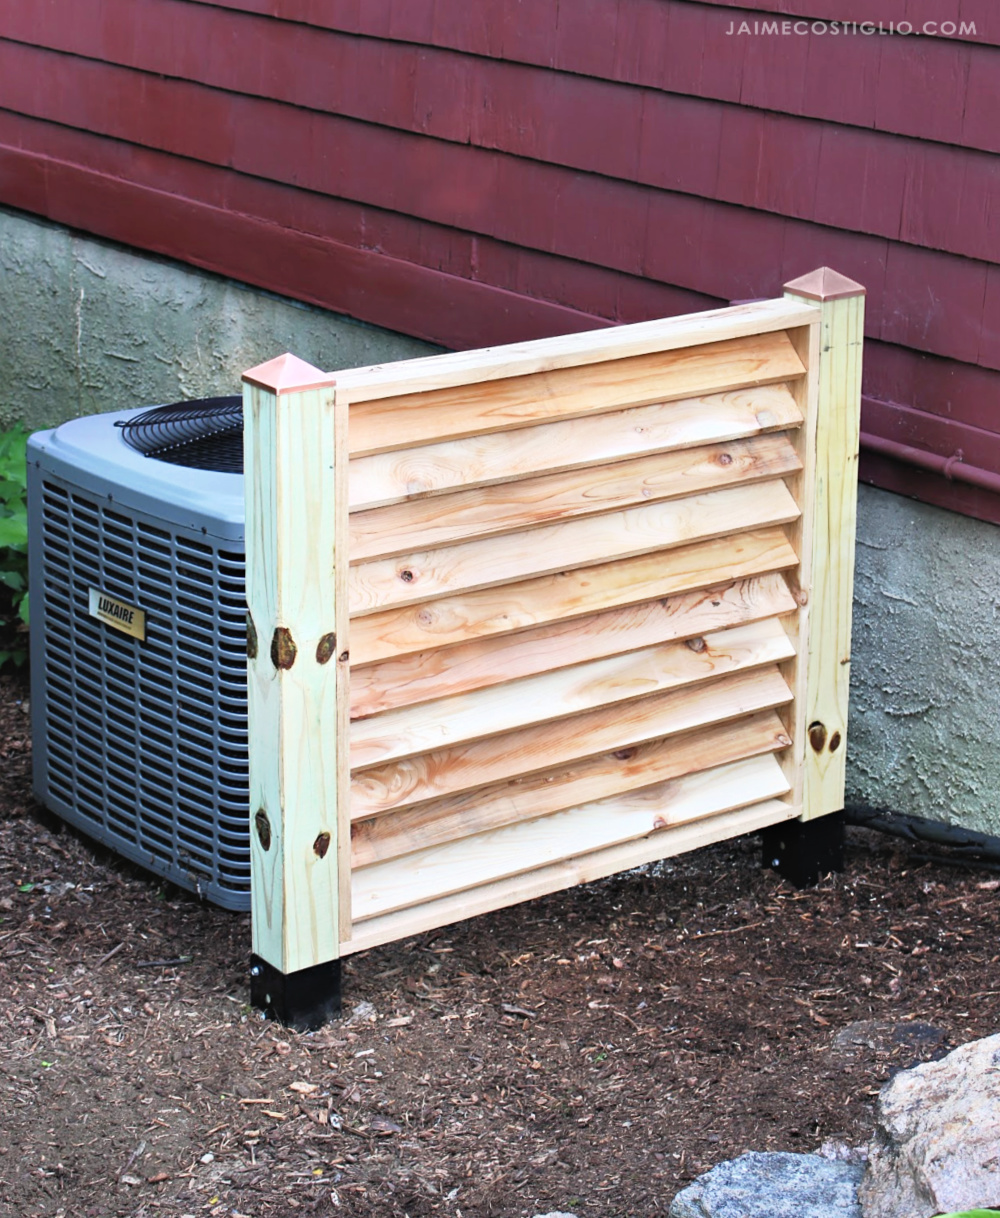
I love the contrast of the black spike against the warm wood tones. The E-Z spikes are made to fit 4×4 pressure-treated posts.
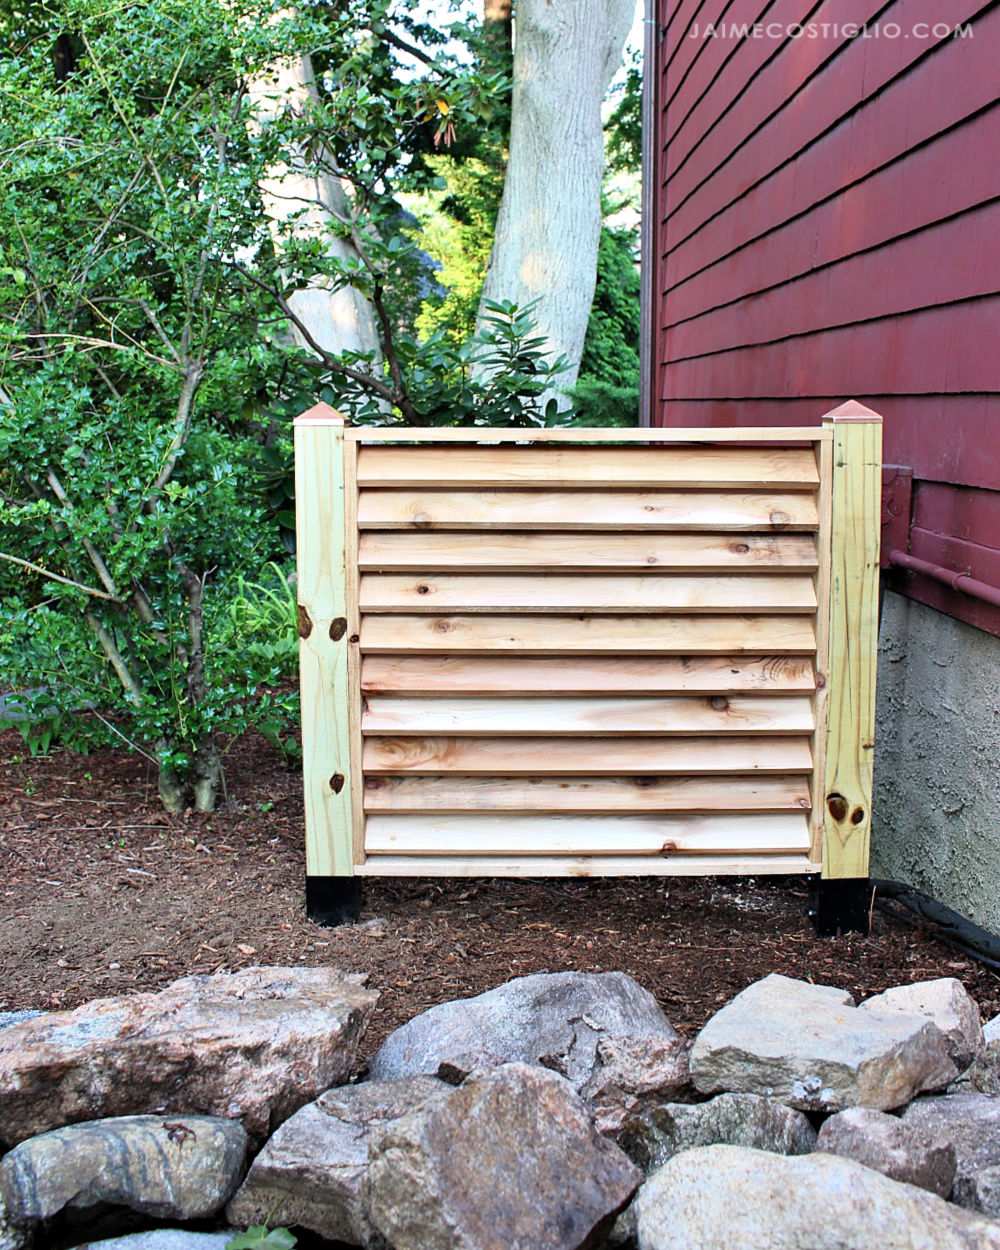
The screen completely covers the AC unit, and all that cedar wood looks really good compared to the unfriendly mechanical unit.
Below find the step-by-step instructions on how to build and install this AC screen. Be sure to read them through entirely before beginning your project.
Supplies
- (1) – 4×4 x 8ʹ pressure-treated post
- (7) – 1×4 x 8ʹ cedar boards
- (2) – Simpson Strong-Tie® E-Z Spike™ fence post spikes
- (8) – 1½” Simpson Strong-Tie Strong-Drive SDS Heavy-Duty Connector screw
- (2) – copper post caps
- 1¼” exterior pocket hole screws
- 2″ exterior wood screws
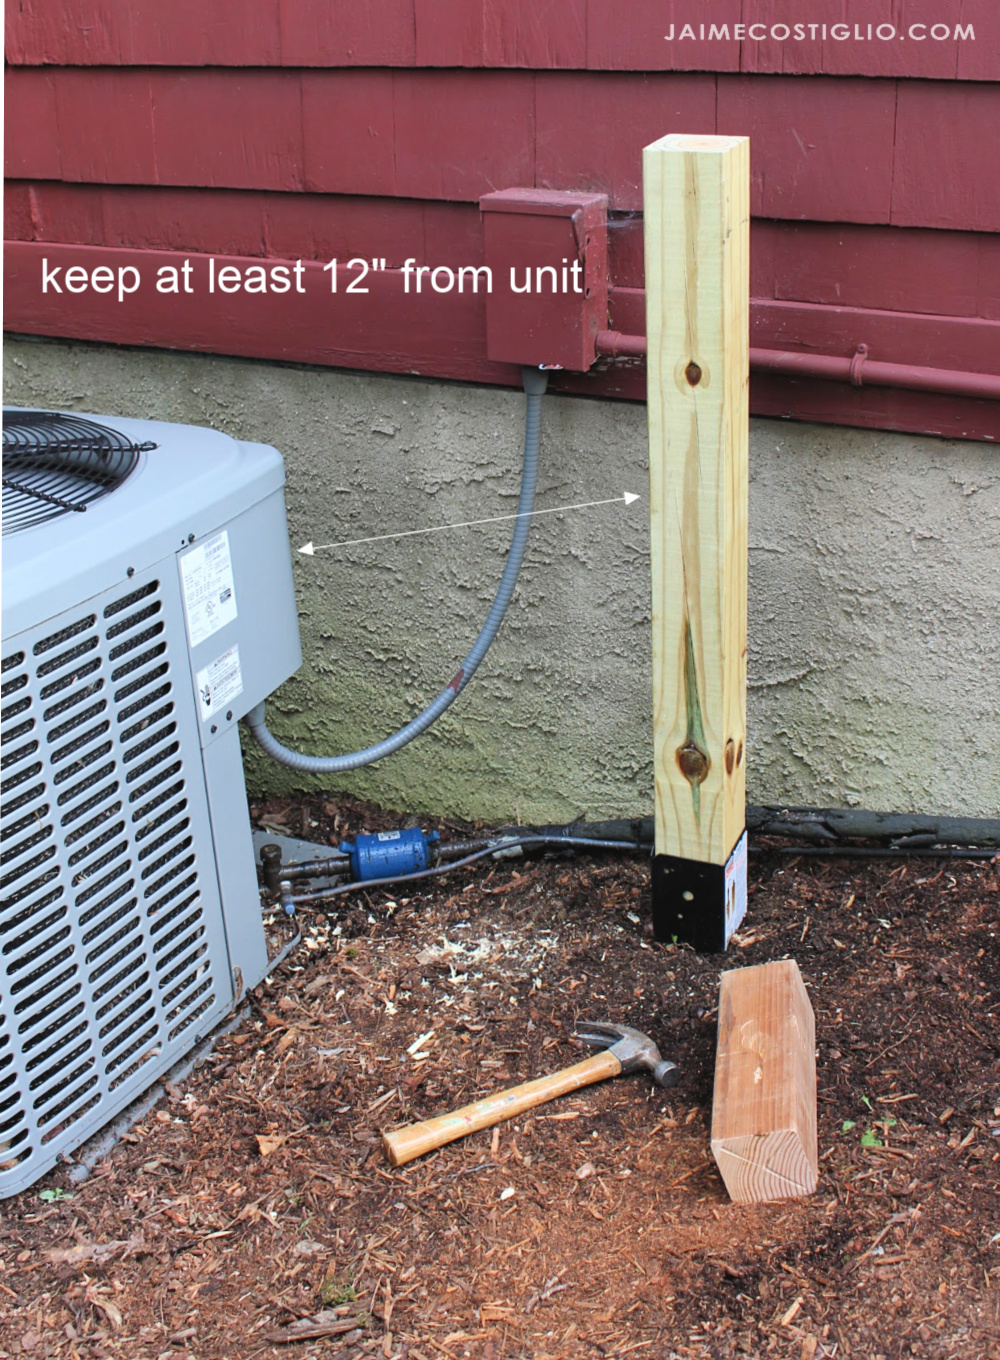
Installing the E-Z Spike™ Fence Post Spikes
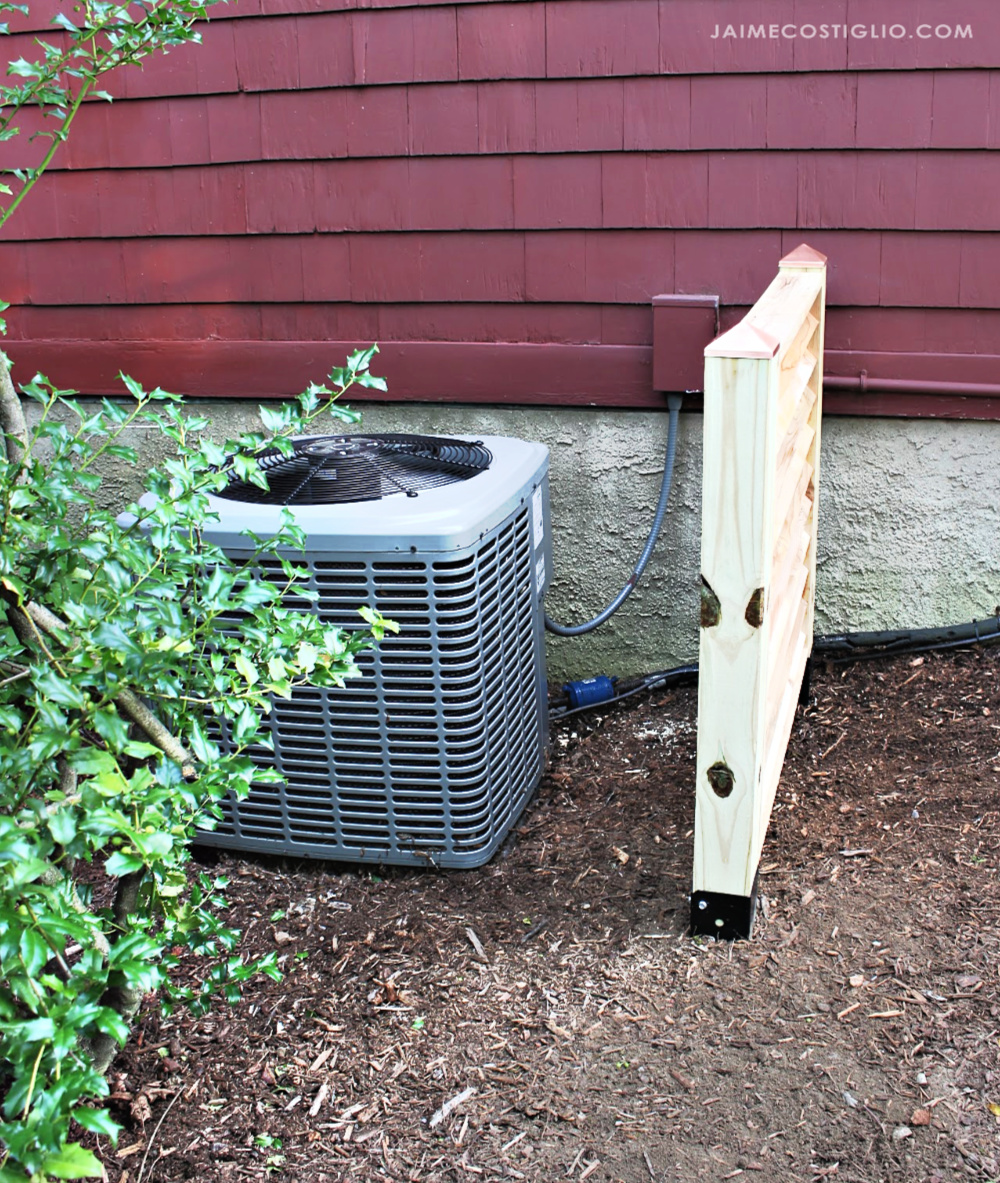
Step 1: Install the first E-Z Spike.
Install the E-Z Spike into the earth at your desired location. Use a scrap piece of 4×4 to hammer the spike down into place. When the spike is in position, insert the post.
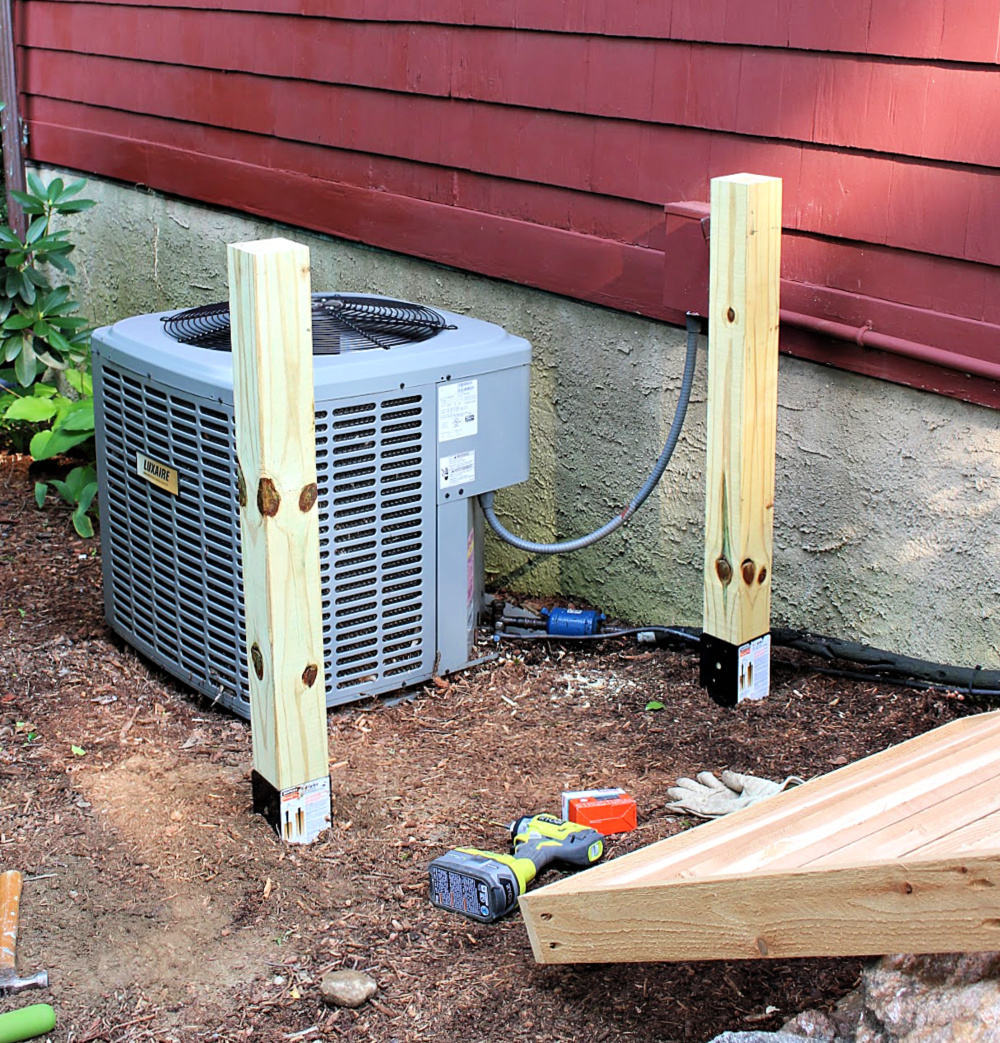
Step 2: Install second E-Z Spike™ at desired distance from the first.
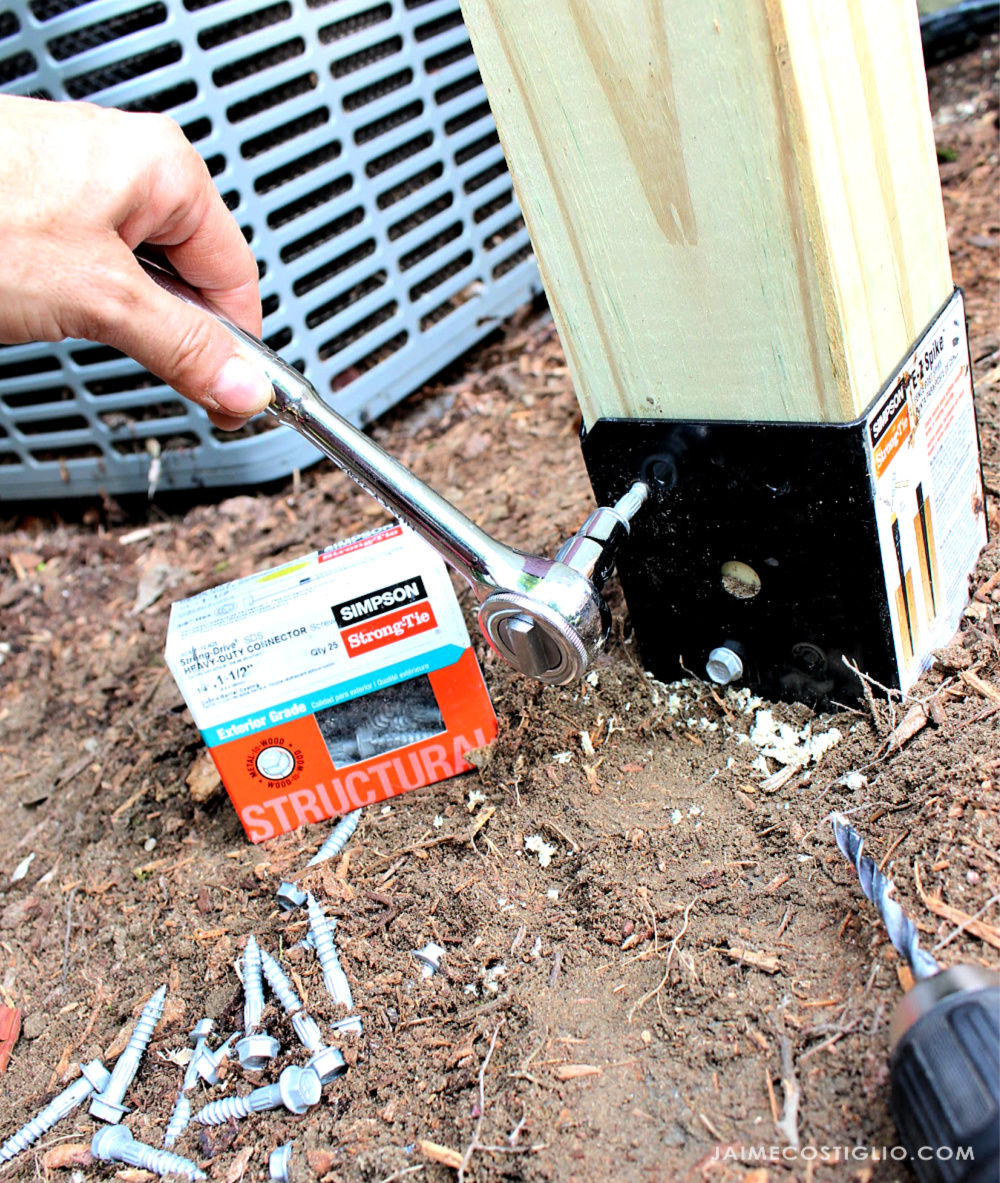
Step 3: Secure the posts to the spikes.
Use Simpson Strong-Tie® Strong-Drive® exterior connectors.
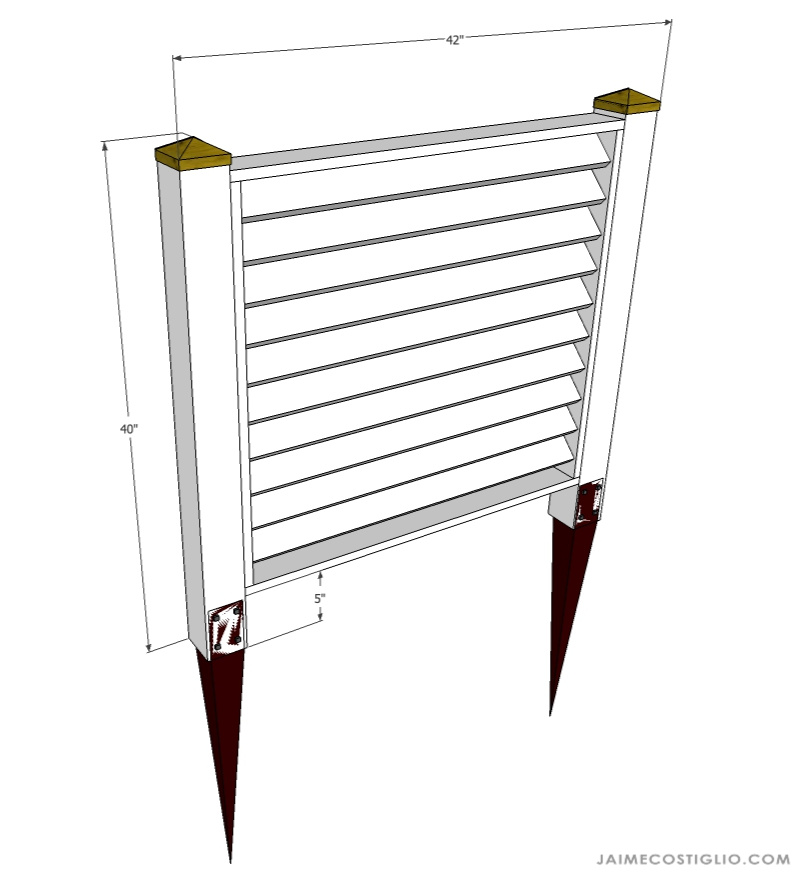
Building the Slatted Panel
Double-check the measurements between the posts before building the slatted panel portion.
Cut List
- (2) 4×4 @ 39″ (posts)
- (2) 1×4 @ 31½ʹ (panel sides)
- (2) 1×4 @ 35″ (panel top and bottom)
- (10) 1×4 @ 33½” (slats)
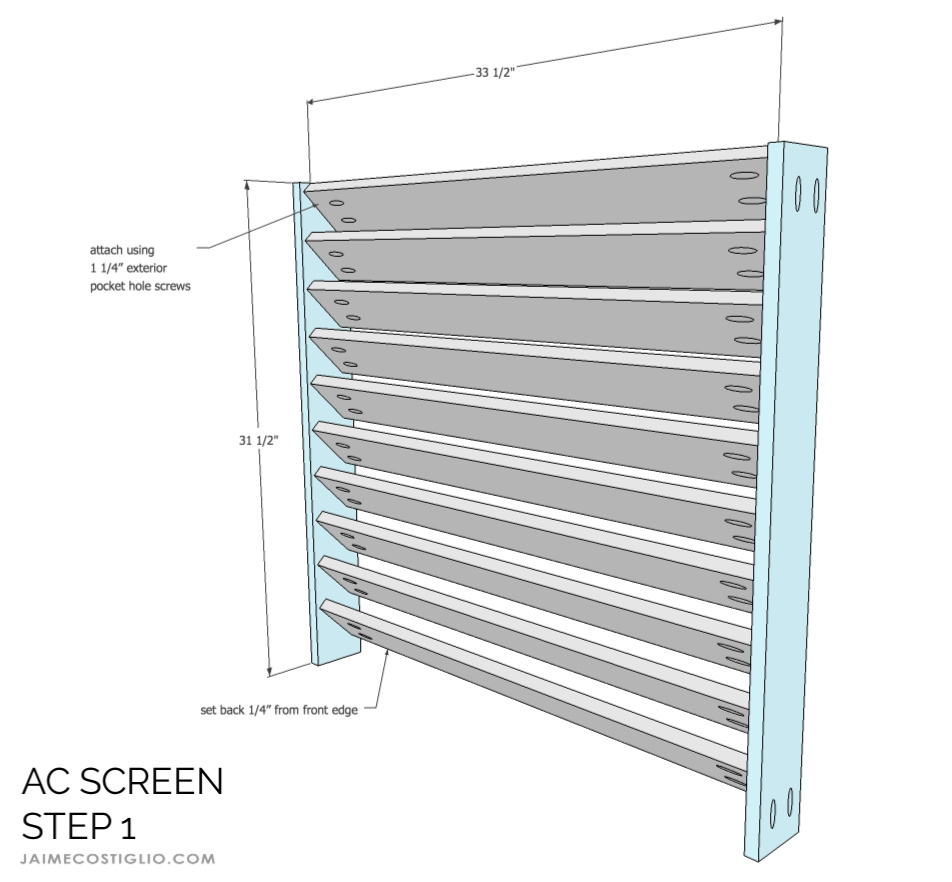
Step 1: Attach slats to panel sides using 1¼” exterior pocket-hole screws.
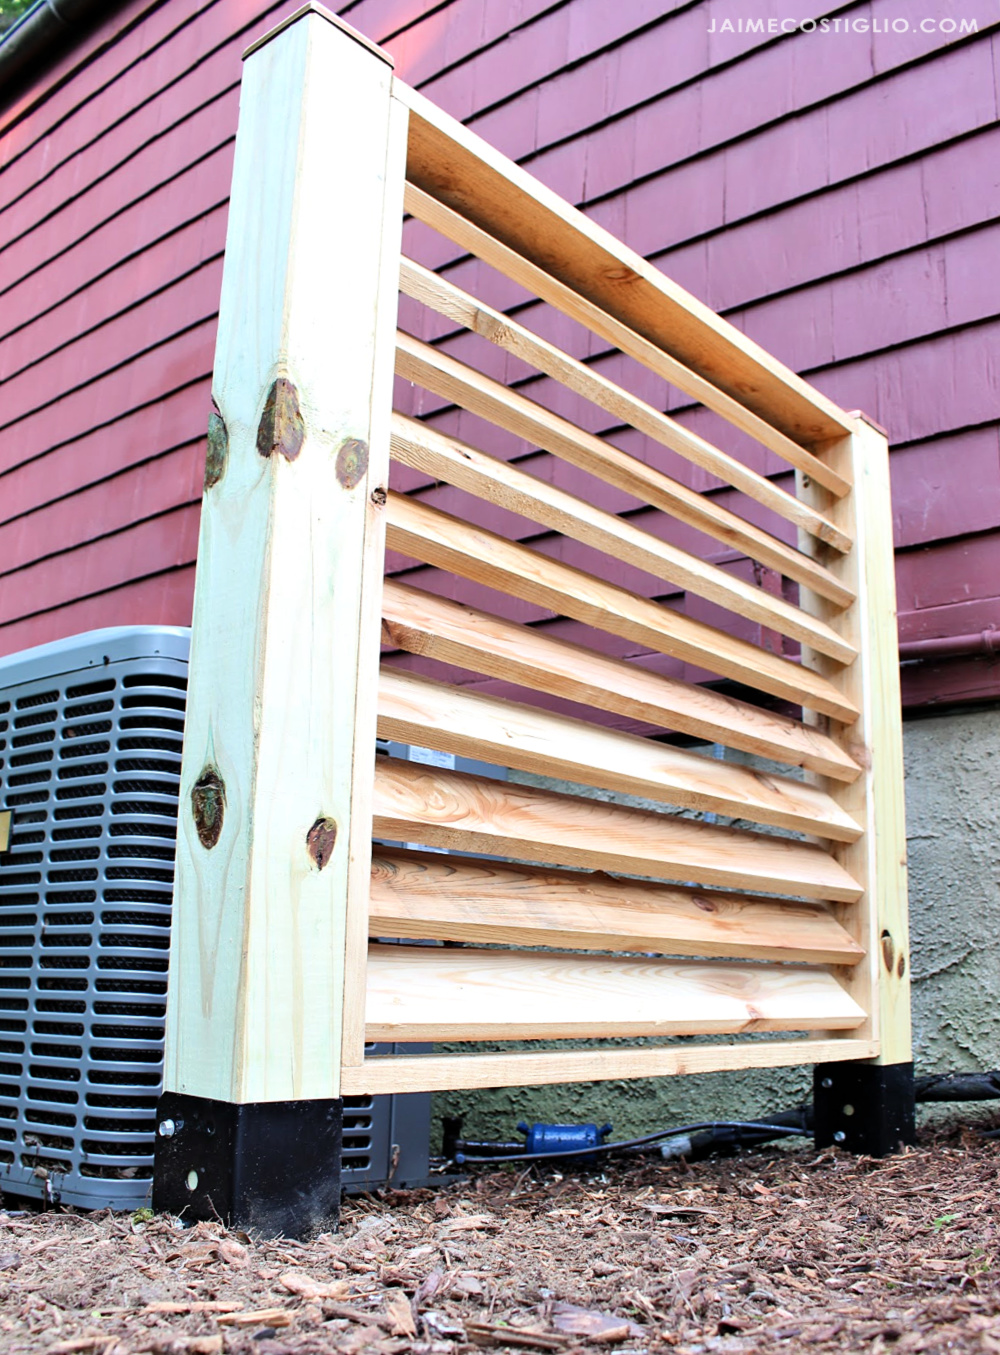
Tilt the slats at a 45° angle set back ¼” from the front edge of the panel side.
Attach the slats one at a time, first to one side, and then the other side and work from the top down.
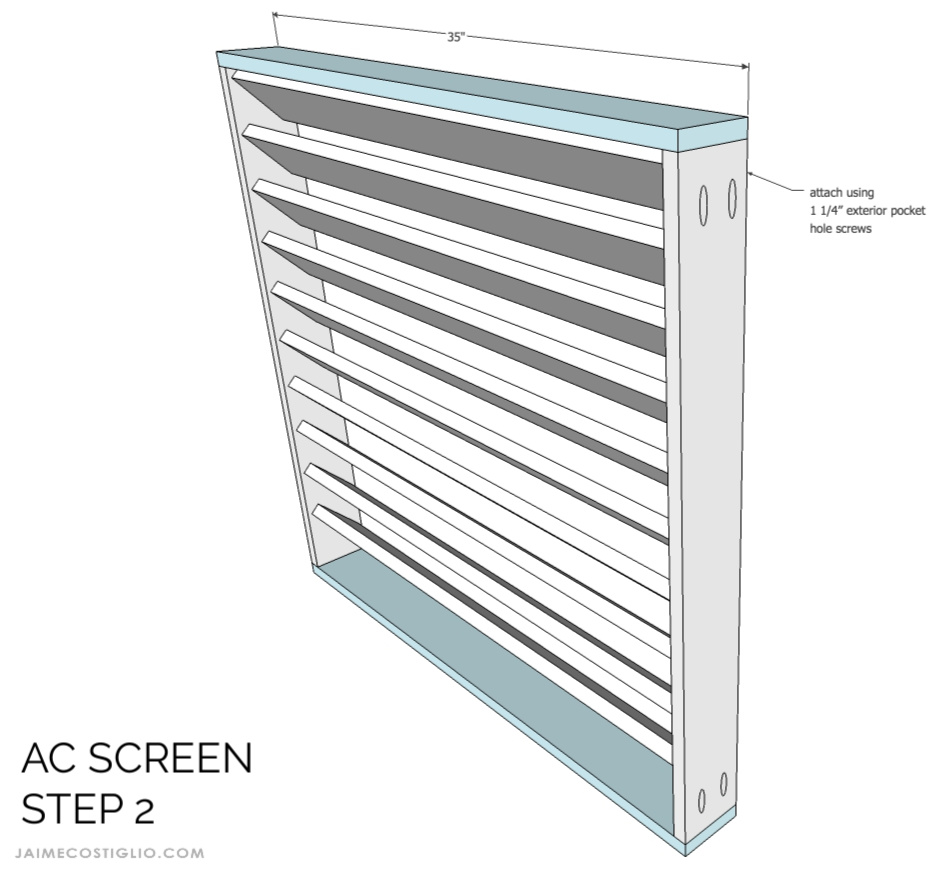
Step 2: Attach top and bottom frame pieces to sides using 1¼“ exterior pocket-hole screws.
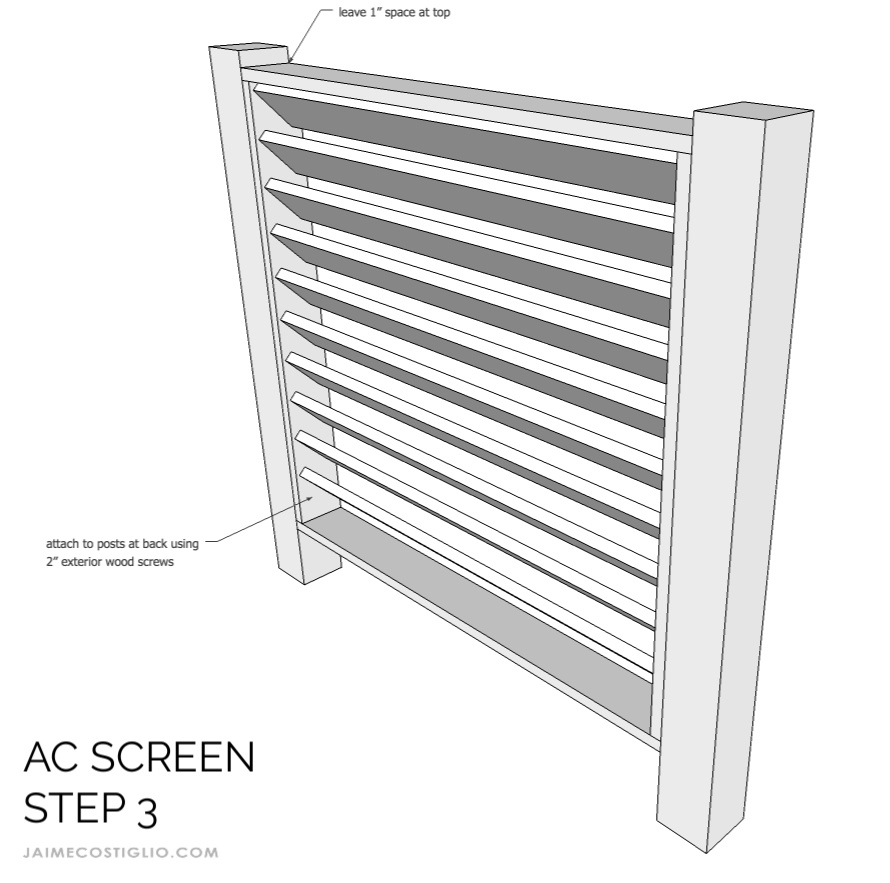
Step 3: Attach the panel to the posts.
Leave 1″ space at the top of the posts.
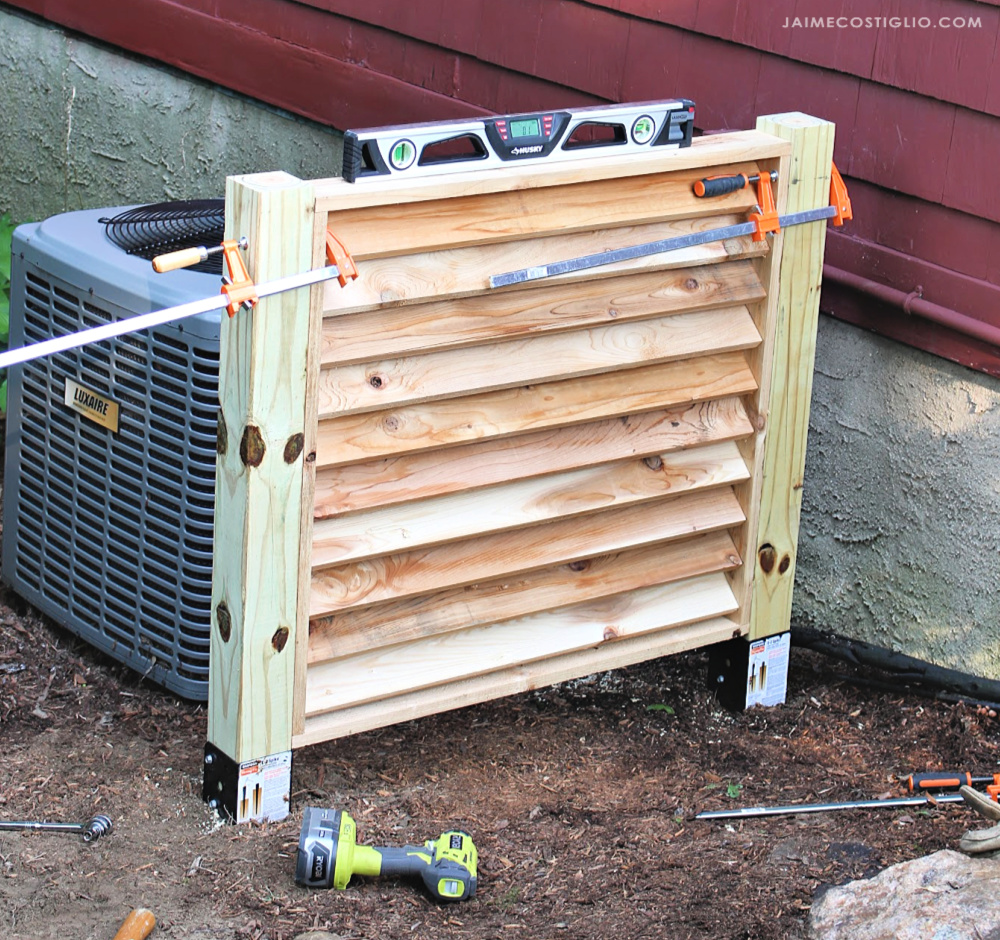
Place the panel in position and use clamps to hold it secure while you check the level. Attach the panel to posts through the panel sides using 2″ exterior wood screws.
Voilà. This AC screen is pretty and makes a great cover for those practical but unaesthetic objects that should be allowed to do their useful work unseen.