
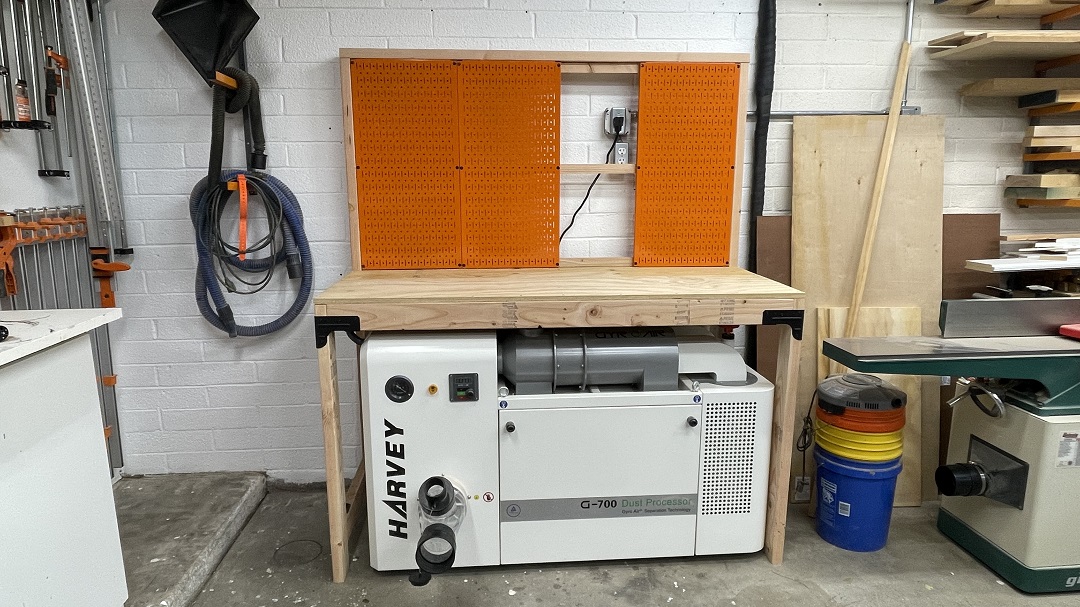
Sadie’s completed workbenchOne of the most exciting additions to my shop recently has been my new workbench. This workbench is special because it fits perfectly over my Harvey Industries G-700 dust processor, which means I gained 10 sq. ft. of work surface. Also, super useful is that the front of the workbench is open so I can easily empty the dust processor as needed. Plus, with the added back and Wall Control panels, I added even more usable space.
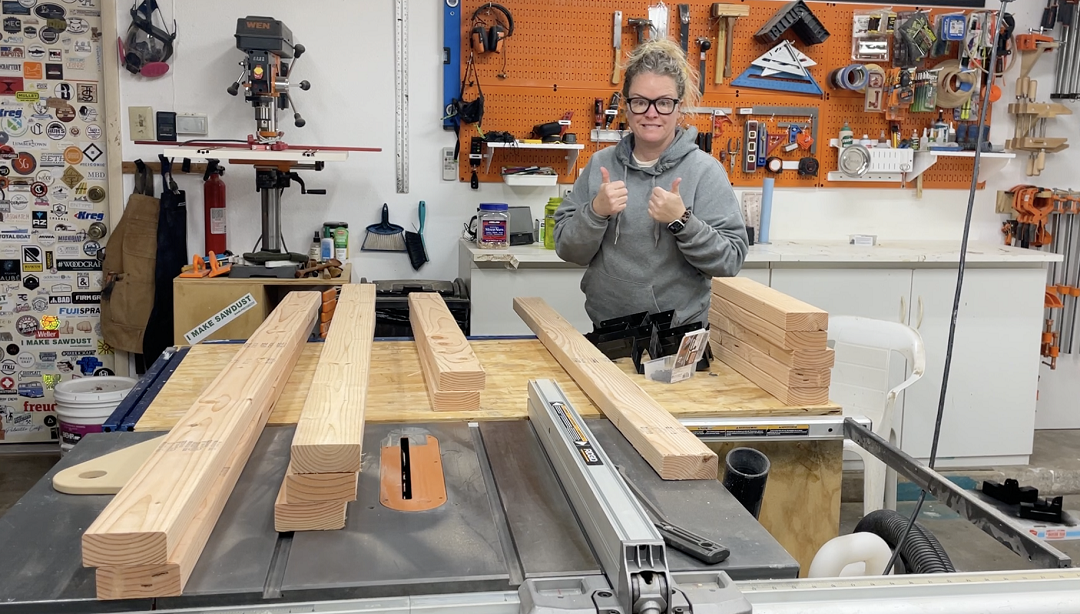
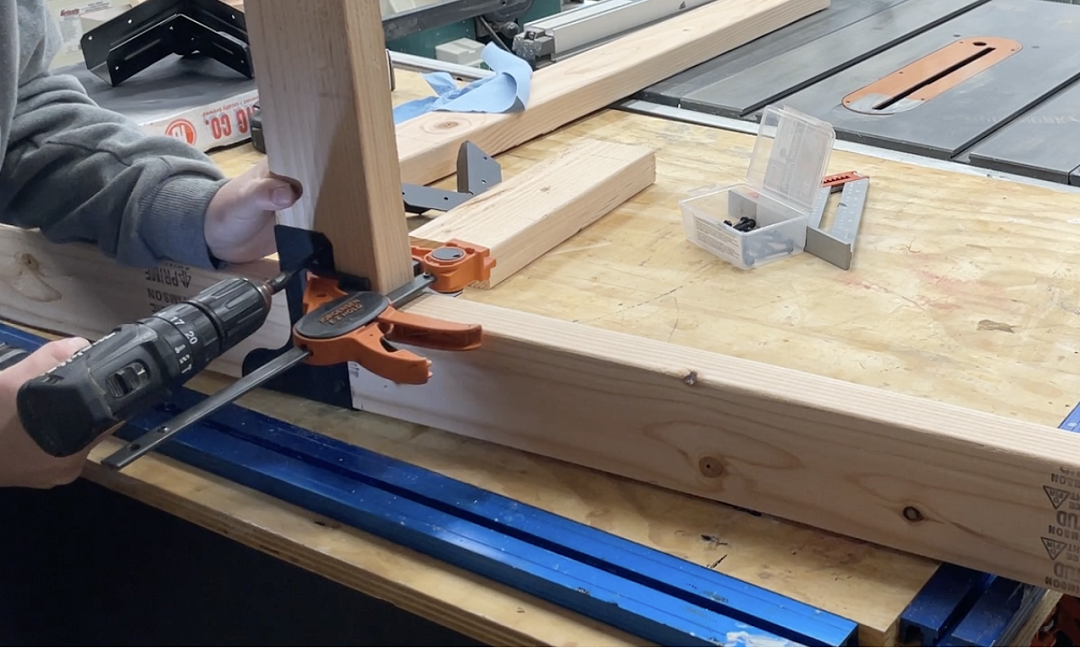
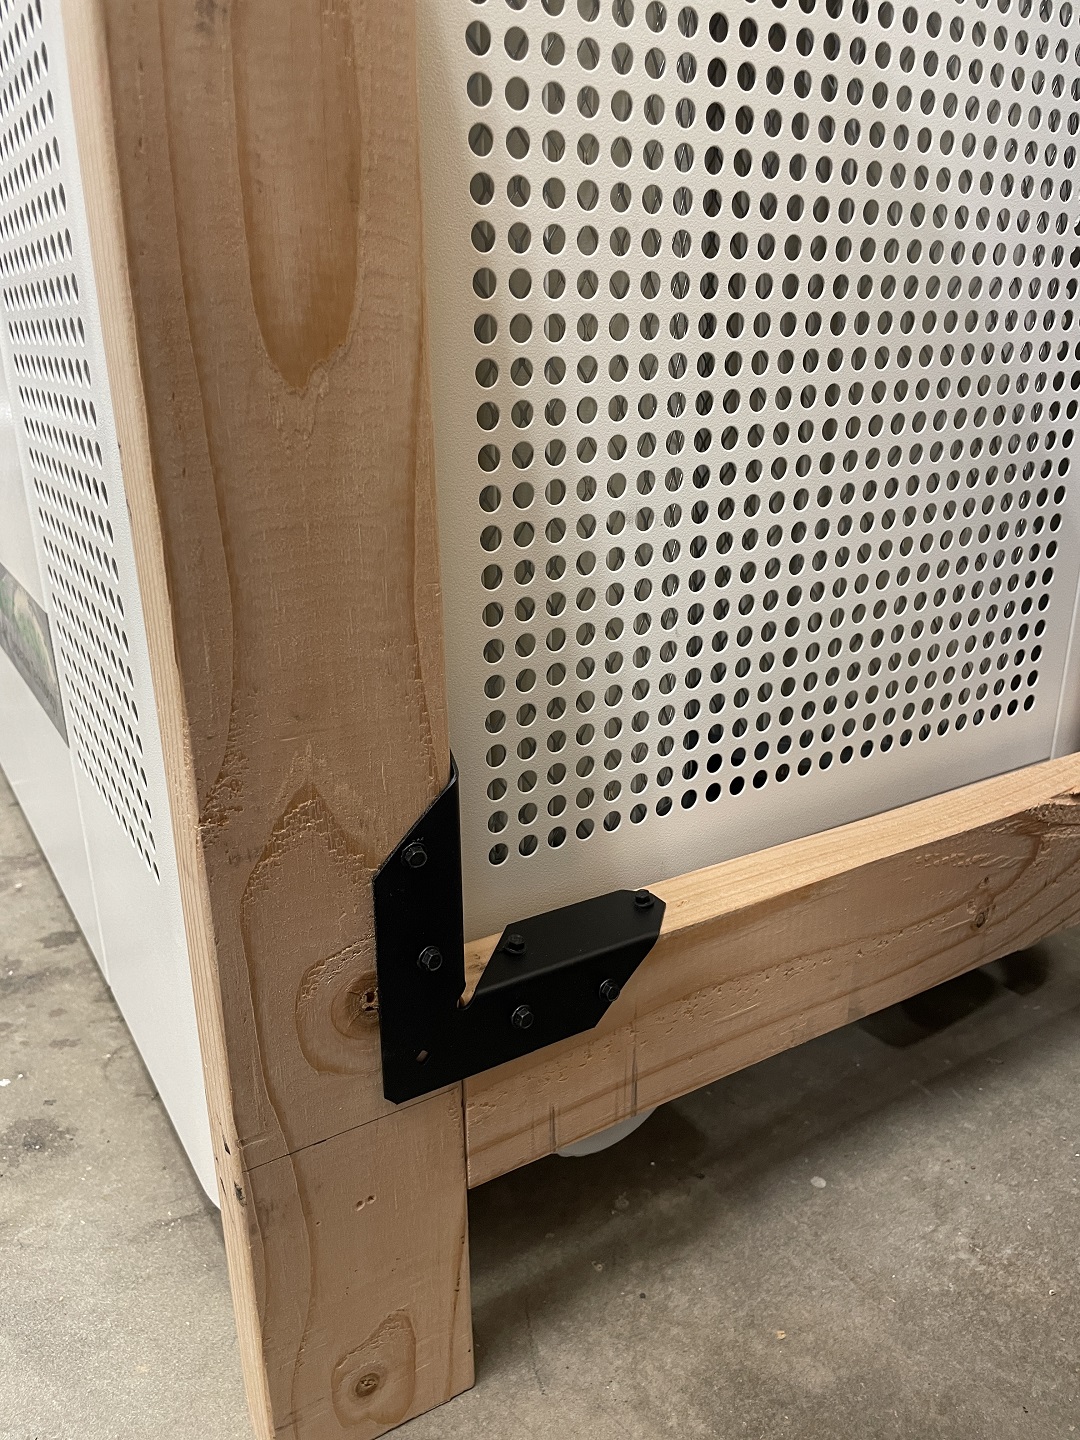
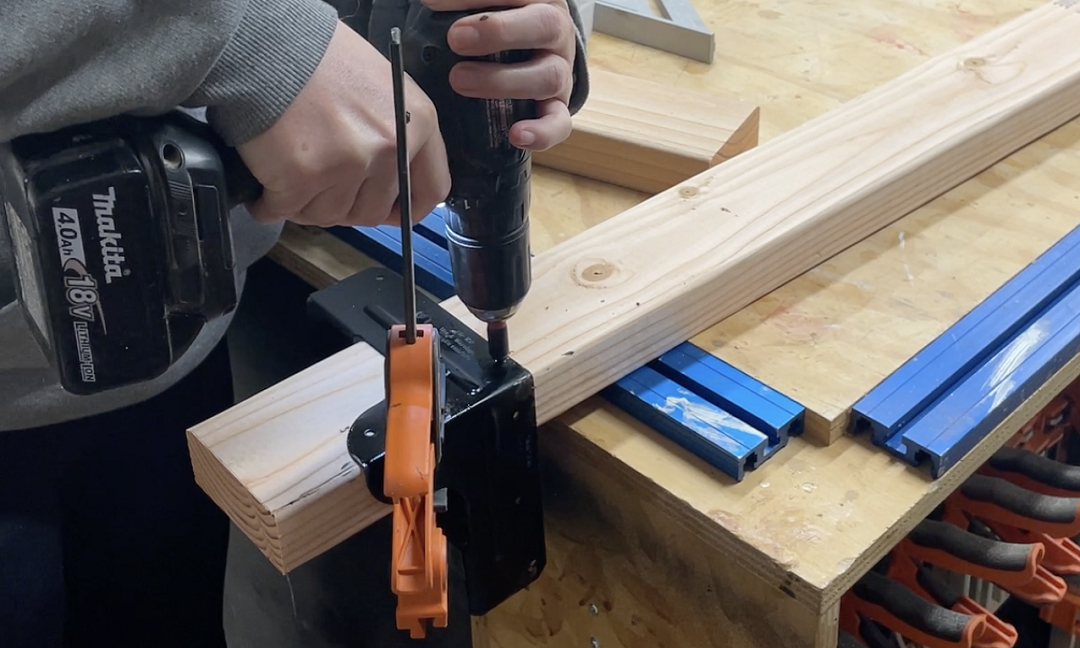
When planning for this DIY project, the 2×4 pricing in my area (I live in Arizona) went back down to $3.23, which was great in saving money for this project. I’m sure you can make a good workbench with just butt joints, but if you want a super- sturdy workbench that can hold a ton of weight, and maybe even withstand dancing on it, then I recommend using connectors. The frame of my new workbench came together super easily with the help of some Simpson Strong-Tie connectors, including the ARTC2Z and ARTA2Z.
I used seven 2×4 pieces of lumber and three furring strips. These strips will help me hold up the back panel for my workbench. Simpson Strong-Tie sent me some ARTC Rigid Tie® corner connectors, specifically the RTC2Z. This connector is part of their Outdoor Accents® decorative hardware collection, and they now come powder coated. If you want hardware that will draw the eyeballs, these are a great option.
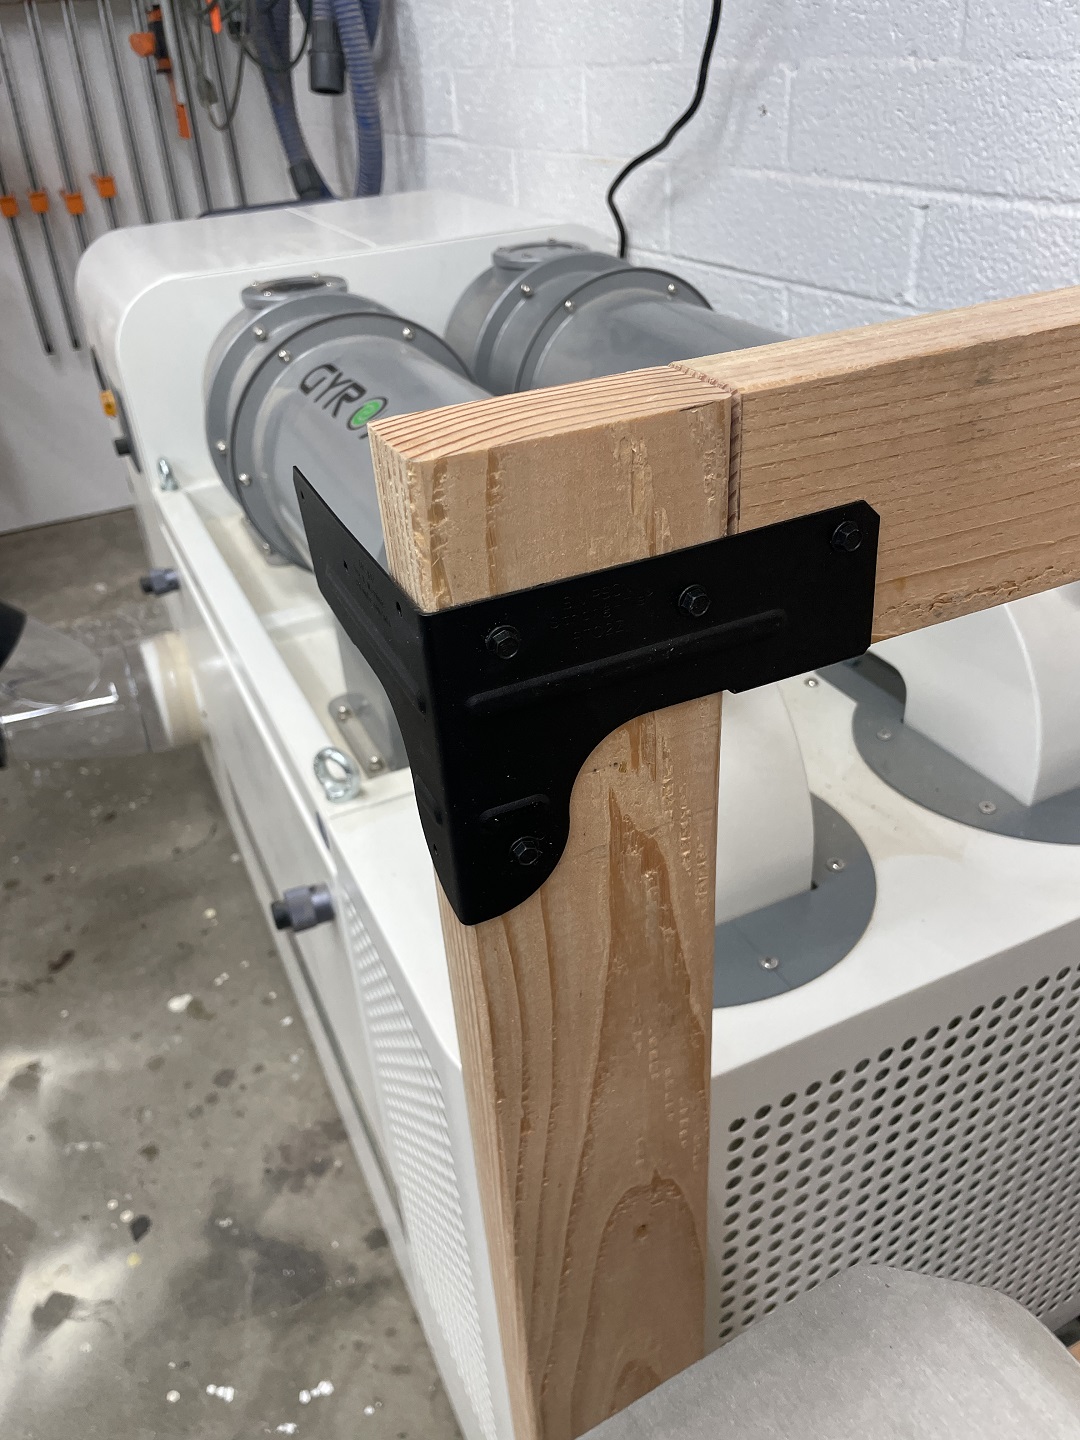
These RTCs are the main hardware that hold this workbench together. I only had four powdered-coated connectors, so I ended up strap painting two more of their galvanized RTCs so they matched. Using the RTC2Z connectors makes assembling the workbench super quick and easy.
Materials List
- 4 RTC2 APRTC Rigid Tie® corner connectors
- 2 RTC Rigid Tie® Corner Connector
- 2 APRTA2Z Rigid Tie® angles
- Outdoor Accents® connector screws
*NOTE: If you want a shelf on your bench, you will need eight RTC2Zs and not RTA2Zs, or you could just get the Simpson Strong-Tie Workbench and Shelving Hardware Kit (WBSK).
How To Build the Workbench
- Step 1: Cut out 2x4s.
- Step 2: Mark locations for the connectors.
- Step 3: Attach connectors to 2x4s using 1 1/2” Simpson Strong-Tie Connectors screws.
- Step 4: Attach back top support using 3” wood screws.
Step 5: Cut 3/4” plywood for top and secure with 1 1/4” wood screws. - Step 6: Cut and install 1 1/2” furring strips to fit inside of the back for wall control panels.
- Step 6: Install wall control panels.
- Step 7: Admire your new workbench and get to work using it to make something AWESOME!
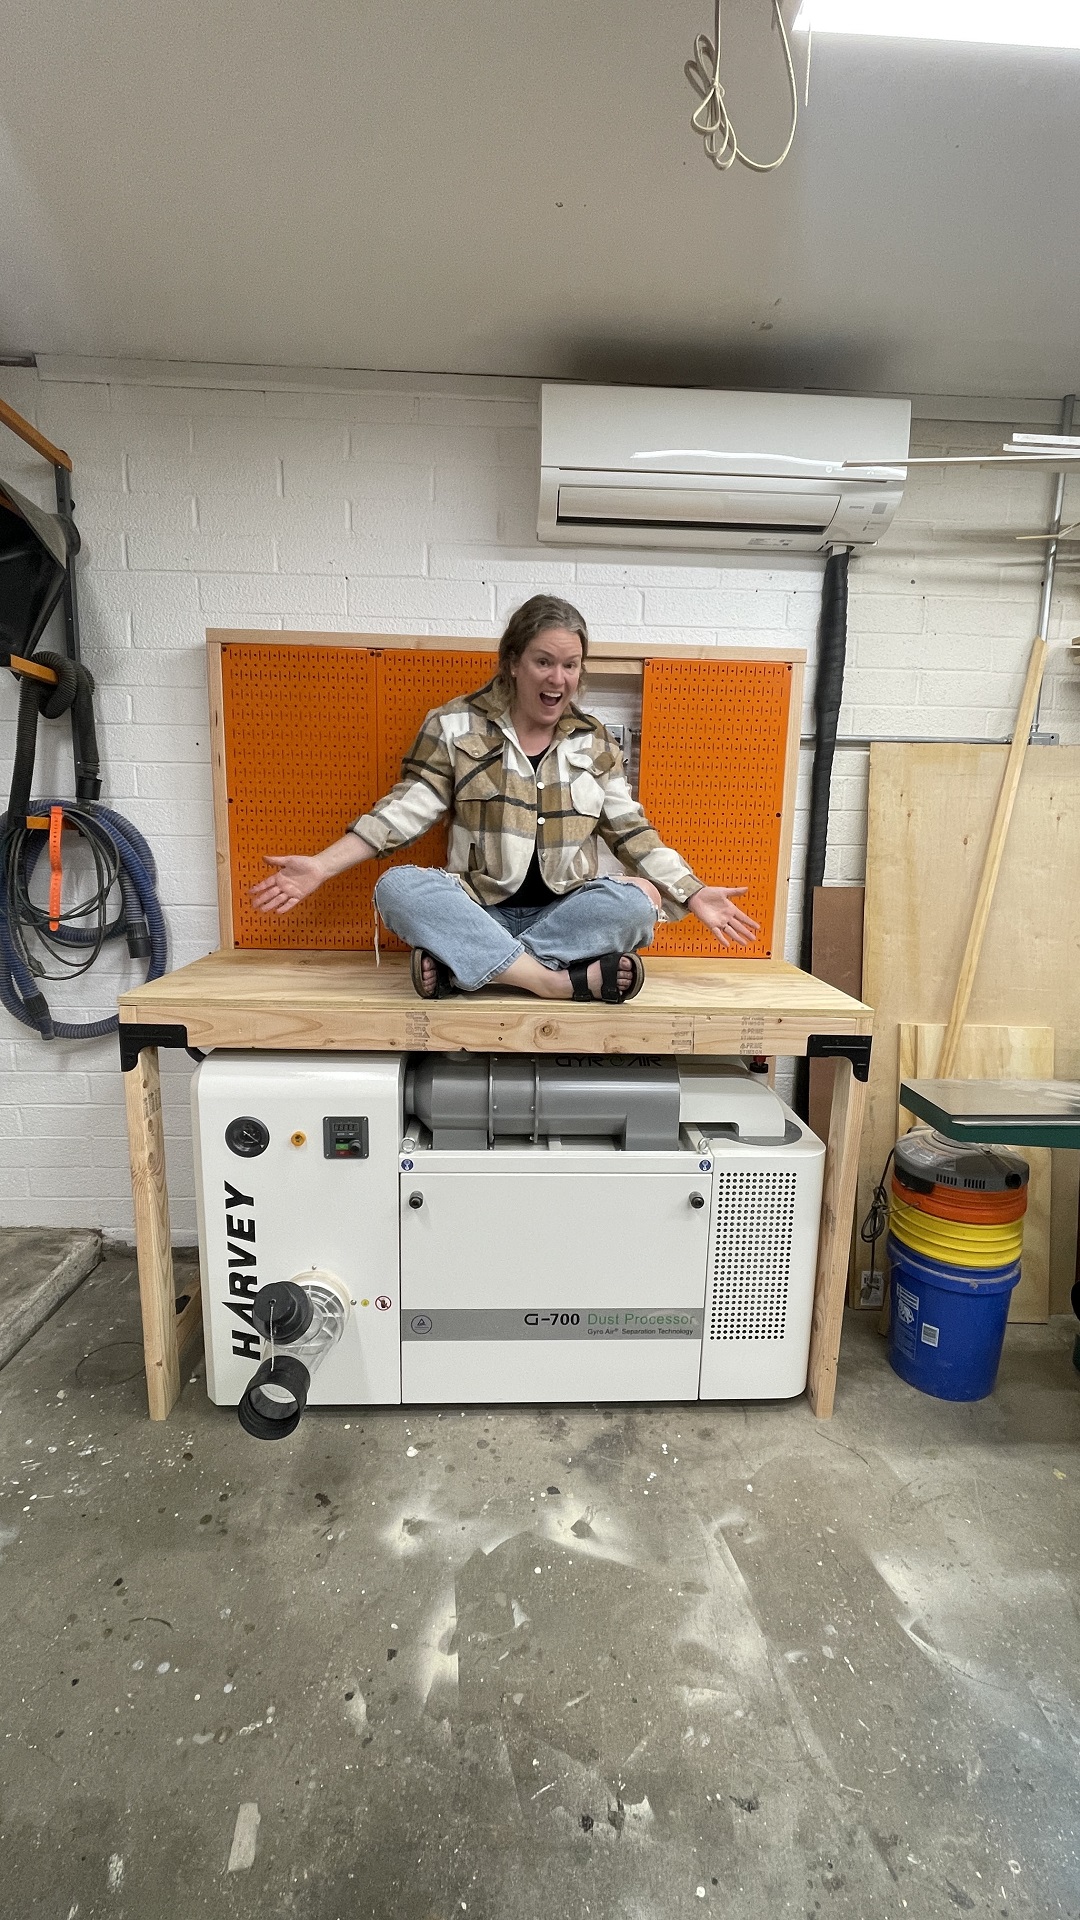
Sadie with the completed workbench
What’s not to love about this addition to my shop! Do you need an easy-to-build, super-sturdy workbench that you can customize to fit your space? Then check out the Simpson Strong-Tie Work Bench and Shelving kit. And let me know what project you have coming up that you could use these connectors on?


