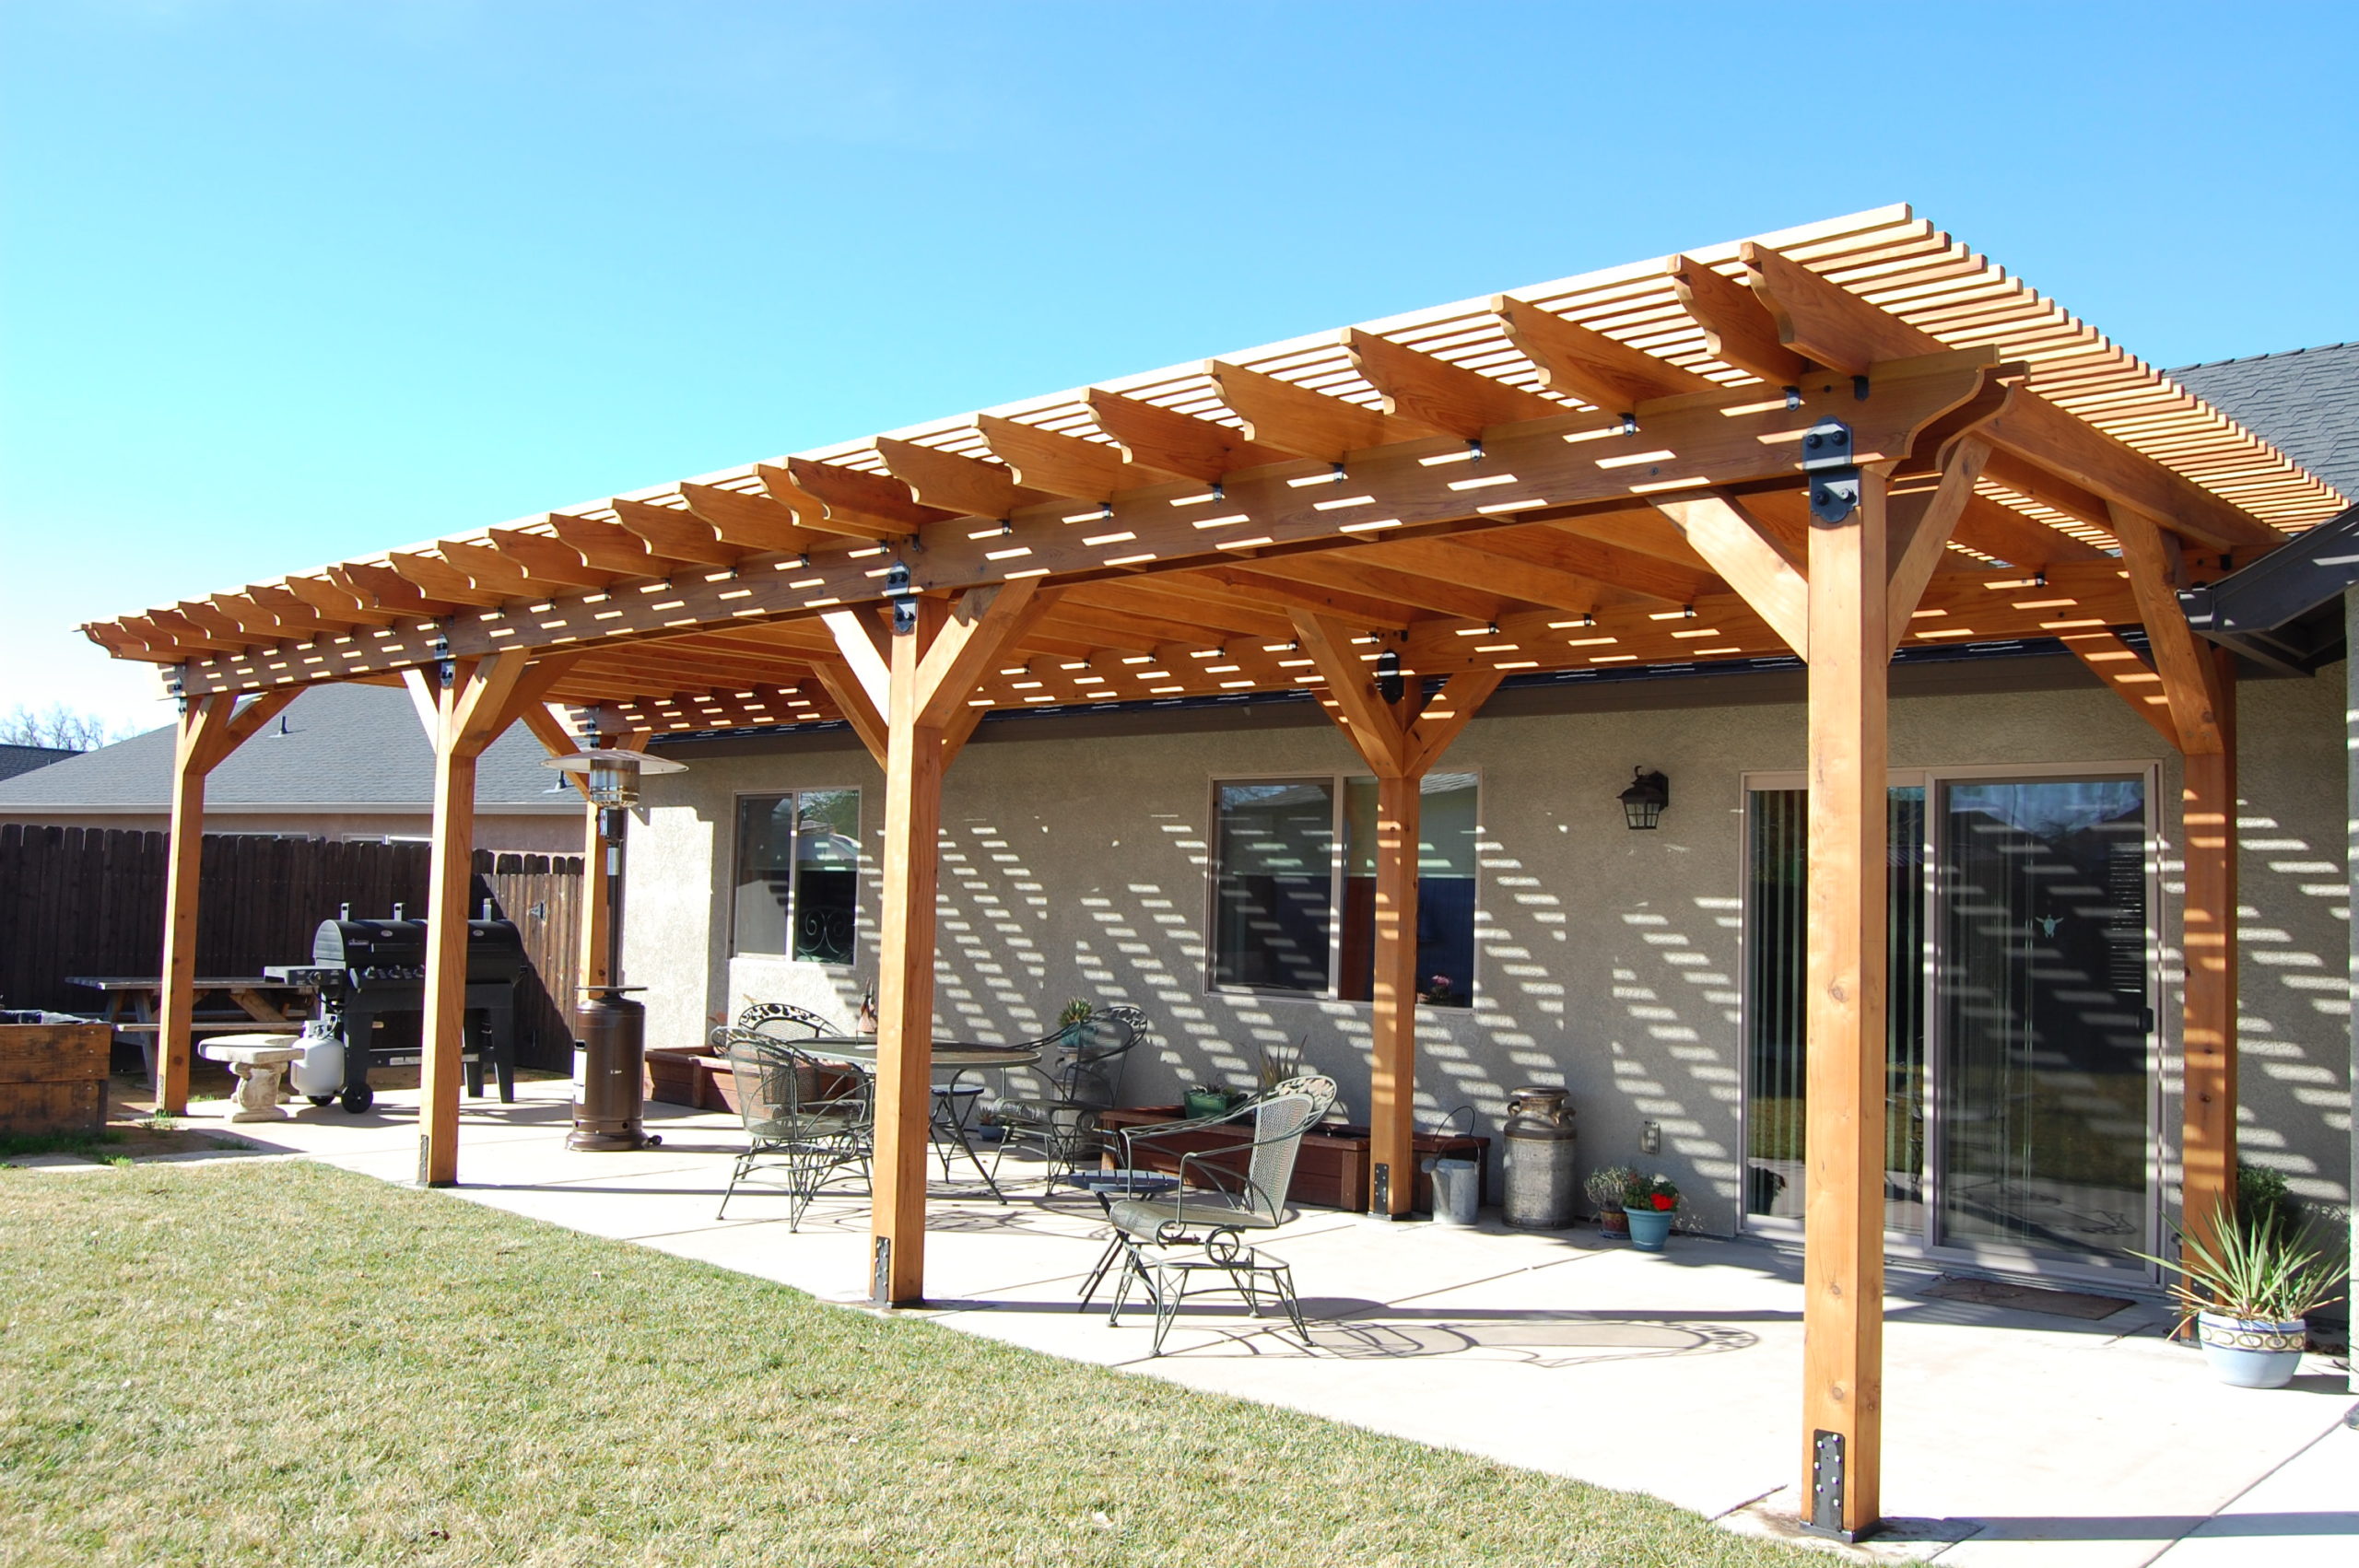
Their concrete patio consisted of a space of about 40′ x 10′, and their plan was to provide coverage for that entire area. The eaves of their house are a low overhang, so one of their criteria was to have the pergola be a relatively tall structure — tall enough that future light fixtures and a ceiling fan could be installed and still allow plenty of head room under the structure. We also found that the local building department was very particular about building permits and city approval. Even though this would be a freestanding structure (not attached to their home), we would need to have a permit with inspections. Finally, my parents wanted this project to be a family DIY job where they could participate actively in designing the layout of the pergola, help shop for the lumber and hardware, and then physically put fastener to wood and get their hands dirty in the construction.
Preliminary Design and Pergola Planner Software™
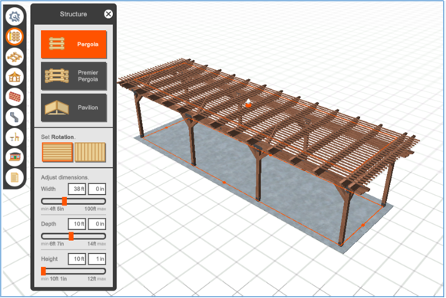
After we established these basic criteria for area and height, as well as how involved my parents would be in the design and construction, we moved on to aesthetic details, including the species of wood, lumber size, connector and fasteners types, and color choices in the final design. Certainly many considerations needed to be taken into account when selecting these items, and we all agreed a tool to help us plan and visualize the design would be helpful. Though I would need to contribute some engineering in the form of creating a number of specific drawing details and several calculations to fulfill the requirements of the city building permit, the most obvious tool for our basic layout and minimum wood member sizes was our Simpson Strong-Tie® Pergola Planner Software™. It was as simple as going to strongtie.com and downloading the software from there. I started with some very straightforward user input, including a rectangular layout that would fit within the existing patio dimensions, as well as our chosen orientation of the girders. From there, I quickly and easily added in the basic wish list of height and general joist span layout. Within minutes I had a virtual view of what we would be building. The software can be found here.
The output provides 3D and 2D layouts of the desired design and also offers cut sheets of wood sizes, lengths and quantities, as well as an itemized list of what connectors and fasteners to use.
One of the design variables that needed to be considered was the wood species. With several variations of wood available, it’s important to factor in strength, environmental durability and cost. Following a bit of research, my parents chose to go with redwood. It did take some time to source the material, and the cost was definitely higher than for other wood species, but ultimately the durability of redwood won out.
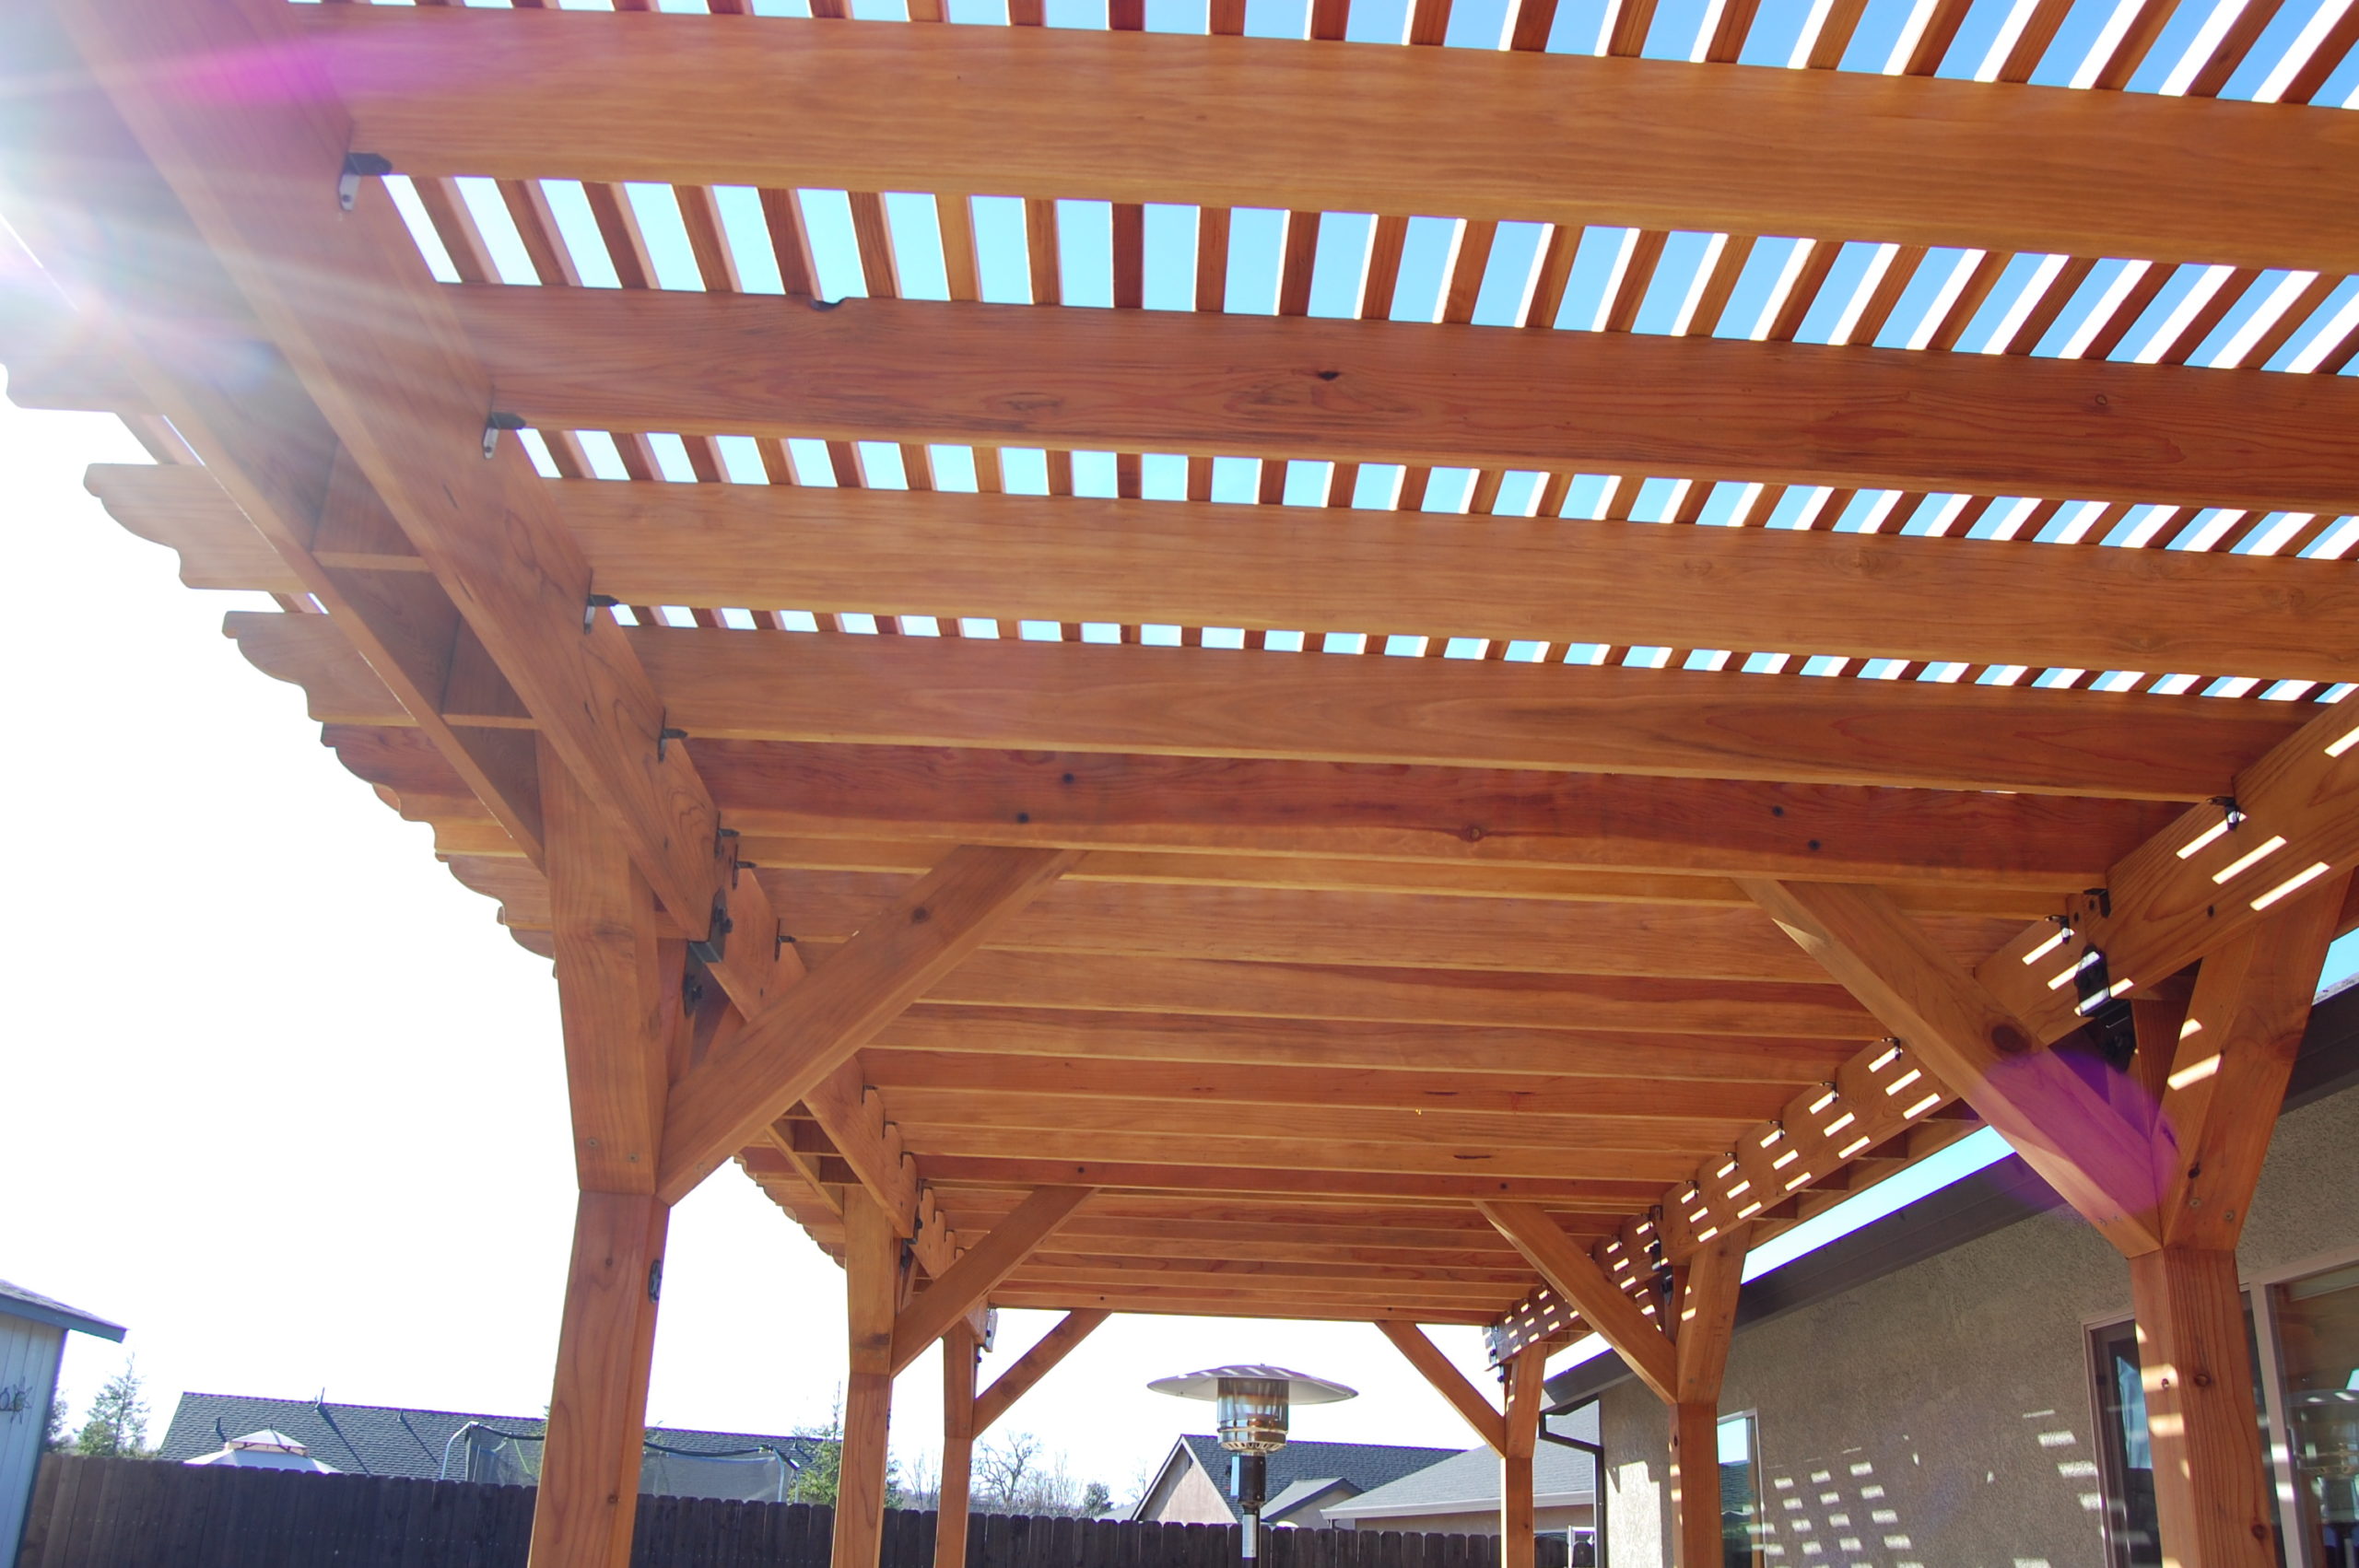
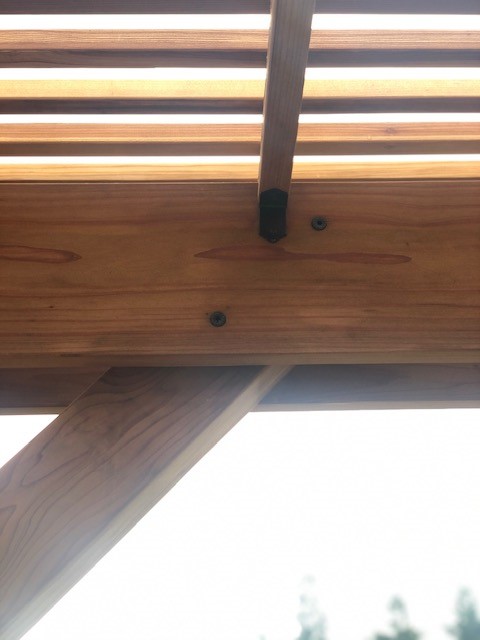
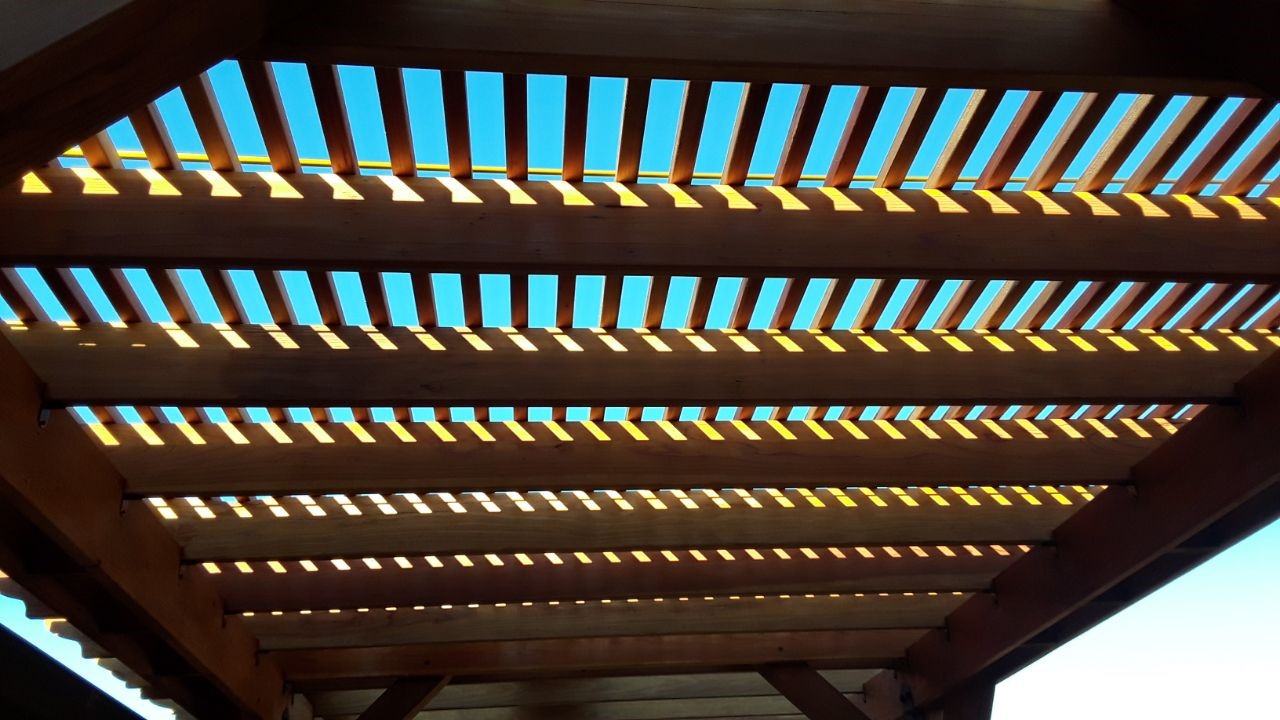
With the wood species selected and the general layout in place, we selected several other variables in the software, including minimum code loading and various aesthetic wants. Then the program essentially designed the minimum wood sizes and connectors and fasteners needed. For our pergola, we went with 6×6 posts, 2×8 joists and 2×2 top pickets. The girders consisted of a double 2×10 set that sandwiched around the posts and blocked at every joist bearing point. They were oriented to run the length of the pergola, which measured about 38 feet, broken into three 11′-8″ spans. The joists spanned a length of 9′-4″ and were equally spaced over the girders at 1′-7″ on center. Both the girders and the joists were designed to have cantilever tails that overhang past the end spans. The canopy was topped out with 2×2 pickets that had 2″ spaces in between.
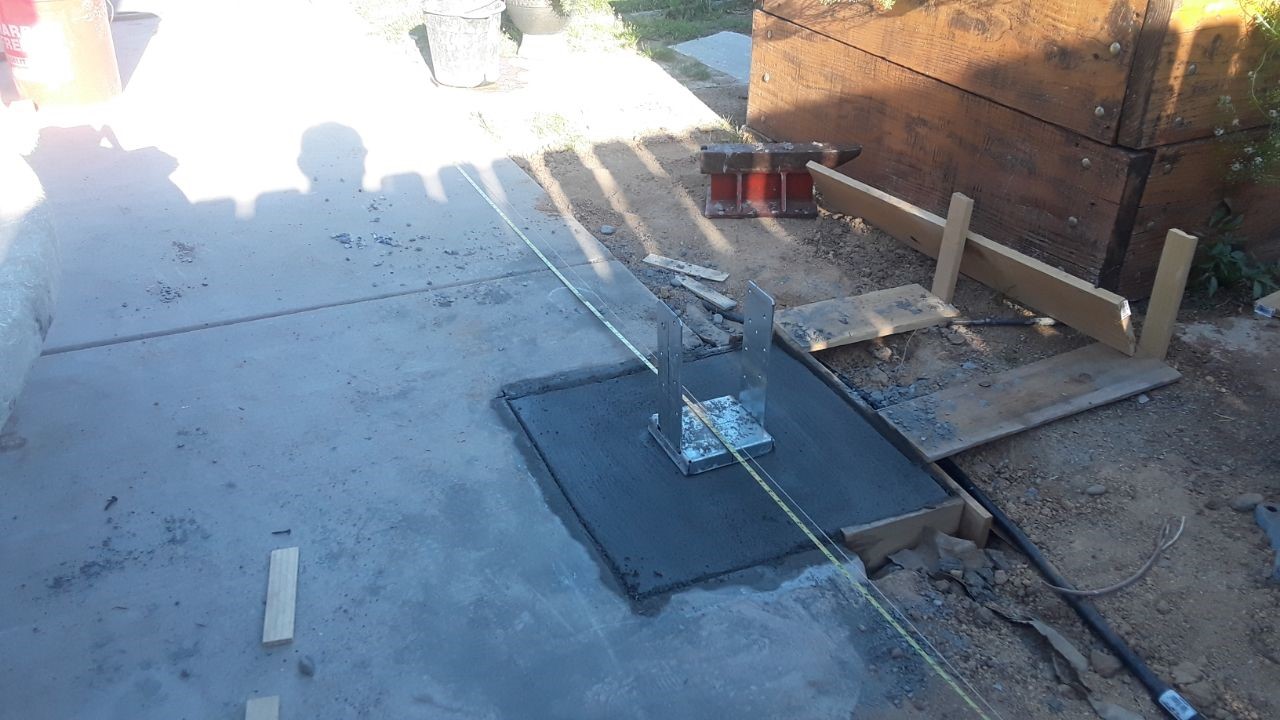
At the foundation level, we knew that we needed to start our pergola off with the right footings and post bases. However, since approval from the building department was required, I needed to design to the minimum snow load and allowable soil pressure according to the local building code. With this in consideration, my design calculations resulted in 20″ x 20″ square x 20″ deep footings, using 2,500 psi concrete. I called out CBSQ66 cast-in-place post bases, eight in total, in lieu of the Outdoor Accents APB66 post bases. Though the APB is a common and perfectly adequate post base, because we had to pour custom footings that needed an embedded portion that would be in position when the concrete would be cast, the CBSQ was the best choice.
Connectors and Fasteners Used
In addition to the post bases, we created a connector and fastener list that the software helped us organize in readable tables. The steel connectors and fasteners are the primary means of attaching all the wood members together, and are essential in forming a continuous path along which the weight and loads of the structure will be transferred to the ground. The software produced cut sheets listing all these various materials so we could begin our shopping for supplies. The list included the following:
- (8) CBSQ66 post bases
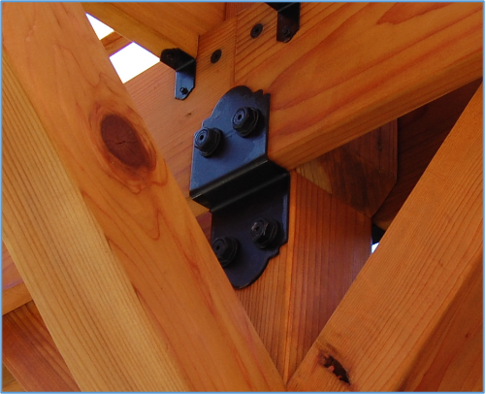
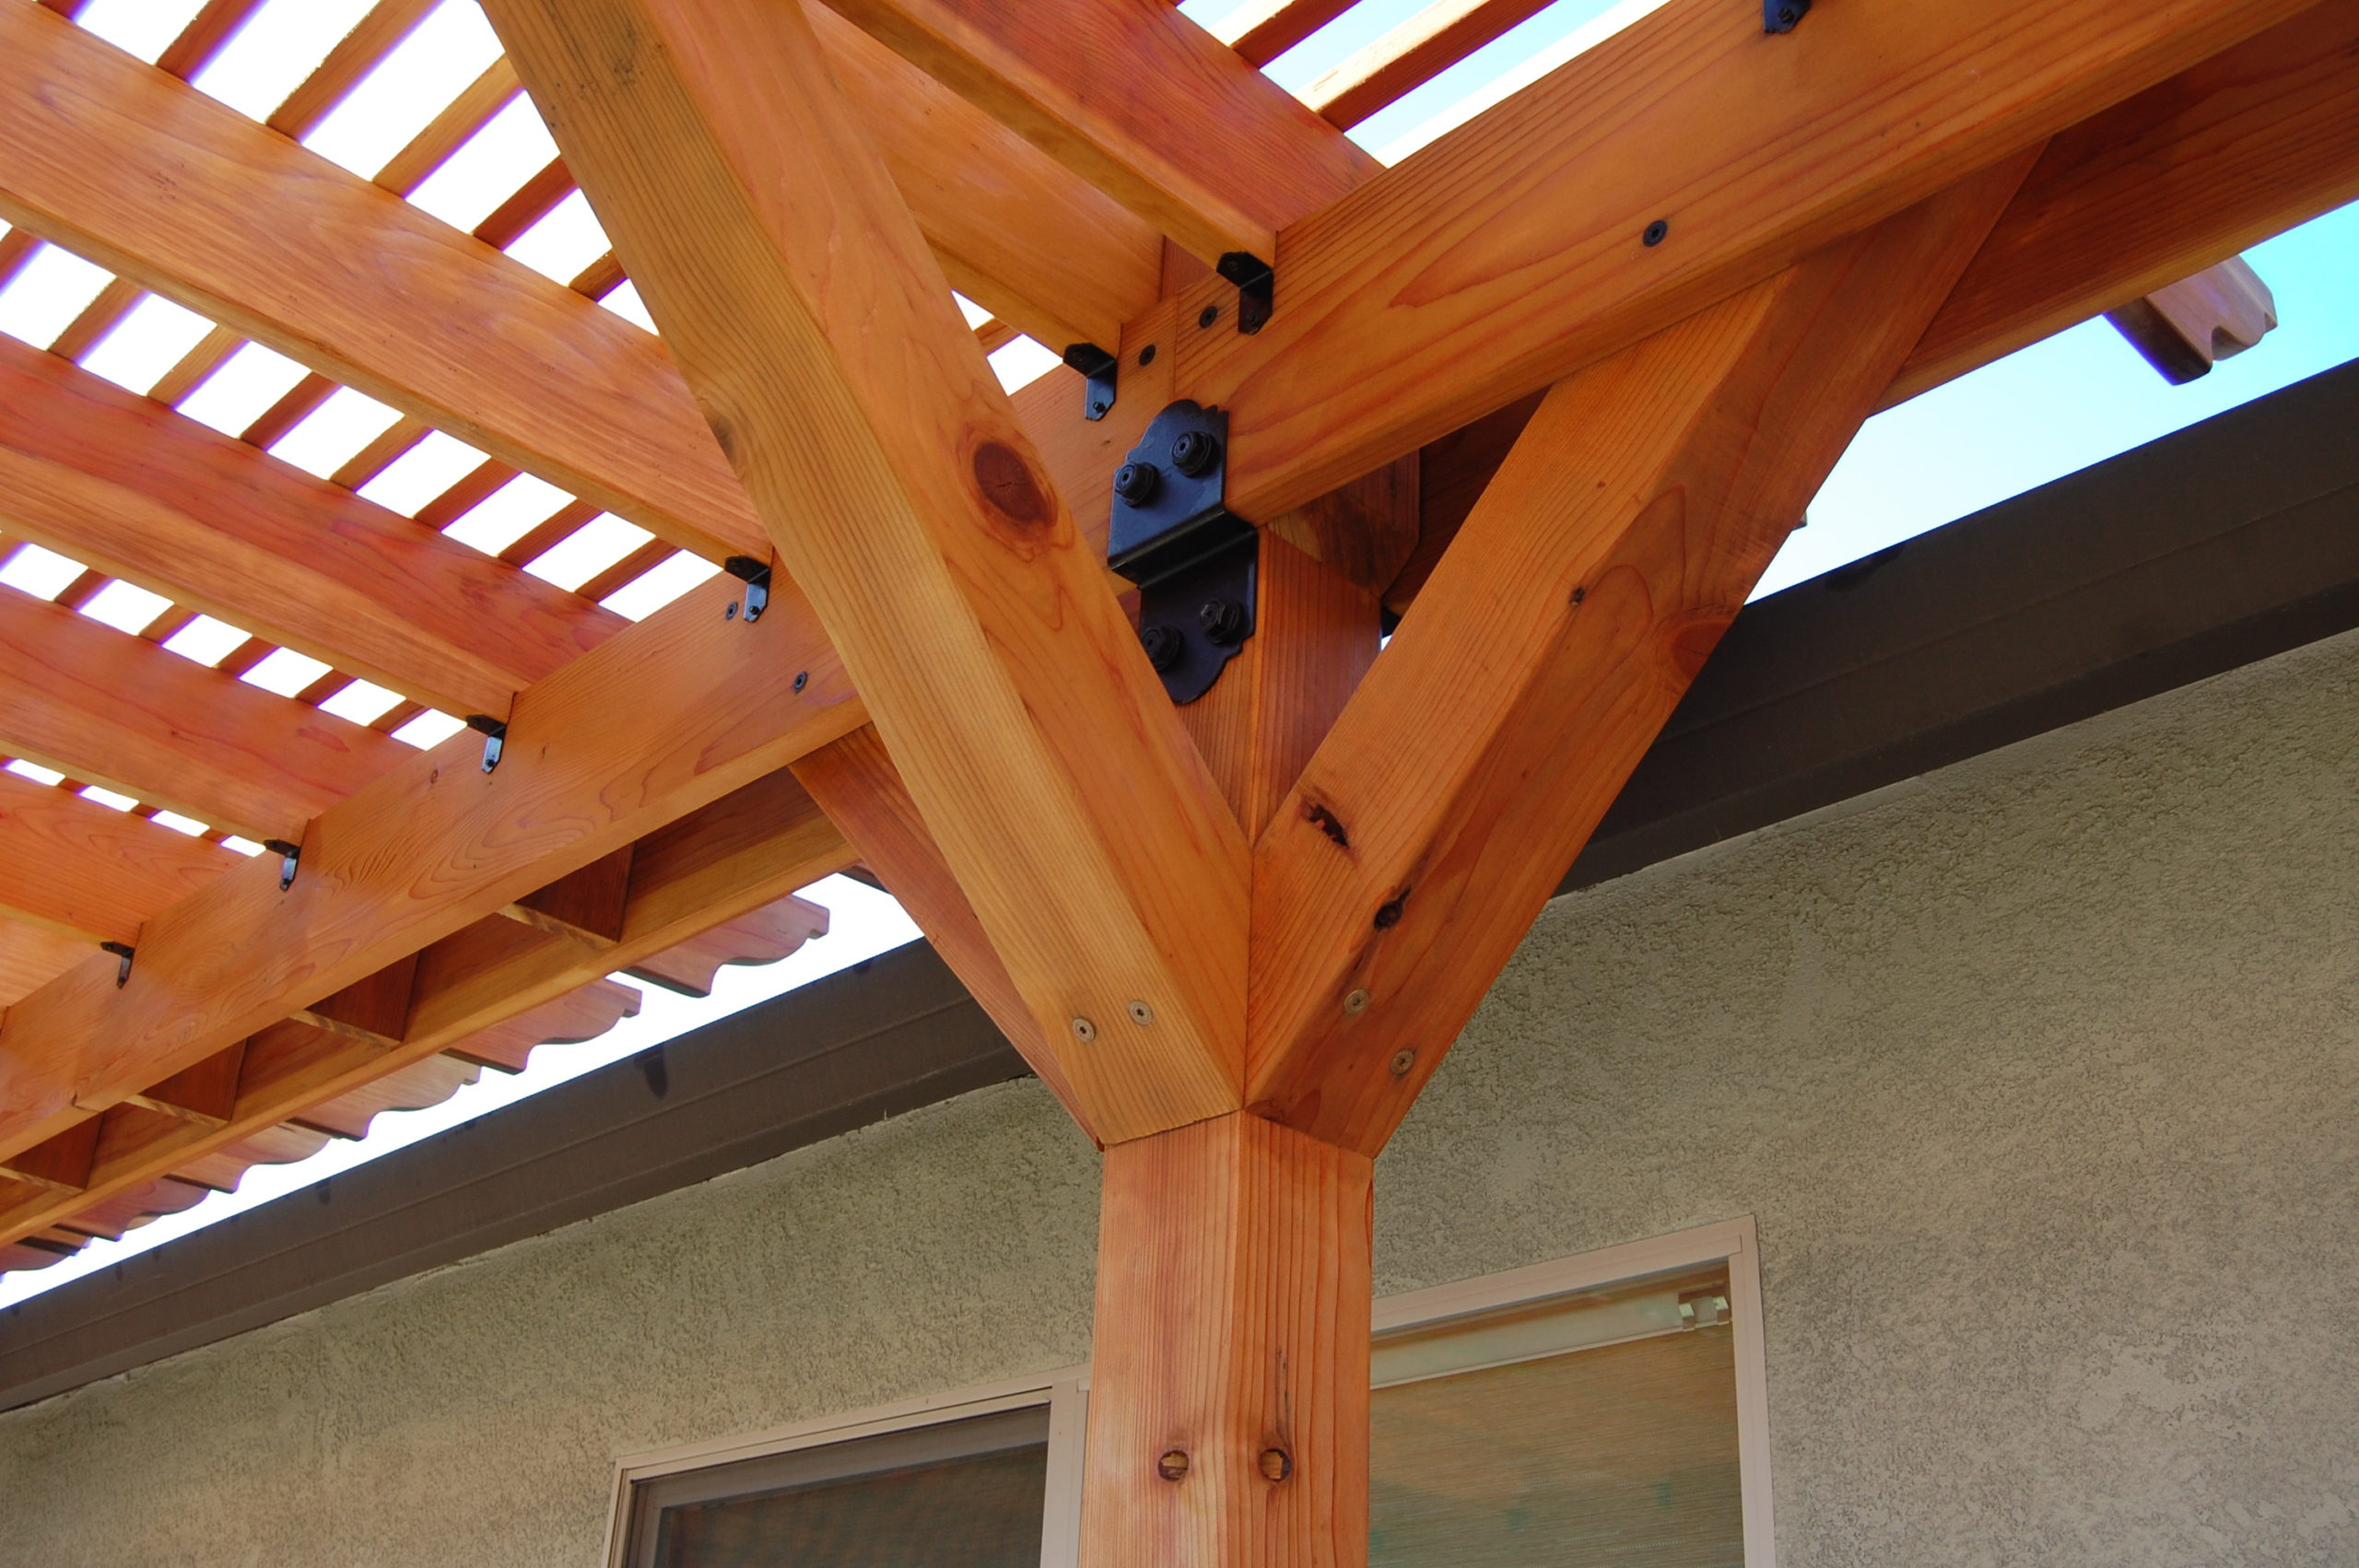
- (16) APDJT2-6 for the post-to-girder connector
- (64) Simpson Strong-Tie® Outdoor Accents® 3 ½” structural wood screws (SDWSDBB) with (64) hex-head washers (STN22) for fastening the APDJT deck joist ties
- (80) 3 ½” structural wood screws (SDWSDBB) at the top of the diagonal-to-girder connection
- (40) Strong-Drive® SDWH Timber-Hex screws (SDWS22800DB) at the bottom of the diagonal-to-post connection
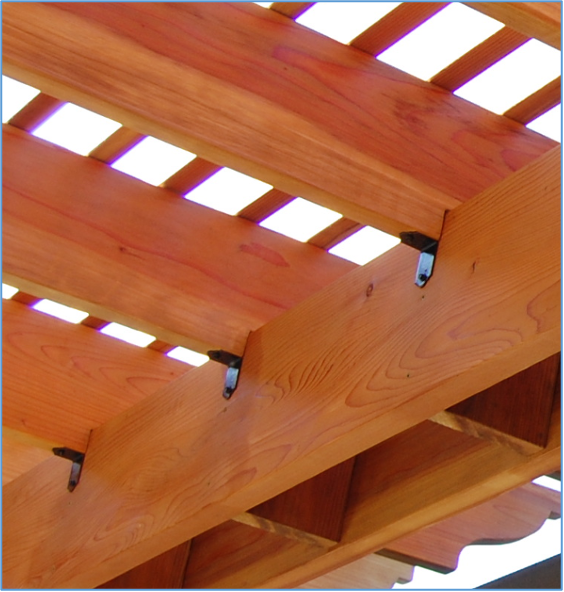
- (112) APA21 light angles to connect the joists to the girders
- (224) Outdoor Accents connector screws (SD10DBB) for fastening the angles
- (1,040) Deck-Drive™ #10 x 2 ½” DSV wood screws (HCKDSVT212S) for the picket joist connection
We sourced our product list through various outlets, including Home Depot and Lowe’s, where every connector and fastener was easily accessible.
Pergola Construction
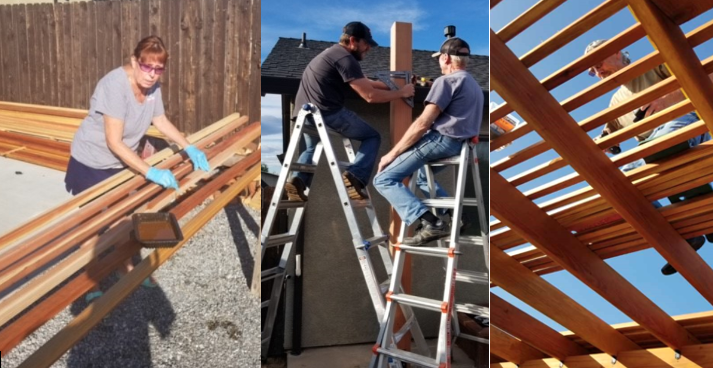
Our conceptual design began as a few sketches on notebook paper and it evolved through the Pergola Planner Software™, a little bit of engineering design and then to sourcing and purchasing the lumber and materials needed to complete this DIY project. Next was to put shovel to ground and drill to fastener to begin constructing my parents’ pergola. In the true spirit of family DIY, my dad, mom and brother all helped during the build.
During the Pergola build
There were several phases to the build, including the initial digging; pouring the eight concrete footings with CBSQ post bases; raising the 6×6 posts; placing the girders using the APDJT2 connectors; lifting and fastening the diagonals to the posts and girders using SDWS screws; and placing the joists and APA21s. We then had the intricate and tedious installation of the 2×2 pickets, fastening each bearing point using Deck-Drive™ DSV Wood screws, and finally cleaning and staining the final product. Though this brief description barely gives full credit to the hard work that went into this pergola, it really turned out spectacularly and the DIY spirit shines in each cut, connection and detail. The best part, of course, was working together as a family from concept through to completion to finally create the beautiful shade structure my parents had been dreaming about for years!