Privacy Overview
This website uses cookies to improve your experience while you navigate through the website. Out of these cookies, the cookies that are categorized as necessary are stored on your browser as they are essential for the working of basic functionalities of the website. We also use third-party cookies that help us analyze and understand how you use this website. These cookies will be stored in your browser only with your consent. You also have the option to opt-out of these cookies. But opting out of some of these cookies may have an effect on your browsing experience.
Always Active

Necessary cookies are required to enable the basic features of this site, such as providing secure log-in or adjusting your consent preferences. These cookies do not store any personally identifiable data.

No cookies to display.

Functional cookies help perform certain functionalities like sharing the content of the website on social media platforms, collecting feedback, and other third-party features.

No cookies to display.

Analytical cookies are used to understand how visitors interact with the website. These cookies help provide information on metrics such as the number of visitors, bounce rate, traffic source, etc.

No cookies to display.

Performance cookies are used to understand and analyse the key performance indexes of the website which helps in delivering a better user experience for the visitors.

No cookies to display.

Advertisement cookies are used to provide visitors with customised advertisements based on the pages you visited previously and to analyse the effectiveness of the ad campaigns.

No cookies to display.

How to Build a DIY Heavy-Duty Workbench

Create a dedicated workspace to tackle all your projects with this heavy-duty workbench. Not only can it serve as a location for all your project materials, it will also help make cleanups quicker and more efficient with its built-in storage underneath. This workbench is a great investment for future projects and is perfect for the garage, basement or shed.

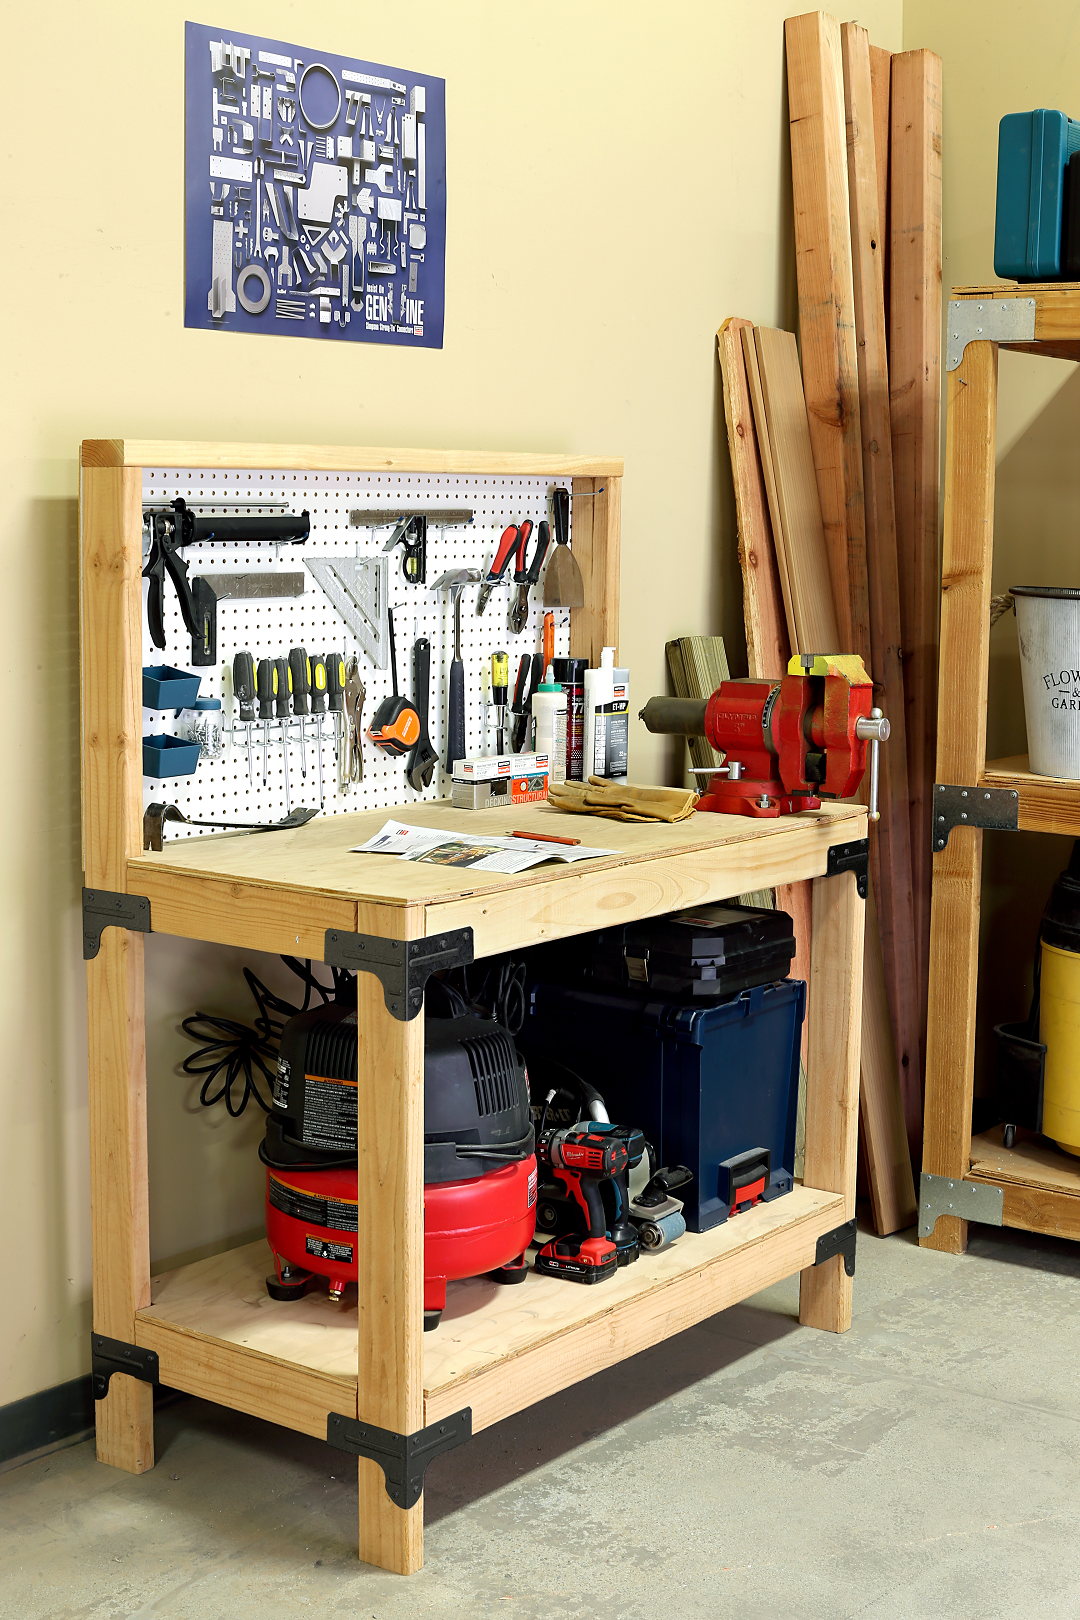
Building this 4′-wide workbench is fast and easy with 2×4 lumber and Simpson Strong-Tie Rigid Tie®RTC2Z connectors. Rigid Tie connectors are easy to install and strong enough to support even the heaviest boxes, tools or machinery, and they can be finished with paint to blend with their surroundings.  

Download the free plans for this DIY Heavy-Duty Workbench here.

You can also find more resources including a step-by-step tutorial on how to build your own work bench on our website.

Heavy Duty Work Bench

Tools Needed 

  • Saw
  • Screw gun 
  • #2 Phillips-head bit 
  • Tape measure 
  • Clamps
  • Framing square 

Installation Instructions 

  1. Cut lumber and plywood to size. Since all of your cuts are straight cuts, Simpson Strong-Tie connectors simplify building with wood.  
  2. Install connectors on vertical posts: Mark height, clamp connector to post, and attach with Simpson Strong-Tie® #8 x 1 1/4″ wafer-head screws. No predrilling is needed.  
  3. Connect horizontal rails on each side: Use a clamp to help hold the wood in the seat of the connector during installation.
  4. 4. Notch corners of plywood shelves: Use a piece of 2×4 on each corner of the shelf, trace, and cut to accommodate corner posts (only notch back corners of top shelf).  

Hardware Needed

Simpson Strong-Tie® Connectors

Lumber needed

  • (6) Pieces of 2×4 x 8′ lumber
  • (1) 4′ x 4′ sheet of 5⁄8″ plywood
  • (1) 2′ x 4′ sheet of ¼” pegboard

Cut List

Cut from 2×4 x 8′

  • (4) 45″ rails
  • (2) 58″ rear corner post and (4) 17″ end rails
  • (1) 48″ top rail
  • (2) 36″ front corner posts

Cut from plywood and pegboard

Find more do-it-yourself project plans at strongtie.com/diy.

Share

Stay Connected

Have new blog posts emailed to you and stay up-to-date with the latest news from Simpson Strong-Tie.

Keep Reading