Privacy Overview
This website uses cookies to improve your experience while you navigate through the website. Out of these cookies, the cookies that are categorized as necessary are stored on your browser as they are essential for the working of basic functionalities of the website. We also use third-party cookies that help us analyze and understand how you use this website. These cookies will be stored in your browser only with your consent. You also have the option to opt-out of these cookies. But opting out of some of these cookies may have an effect on your browsing experience.
Always Active

Necessary cookies are required to enable the basic features of this site, such as providing secure log-in or adjusting your consent preferences. These cookies do not store any personally identifiable data.

No cookies to display.

Functional cookies help perform certain functionalities like sharing the content of the website on social media platforms, collecting feedback, and other third-party features.

No cookies to display.

Analytical cookies are used to understand how visitors interact with the website. These cookies help provide information on metrics such as the number of visitors, bounce rate, traffic source, etc.

No cookies to display.

Performance cookies are used to understand and analyse the key performance indexes of the website which helps in delivering a better user experience for the visitors.

No cookies to display.

Advertisement cookies are used to provide visitors with customised advertisements based on the pages you visited previously and to analyse the effectiveness of the ad campaigns.

No cookies to display.

DIY: How to Build a Computer Stand

Having a flat, raised surface to hold your computer or laptop is essential for any desk or workspace. It can help make sure your computer won’t overheat and minimizes your workstation clutter. Another great benefit of having a computer stand is its ergonomic convenience. It allows you to adjust your computer to a comfortable height that is level with your line of sight and helps prevent posture as well as eye strain.

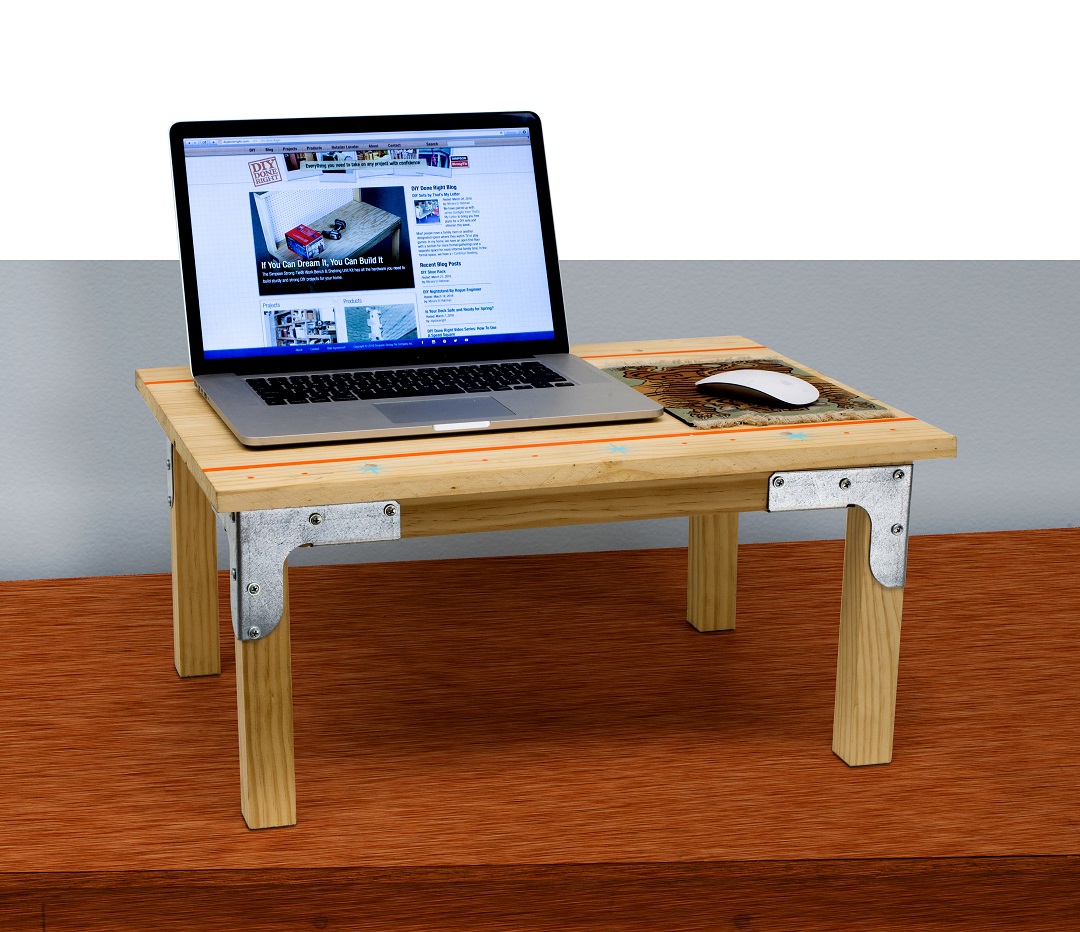
Give yourself the flexibility to work standing up with this versatile computer stand. The stand can also be used as a tea table tray or even a child’s table. Construction is easy, and Simpson Strong-Tie® connectors ensure that your computer stand is sturdy and solid. 

Download the plans for this DIY Computer Stand here.

Computer Table Constructed with RTC22

Tools Needed 

  • Saw
  • Screw gun 
  • #2 Phillips-head bit
  • T25 bit (included with Deck-Drive™ DSV Wood screws) 
  • #10 counter sink bit 
  • Tape measure 
  • Clamps
  • Framing square 
  • Straightedge 

Installation Instructions 

  1. Cut lumber to size. Since Simpson Strong-Tie connectors require only straight cuts, they can greatly simplify building with wood. 
  2. Attach legs to connectors. Attach each leg (A) to an RTC22Z connector. For correct placement, place short rail (B) inside connector first to make sure leg is properly lined up. (Note: The edge of the leg and rail will extend approximately ¼” above the top edge of the connector.) Attach SD8 x 1.25″ wafer-head screws to outer holes of connectors. 
  3. Attach rails to connectors. Attach short rails (B) and long rails (C) to connectors with SD8 screws. Attach screws only through outer holes first; wait to attach screws through inner holes of connector until top is attached.  
  4. Attach top. Place top on frame so that it overlaps frame by 1″ on all sides. Connect the top to the short and long rails withDeck-Drive™ DSV Wood screws, using countersink bit. (Clamps can be used to hold top to frame during screw installation.) Then place wood plugs on top of DSV screws and make flush with the top.  

Hardware Needed 

Lumber Needed 

  • (2) pieces 2×2 x 8′ 
  • (1) 18″ x 48″ x ¾” edge-glued panel
  • (1) box ⅜” flat-head wood plugs

Cut List 

Cut from 2×2 x 8′ 

  • (2) 19″ long rails 
  • (4) 10 1/2″ legs 
  • (2) 13″ short rails 

Cut from 18″ x 4′ x 3/4″ panel 

  • (1) 18″ x 24″ top 

Find more do-it-yourself project plans at strongtie.com/diy.

Share

Stay Connected

Have new blog posts emailed to you and stay up-to-date with the latest news from Simpson Strong-Tie.

Keep Reading