
When the weather cooperates, my family eats dinner outdoors, which can be nearly every evening in the warmer months. But we had an old flimsy metal table that only fit four chairs properly for our family of five. We needed an outdoor dining table to fit our patio space. So in true DIY fashion, I built a table to accommodate not only my family but a few guests as well.
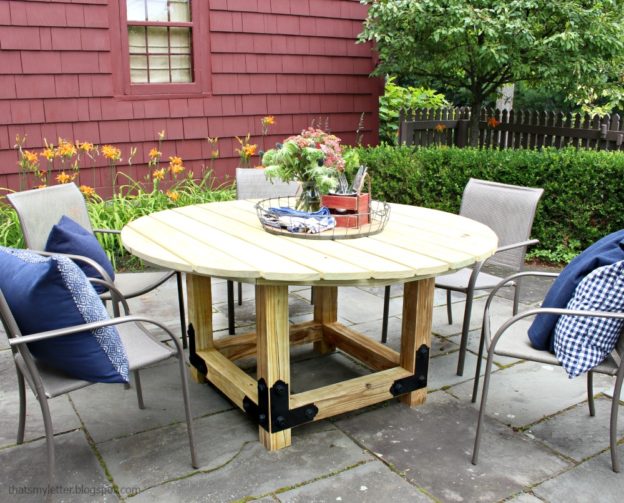
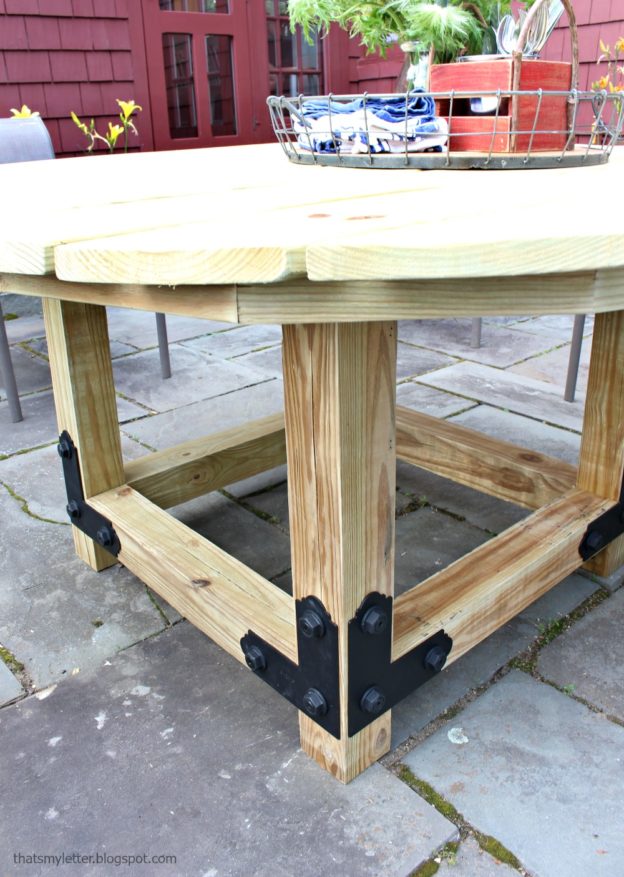
This round outdoor dining table is perfect for everyday dinners on our front patio as well as for entertaining friends and family.
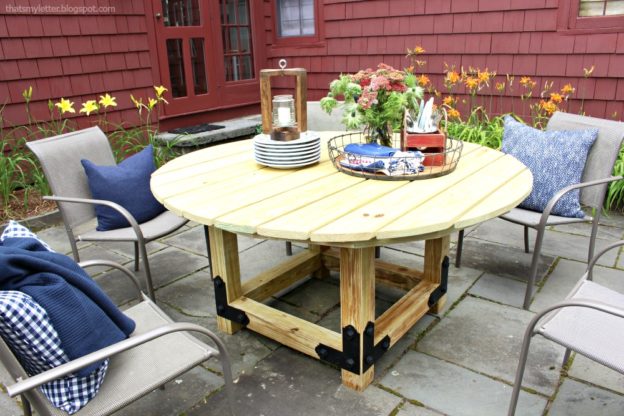
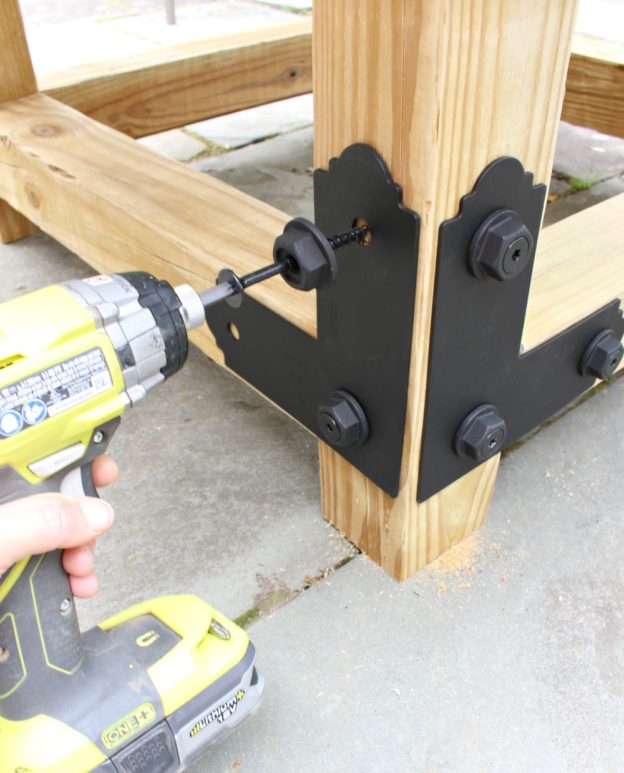
With a solid post base and Simpson Strong-Tie® Outdoor Accents® hardware, this outdoor dining table is super sturdy and looks beautiful while standing up to the elements.
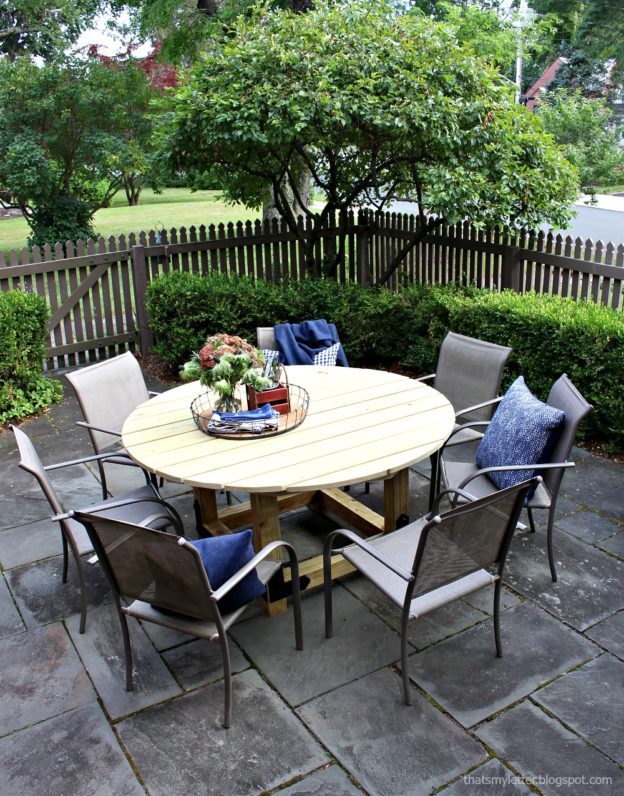
I built the round top with a 65″ diameter simply because that size fit my patio best. A 65″ size fits seven chairs comfortably with plenty of elbow room.
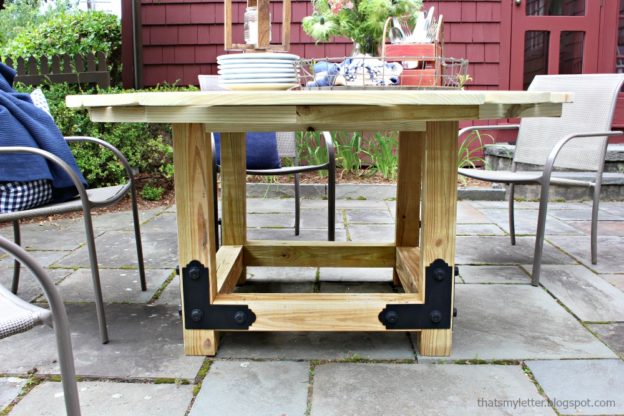
But the real star of the show here is the Outdoor Accents® hardware, which not only adds beautiful contrast but provides strength and stability to the base.
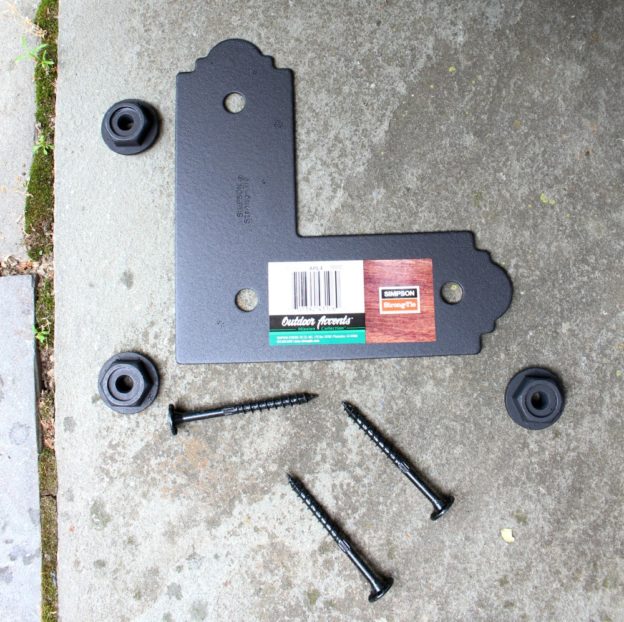
These Outdoor Accents® strap ties are installed using a hex-head washer and a structural wood screw made specifically to fit this hardware. Simpson Strong-Tie has eliminated any guesswork and made the installation completely user friendly.
Below are the materials and tools necessary to build this table along with step-by-step instructions. Be sure to read through all steps before beginning and always follow all safety precautions.
First, grab the plans here!
Materials:
- (2) 4×4 x 10ʹpressure treated posts
- (5) 2×4 x 8ʹpressure treated studs
- (5) 5/4 x 12ʹdeck boards
- (8) Simpson Strong-Tie® Outdoor Accents® APL4 strap ties
- (24) Outdoor Accents hex-head washer
- (24) Outdoor Accents structural wood screw
- (4) Simpson Strong-Tie Outdoor Accents APA4 90 angle (optional)
- 2 1/2″exterior pocket-hole screws
- 2 1/2″exterior wood screws
Tools:
- Miter saw
- Drill
- Measuring tape
- Pencil
- Pocket-hole jig
- Jig saw or router
- Sander
Cut List:
Base:
- (4) 4×4 @ 27 3/8″(legs)
- (4) 4×4 @ 24″(base cross supports)
- (4) 2×4 @ 24″(base top supports)
Top:
- (1) 2×4 @ 61″(top support)
- (2) 2×4 @ 39 1/2” (top side supports)
- (3) 5/4 deck boards @ 66″(top)
- (2) 5/4 deck boards @ 64″
- (2) 5/4 deck boards @ 59″
- (2) 5/4 deck boards @ 51″
- (2) 5/4 deck boards @ 38″
- (6) 2×4 @ 17″, both ends 20 miter cut, not parallel (top apron)
- (4) 2×4 @ 20″, one end 17 miter, one end 15 miter, not parallel (see Step 4 sketch)
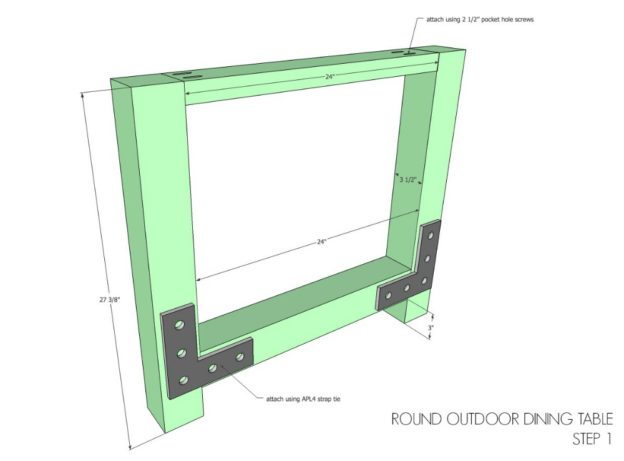
Step 1: Make the legs.
Attach legs to top support using 2 1/2″pocket-hole screws. Attach legs to base cross support using Simpson Strong-Tie® Outdoor Accents® APL4 strap tie with hex-head washer and structural wood screw.
Make 2.
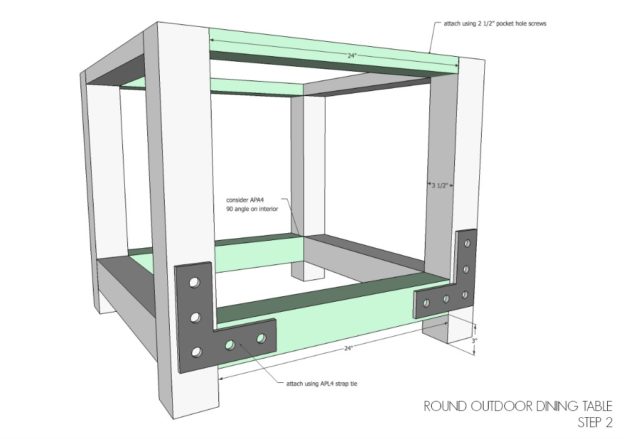
Step 2: Create the base by attaching the two leg sets together.
Using 2 1/2″pocket-hole screws at top support. Attach base cross support using APL4 strap ties. Consider APA4 90°angle on interior corners for more support.
Step 3: Make top.
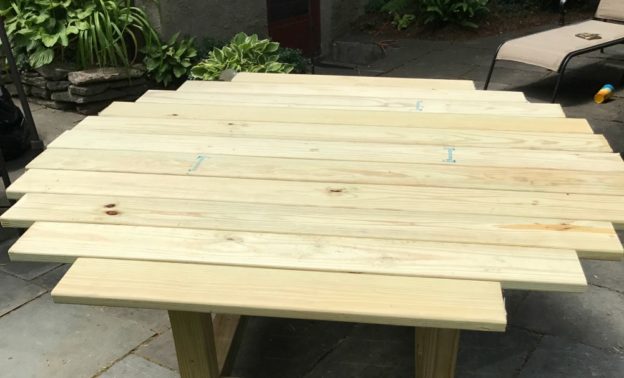
NOTE: Your boards should be cut straight at this point. You will cut the circular shape later. Begin with the longest middle board and attach at center to cross supports using 2 1/2″exterior wood screws. Working your way out from the center, leave 1/4″spacing between boards and continue to attach all deck boards to cross supports.
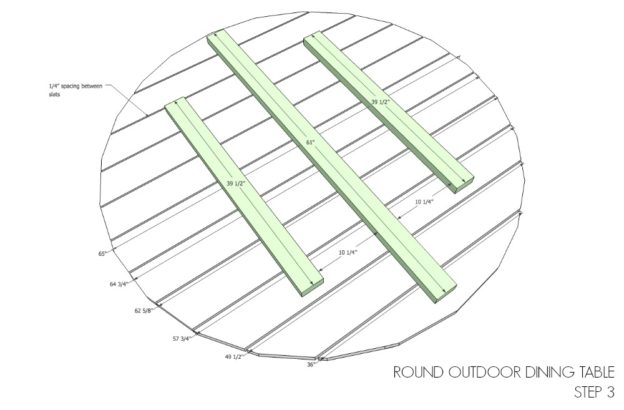
Tip: Use 1/4″plywood scraps as spacers between deck boards. This makes attaching the boards faster and ensures even spacing between all boards.
![]()
Step 4: Attach top apron pieces using 2 1/2″exterior wood screws.
Now flip over top and cut out circular shape. Insert a screw at center and, using twine and a pencil, mark 34″all around the edge for an even circle. You can use a jigsaw or router.
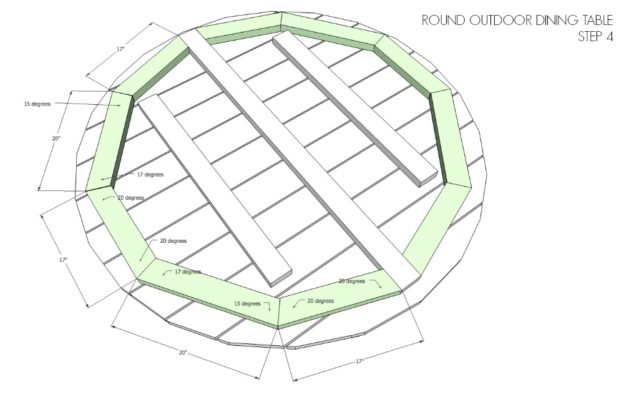
NOTE: Miter cuts and board lengths are not all the same.
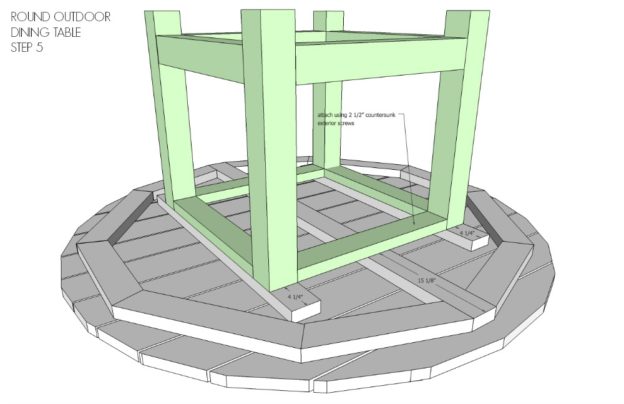
Step 5: Attach base to top at supports using 2 1/2″countersunk exterior wood screws.
I suggest working upright to avoid having to tip the whole table over. The sketch above is for instructional purposes so you can see where the base lines up with the top supports.
Sand well and finish as desired.
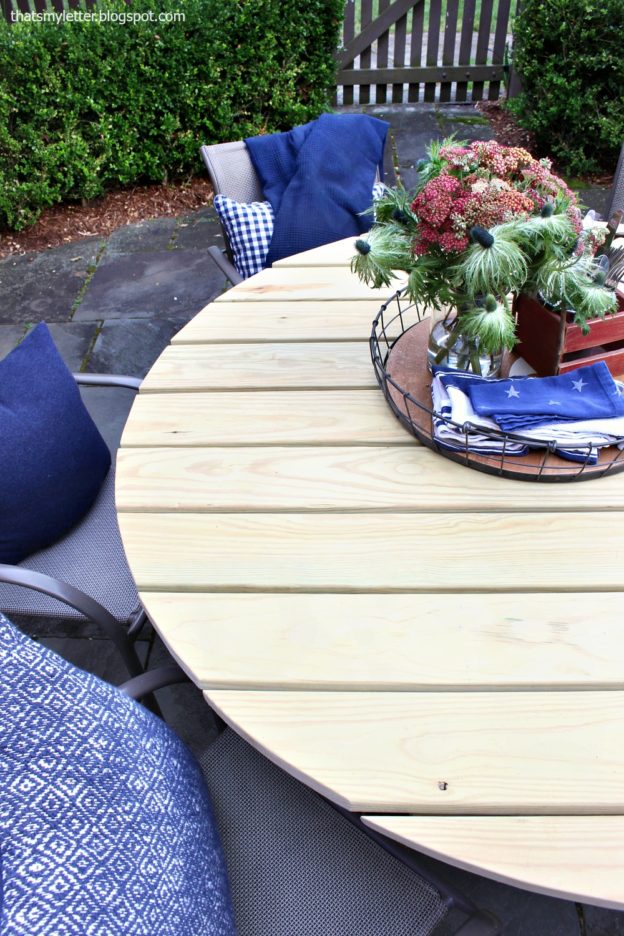
I haven’t applied any stain or finish to this table. Instead, I’m going to let it gray out naturally.


