Hello, fellow makers! My name is Mark Geary. I’m a graphic designer living and working in Rhode Island, and among many other things, I am a DIYer. Whether I’m putting up shelves in my house or reading up on traditional Japanese joinery techniques, my life as a maker takes many twists and turns. This year, my wife and kids gifted me one of those fancy smokeless firepits for Father’s Day. I was super excited to give it a whirl, but I realized I would need firewood and a place to store firewood. The firewood would be easy to come by because all the trees in my yard are overgrown and in need of pruning. Storing the firewood was going to be a bit more of a challenge.
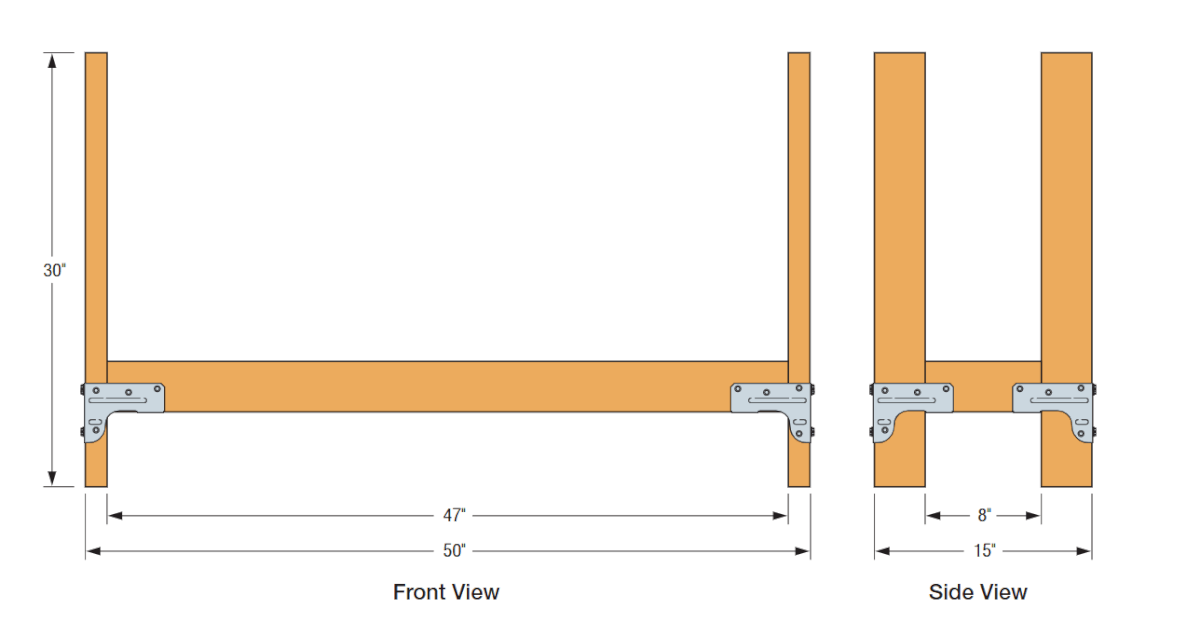
I needed a firewood holder, and I didn’t want to spend a lot of time or money building something. I looked around at what was available to buy, but I have to admit that most outdoor furniture or accessories I’ve purchased over the years were overpriced and have underdelivered in their performance. I had some pressure-treated 2x4s lying around the garage that I could use, but I needed a plan. In the not-too-distant past I worked briefly at one of the big box stores and remember seeing a product that allowed you to assemble a workbench or shelving quickly and easily. That was my first experience with Simpson Strong-Tie. So I went to strongtie.com to see whether they had a solution to my problem and, bingo, there was a plan for a simple log holder using 2x4s and Simpson hardware. Here’s the link to the project instructions.
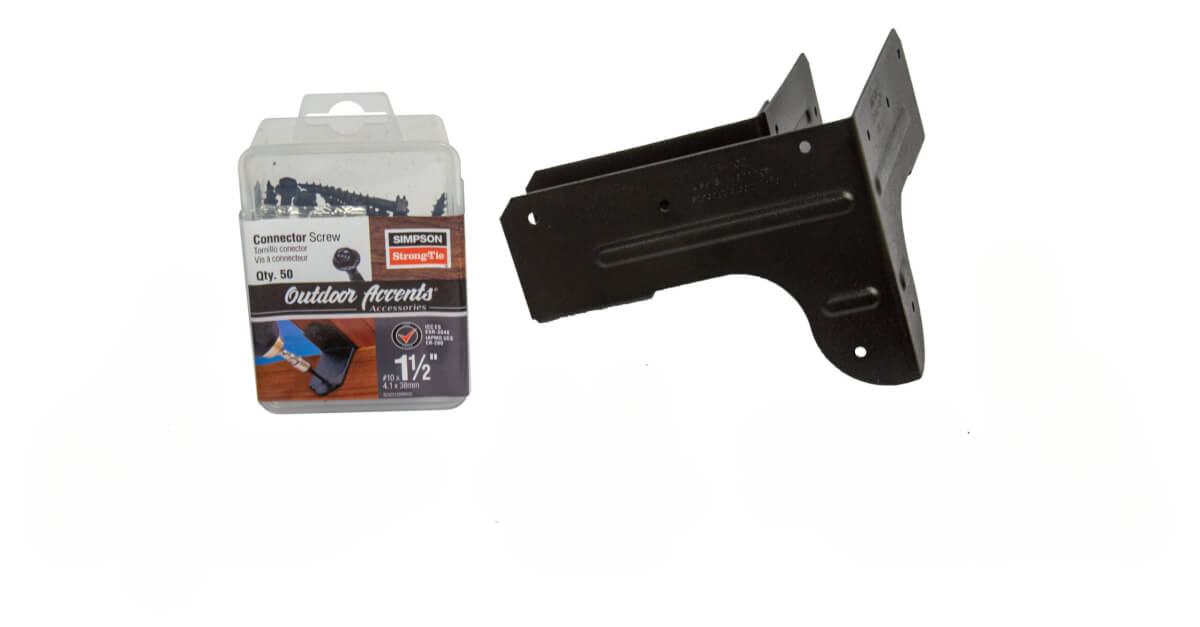
The following day, I went to one of the big box stores and found the Rigid-Tie® connectors shown in the plans provided by Simpson. (There were two options, and I went with the black powder-coated APRTC2 with matching fasteners.) When I got home, I immediately went to work. In about an hour I had measured and cut all my 2x4s. Then for extra weather protection I painted the wood with a tinted weather sealer that matched my kids’ swing set. Once everything was dry, I took one of the Rigid-Tie connectors and marked my boards with a marker. I paid special attention to the location of the connector on each leg so that the log holder would be level. Once I’d marked everything, I used matching fasteners to attach the connectors to the holder’s legs. There are lots of fastener holes in the connectors for projects of different sizes or load demands. To begin with, I used just enough screws to hold the connector in place on each leg. Then, once I’d attached all the legs and cross beams, I drove screws into the remaining holes to make the log holder extra sturdy. All of this took maybe an hour and a half. I cut the 2x4s with a Japanese pull-saw. If you’re using a power saw, you might cut off a few minutes (pun intended).
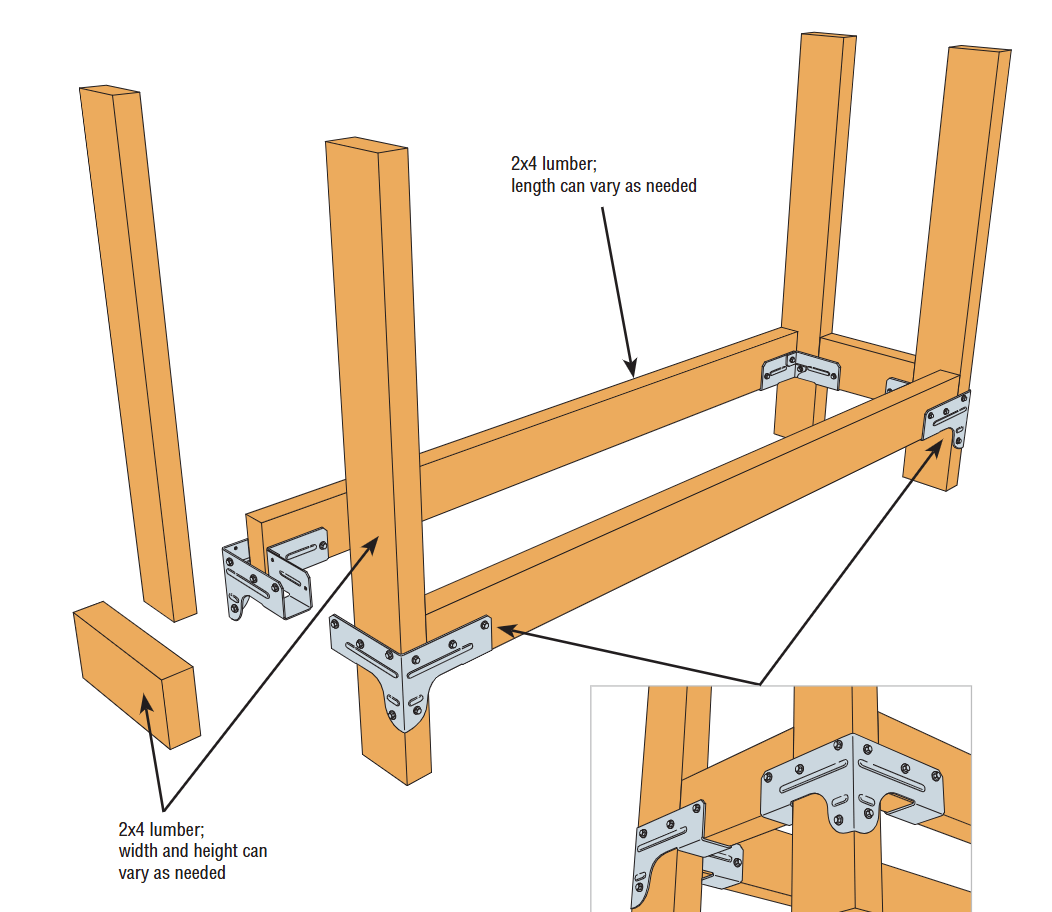
This is a very easy project to complete if you have any familiarity with hand tools or basic power tools. Just measure, cut, and assemble. You’ll need a saw, drill/driver and a measuring tape. I did it by myself, while my son was practicing his slapshot in the driveway. Both of us probably should have been wearing helmets. But I opted for safety glasses, not realizing beforehand that flying hockey pucks might be involved.
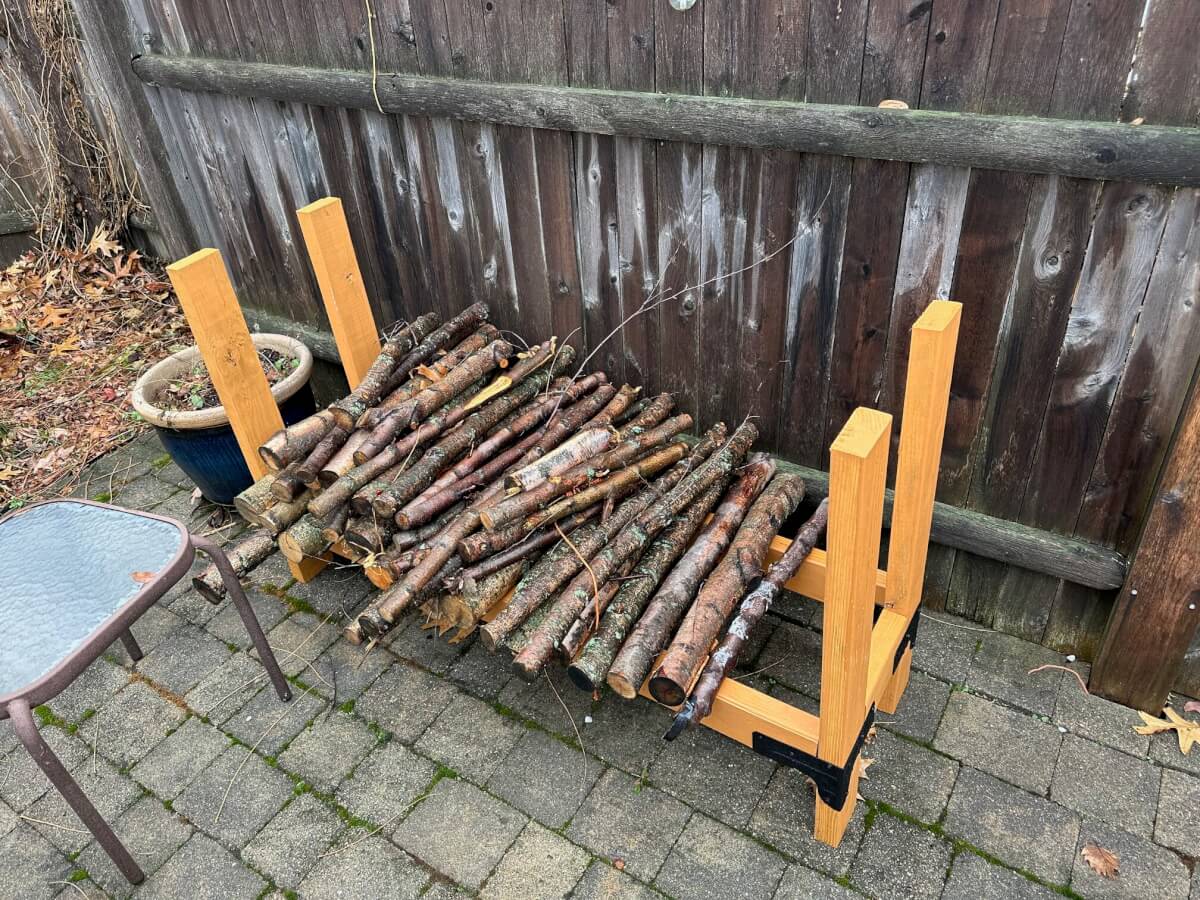
I’m very happy with the way this project turned out. I have it loaded high with firewood on the patio, ready for the next bonfire. It’s sturdy and practical, and it looks like it belongs there. The Simpson Strong-Tie hardware was easy to use and saved me a lot of time. I’m now thinking about building an awning for the grill after getting several inches of rain this past week. No one wants a soggy steak!
Time and labor estimate for this DIY project:
- Time to complete: two hours
- Difficulty level: beginner
- Labor: one-person jobLearn how to build a practical and sturdy DIY log holder using affordable materials and Simpson Strong-Tie hardware. Perfect for storing firewood in your backyard with just basic tools.
