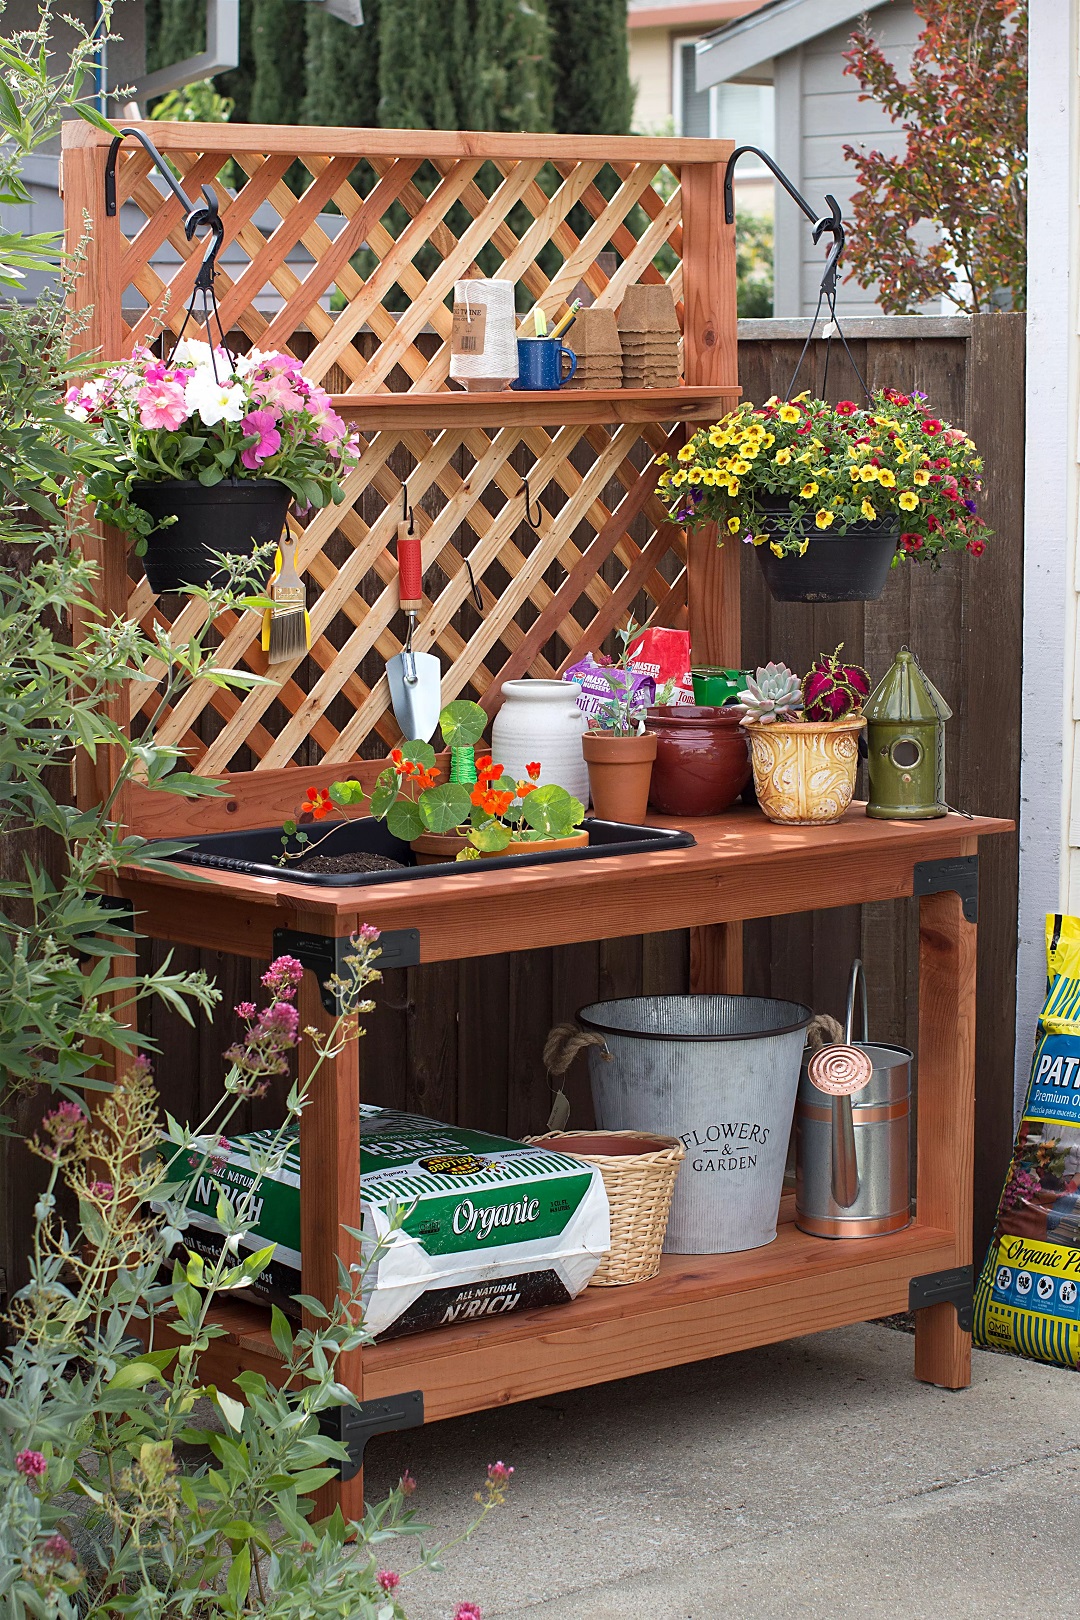
Building your own 4′-wide potting bench that includes a soil bin for potting or repotting plants is fast and easy with 2×4 lumber and Simpson Strong-Tie® Rigid Tie® RTC2Z connectors. Create this sturdy potting bench using cedar, redwood or preservative-treated wood with a wood stain for a natural look, or use nontreated lumber and protect it with your favorite paint color.
Download the free plans for this DIY Outdoor Potting bench here.
Tools Needed
- Saw
- Miter saw
- Drill/ screw gun
- #2 Phillips-head bit
- Tape measure
- Framing square
- Straightedge or chalk line
- Clamps
- Staple gun
- Bit holder (optional)
- Paint brush (for sealing or painting)
Installation Instructions
- Measure and cut lumber. All of your lumber cuts are straight cuts, which make it easy to install the RTC2Z corner connectors.
- Install connectors on each vertical leg. Mark height, clamp RTC2Z connector to leg and attach with #9 x 1 1/2″ Strong-Drive Connector screws.
- Connect short and long rails on each side, top and bottom. Use a clamp to help hold the wood in the seat of the connector.
- Install center support boards. On the bottom, measure 22″ in from the inside left short rail and attach the center support board with a 2″ Deck-Drive™ DSV Wood screw from the back. Toenail the front DSV screw into the inside of the front horizontal rail. On the top, measure 26″ in from the inside of the left short rail and attach the support board the same as the bottom.
- Attach top rail and shelf. Attach the top rail to the end posts with 2 1/2″ bugle-head screws. Measure down 16″ from the rail and attach shelf between vertical posts with 1 1/2″ screws.
- Install trim and splashboards. Start at the bottom and attach trim board to the front and back long rails between the legs with 2″ screws. Then, attach the splashboard on the back of the legs. On the top, install the remaining trim board between the back legs.
- Install top and bottom planks with DSV screws. Start at the bottom. Attach the three 48″ planks to the short rails, leaving a 1⁄4″ gap between each plank. For the top work surface, attach the left 17 1/2″ plank first to the short rail and then attach the right-hand side planks, leaving a 3/8″ gap between each one. Next, attach the front work surface plank so that it’s flush with the left plank. The soil bin will fit inside the top opening.
- Install lattice. Use a clamp to hold the lattice in place on the back legs and attach with 2″ screws. Attach a splashboard to the bottom of the lattice with a staple gun.

Simpson Strong-Tie® Connectors and Fasteners
- (8) Rigid Tie® RTC2Z connectors
- (1) 100qty. box Simpson Strong-Tie #9 x 1 1/2″ Strong-Drive® SD Connector screws for exterior use (Model No. SD9112R100)
- (1) 1lb. box Simpson Strong-Tie #10 x 2″ Deck-Drive™ DSV Wood screws for exterior use Model No. DSVT212R1LB)
- (4) 2 1/2″ bugle-head screws (included in WBSK kit)
Other Materials
- (1) Soil bin (27 1/2″ x 19 3/4″ x 6″)
- Exterior-grade paint or stain (optional)
Lumber Needed
- (7) pieces 2×4 x 8′
- (3) pieces 1×4 x 8′
- (1) piece 1×6 x 8′
- (3) pieces 1×6 x 6′
- (1) piece 4′ x 8′ sheet of redwood lattice
Cut List
Cut from 2×4 x 8′
(4) 45″ long rails
(2) 34″ front legs
(1) 21″ center support (top)
(1) 48″ top rail
(1) 45″ top shelf support
(2) 74″ back legs
(4) 17″ short rails
(1) 21″ center support (bottom)
Cut from 1×4 x 8′
- (3) 45″ trim boards
- (1) 45″ work surface splashboard
- (1) 48″ lower shelf splashboard
- (1) 17 1/2″ work surface plank (left)
Cut from 1×6 x 8′
- (1) 50 1/2″ work surface front plank
- (1) 45″ top shelf
Cut from 1×6 x 6′
- (3) 48″ lower shelf planks
- (3) 21 1/2″ work surface planks (right)
Cut from 4′ x 8′
- (1) 48″ x 43″ redwood lattice
Find more do-it-yourself project plans at strongtie.com/diy.